Boot Integrity

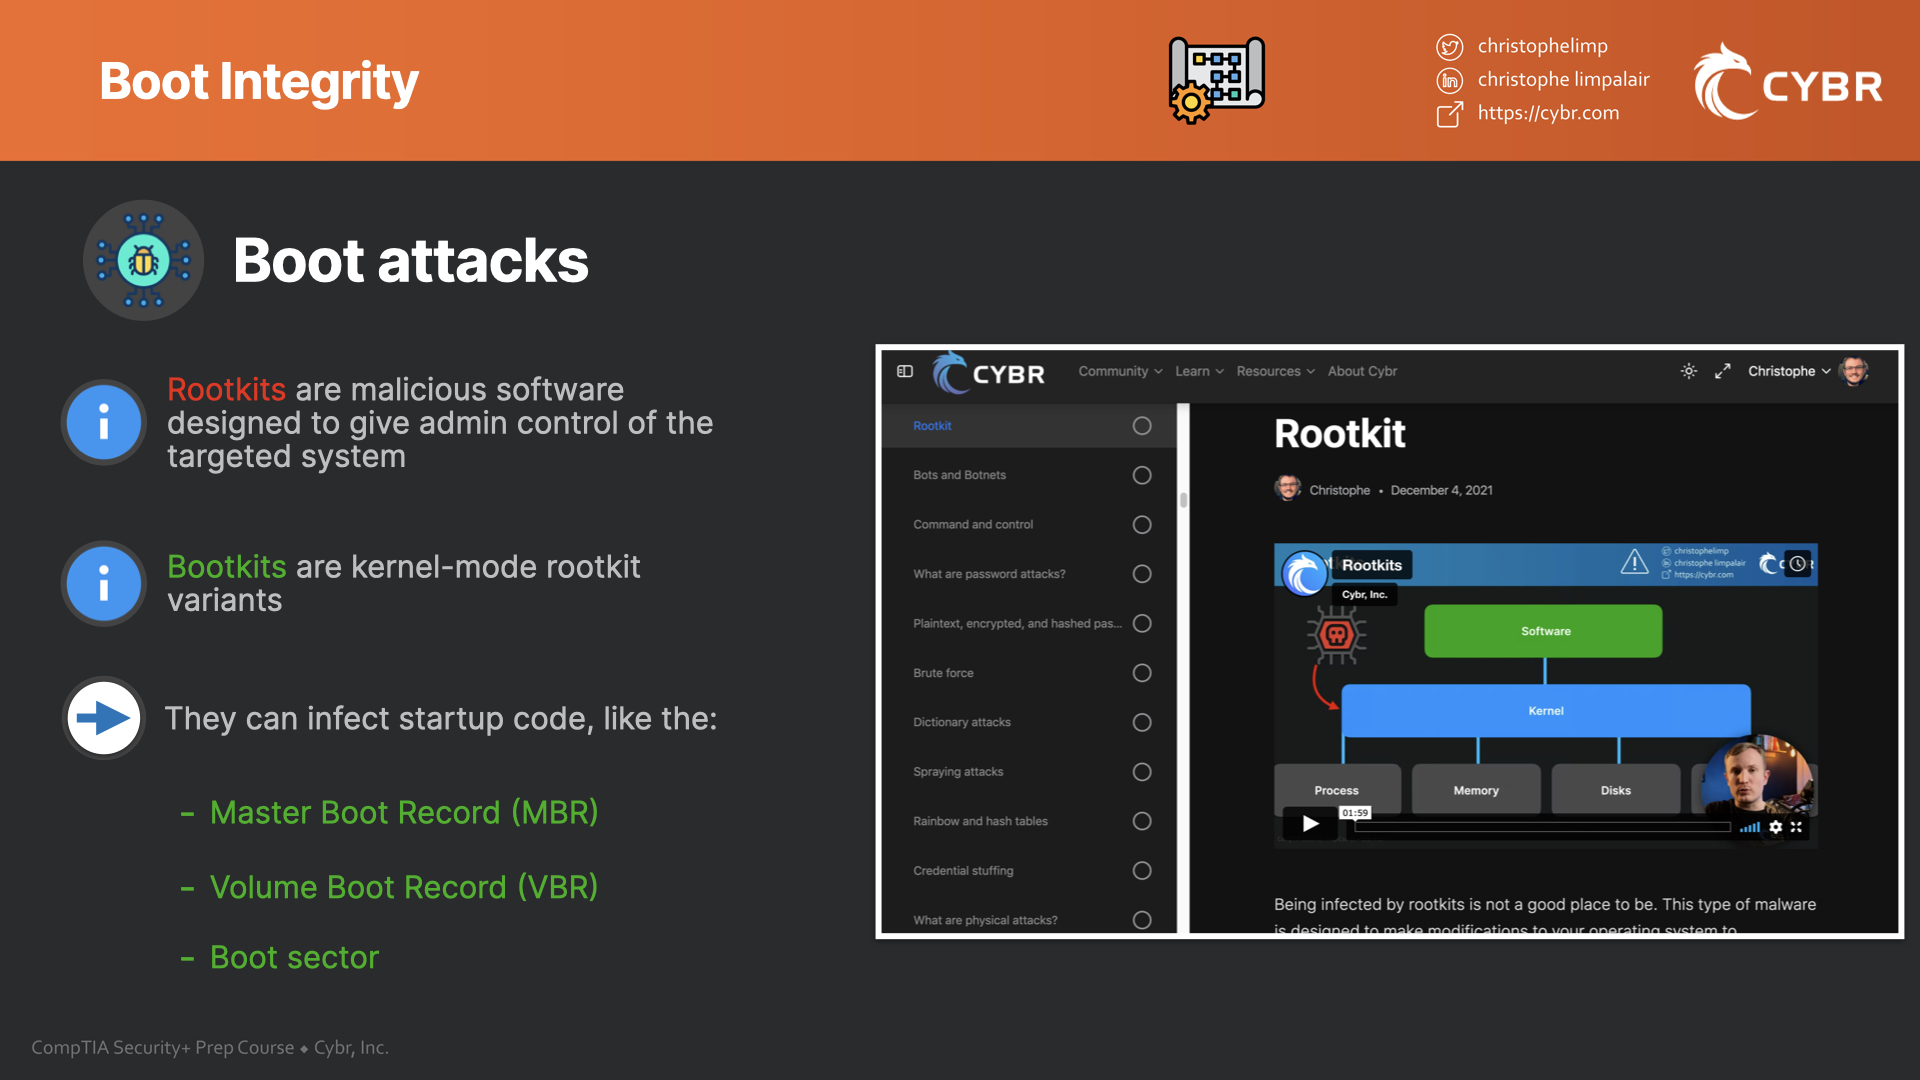
Ever hear of a rootkit before? A rootkit is a malicious piece of software that’s designed to give admin control of the targeted system to an attacker while remaining hidden.
It’s definitely not something you want installed on your device, because it’s difficult to detect, and even if you do happen to detect it, it’s not easy to remove.
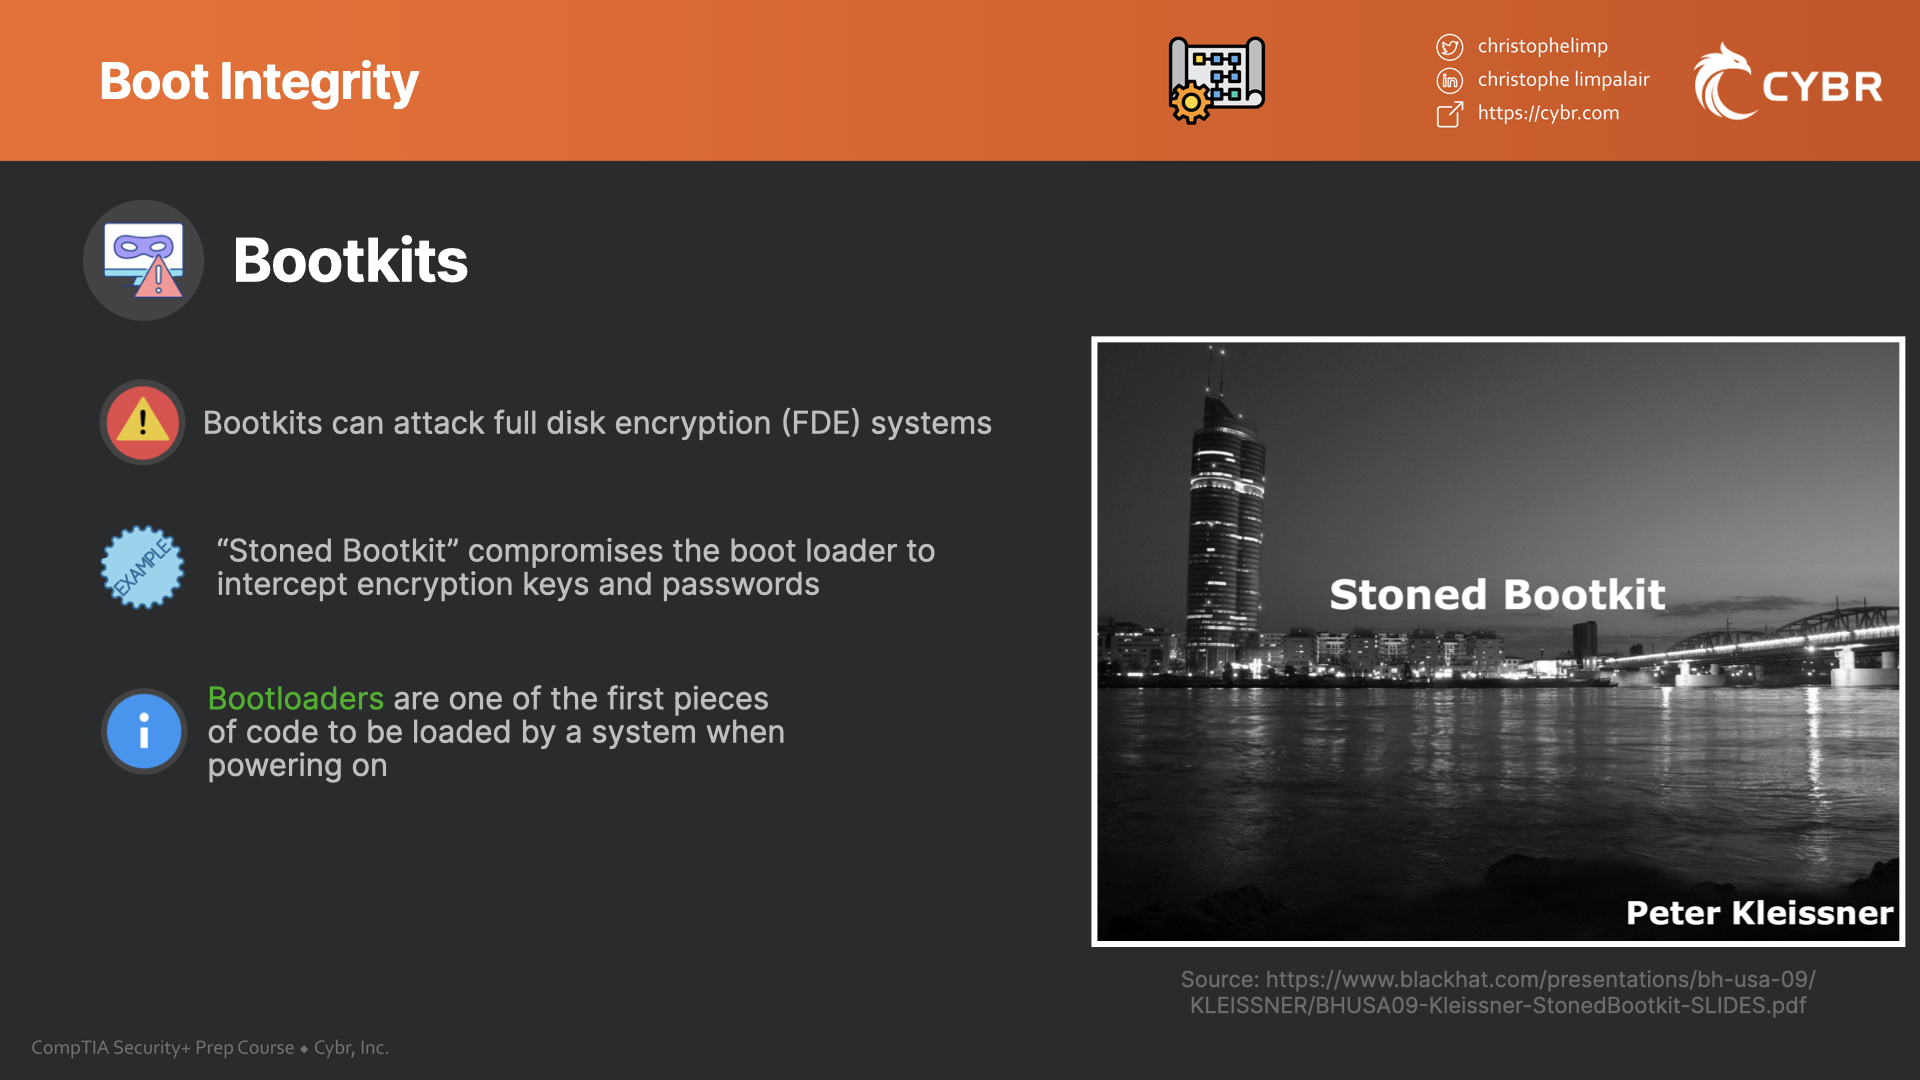
There’s even a bootkit which is a kernel-mode rootkit variant. It’s called bootkit because it can infect startup code like the Master Boot Record (MBR), Volume Boot Record (VBR), or boot sector.
This can be particularly nasty because it can be used to attack full disk encryption (FDE) systems.
An example of this is with a “Stoned Bootkit” which uses a compromised bootloader to intercept encryption keys and passwords. Bootloaders are some of the first pieces of code to be loaded by a system as it gets powered on, which gives way for loading an operating system and applications.
In short, if an attacker is able to modify startup code, they can do a serious amount of damage, even against strong security controls. With that said, there are additional security controls we can implement to defend boot integrity.
In this post, we’ll talk about:
- Hardware root of trust
- Secure boot
- Trusted boot
- Measured boot
Our goal is to establish a chain of trust with the boot system, which we can do by making sure that every code executed by firmware is signed using keys from trusted parties.
An analogy for chain of trust
A helpful analogy for a chain of trust is to think of it in terms of airport security. When you first enter the airport, you don’t have any level of trust. You may not even have a boarding pass or any identification on you. However, to enter the terminal, you have to go through TSA security. A TSA agent will verify your boarding pass and your identification to make sure you are who you say you are and that you actually have a flight in that airport.
Once they’ve verified this information and they’ve checked your bags, they let you into the terminal. At that point, you can walk around freely in the terminal and unless you start acting suspicious, no one will bother you for any identification. You’ve gained a certain level of trust.
Then, once you try to board a plane, you will once again be asked to scan your boarding pass, but you won’t necessarily be asked to show any verification and you won’t have to scan your bags again. The gate agent does need to verify that you’re supposed to be on that specific plane, but they don’t have to be as thorough as the TSA security checkpoint because you already have a certain level of trust.
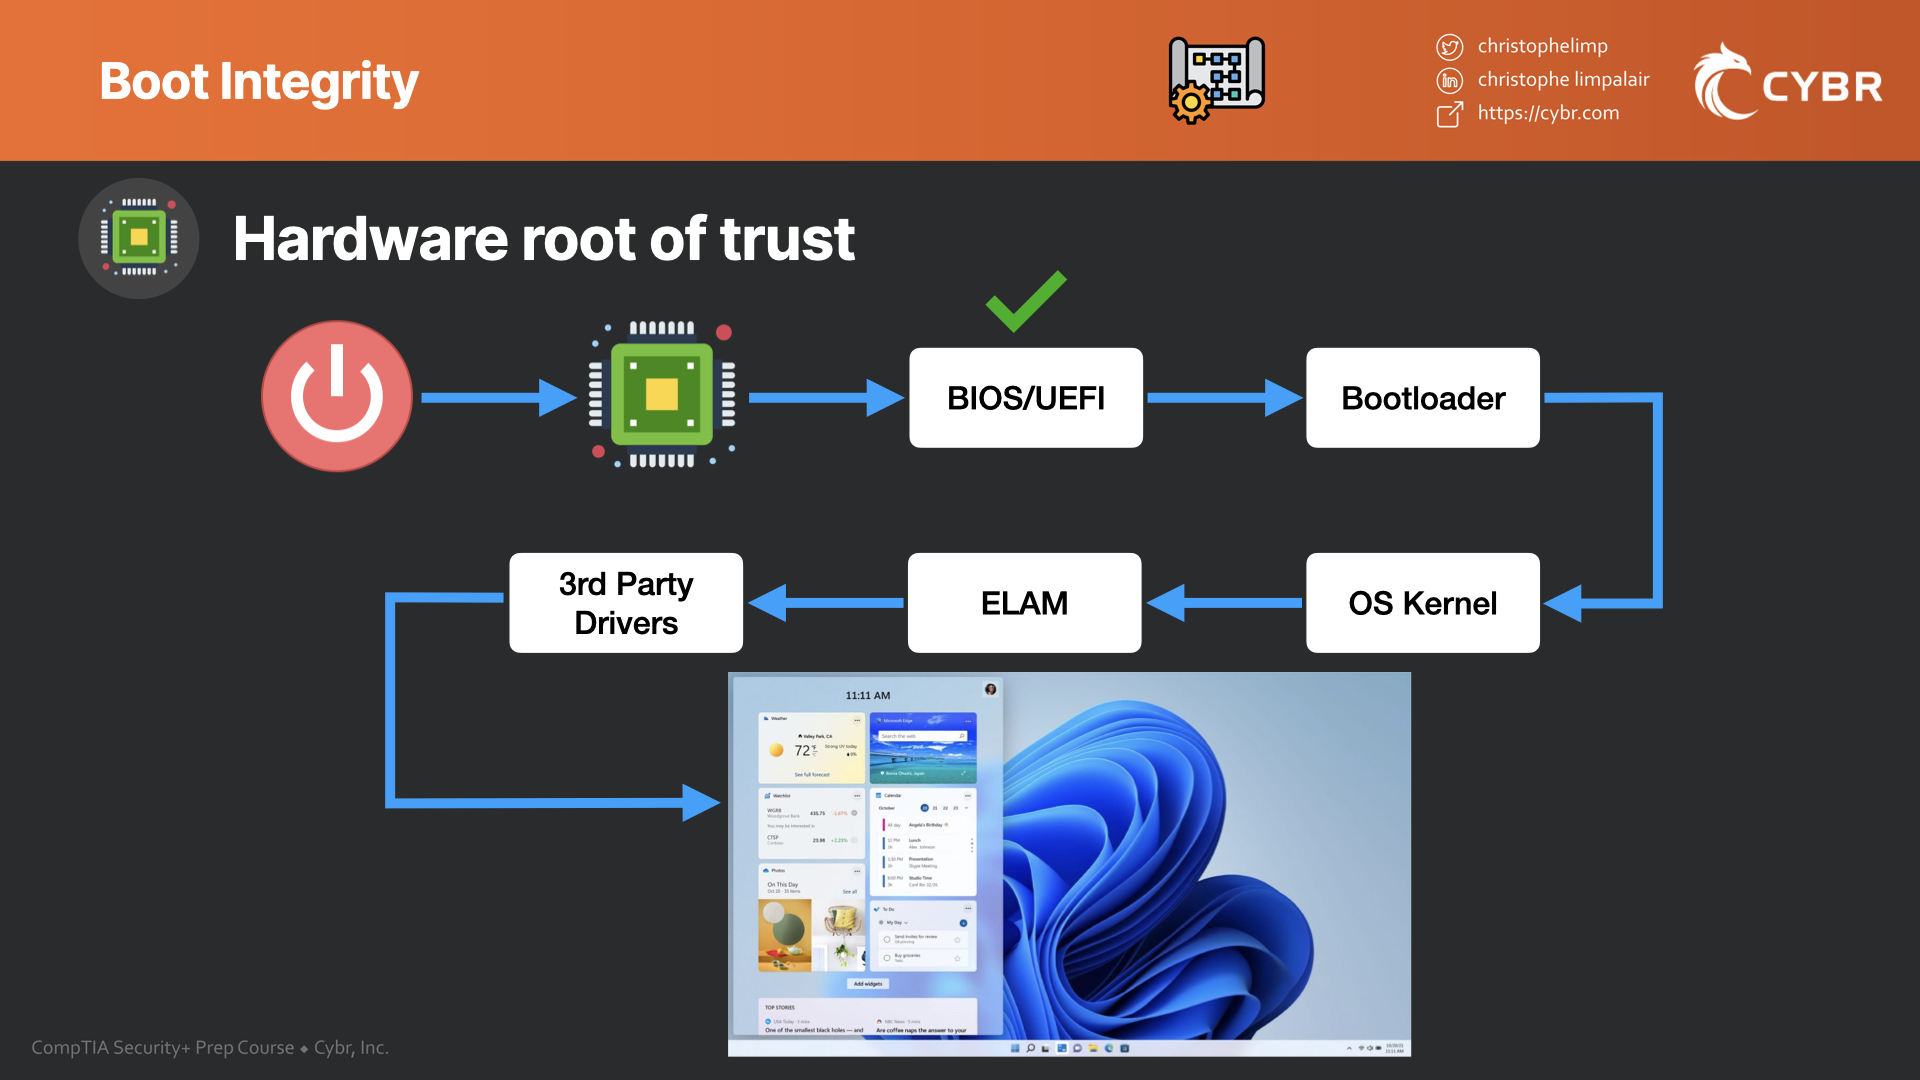
Whenever your computer boots, a similar process happens. Before the first bit of code is run (which would be the BIOS), that code is checked by a hardware chip to make sure it’s legitimate and hasn’t been tampered with. If it checks out and looks good, then the BIOS will be allowed to run. From there, the operating system code will eventually need to run, and it will trust that the BIOS is legitimate, and so on, until the system is fully booted…

Quick note: for this article, I’m using the terms BIOS and UEFI interchangeably. BIOS is a term that stands for Basic Input/Output System, and that’s been used for a very long time, but vendors are switching to calling it UEFI. UEFI does the same job as the BIOS but stores data in a different way and has a couple of other differences, but for this exam and for this lesson, they are the same.
Hardware root of trust
To create a chain of trust, we first have to start at the hardware level, and so we have to create a hardware root of trust.

This is critical because it provides a foundation for the software chain of trust to build off of.
The hardware root of trust can either be implemented as a stand-alone security module, or it can be directly integrated within a process, motherboard, or System on a Chip (SoC).
The most basic versions typically support the ability to encrypt data, validate certificates, and manage keys that can be used for cryptographic functions. More advanced versions support other types of functionality.
Again, as a computer boots, the chip will validate that the BIOS is legitimate by checking cryptographic signatures. That signature is burned into the chip during the manufacturing process which means that it’s unique and can’t be changed.
If you’re not familiar with cryptographic signatures, this is a topic we talk about in our Security+ preparation course in a lesson titled Trusted Platform Modules (TPMs) and Hardware Security Modules (HSMs)(it’s in section 2.1) of the course. TPMs and HSMs play a critical role in creating this hardware root of trust.
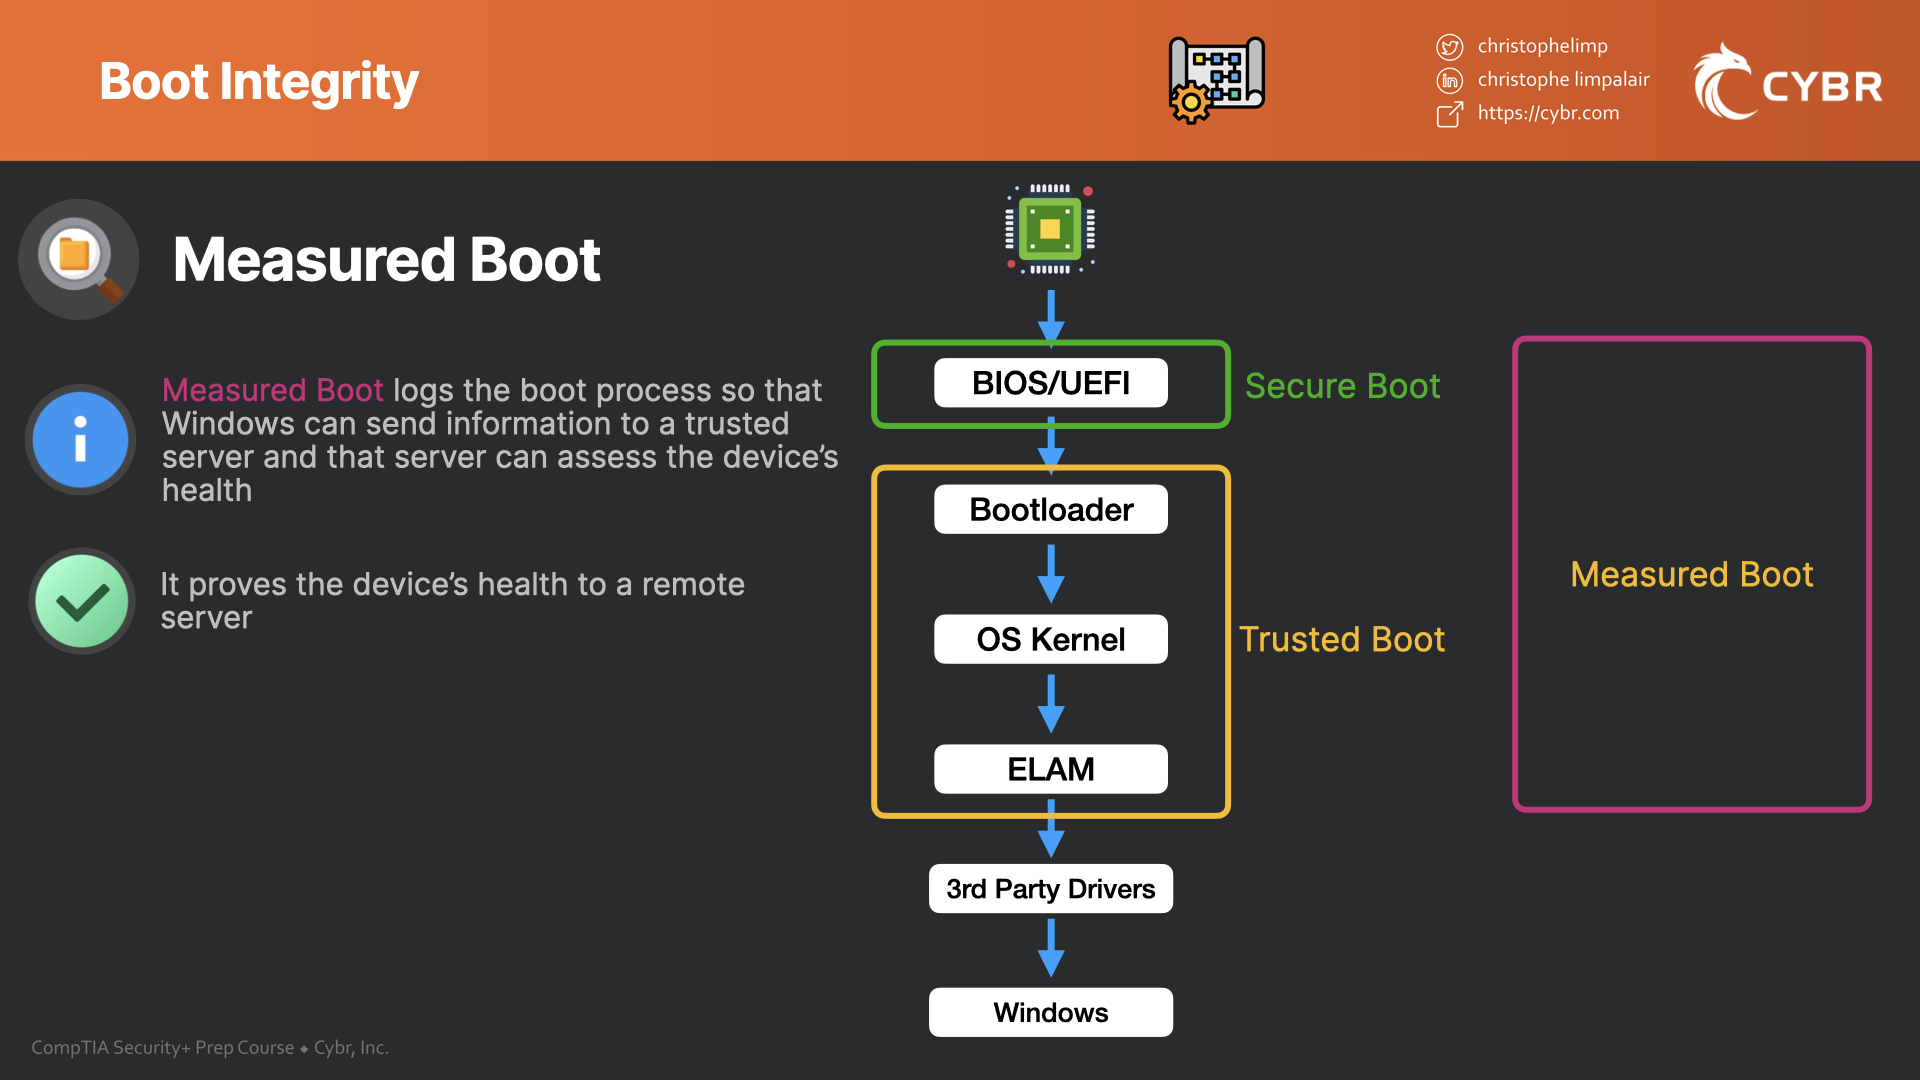
Secure Boot
Once the hardware has verified that the BIOS is legitimate and hasn’t been tampered with, that code will proceed to run. This is when we can then rely on something called Secure Boot to continue building our chain of trust.

Secure Boot is a feature of the Unified Extensible Firmware Interface specification, more commonly known as UEFI. UEFI’s Secure Boot is used to check bootloaders, key operating system files, and the ROM for any tampering attempts.
Everything will have a signature stored in a database and Secure Boot will check those signatures. If the signatures don’t match, then something was modified incorrectly and it won’t be loaded until it’s restored to its correct state.

Trusted Boot
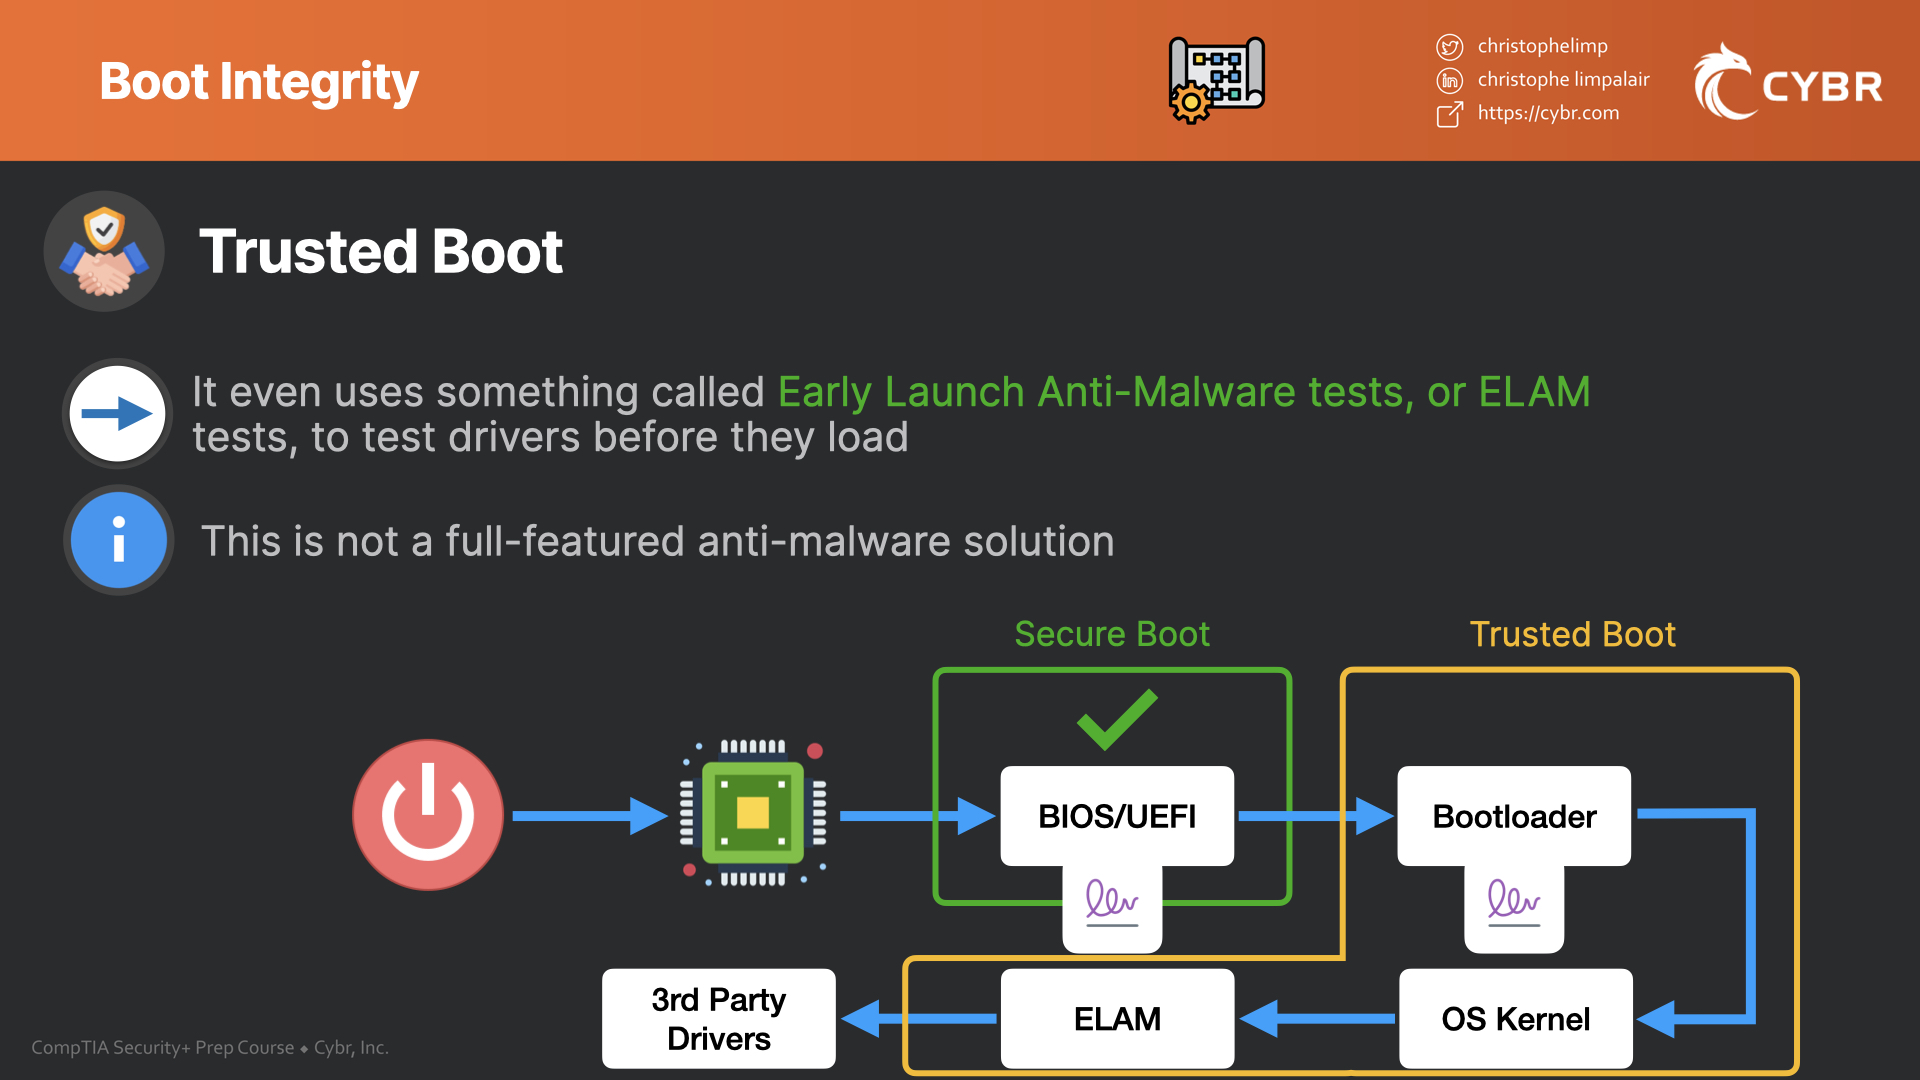
After successfully going through Secure Boot, the process will move on to what’s called Trusted Boot.
During Trusted Boot, the bootloader (which we’ve verified to be trustworthy) will check the digital signature of the operating system kernel before loading it.
The verified kernel will then verify every other part of the OS startup process including boot drivers and startup files, to make sure those components are all safe.

It will even use something called Early Launch Anti-Malware tests, or ELAM tests, to test all drivers before they load. ELAM is not a full-featured anti-malware solution…that anti-malware solution loads later in the boot process. But because malware could try to inject itself before that full-fledged anti-malware solution loads, ELAM can help make sure that doesn’t happen.
Again, if any part of this process doesn’t check out, then Trusted Boot will refuse to load the corrupted components and may even attempt a recovery procedure.
Measured Boot
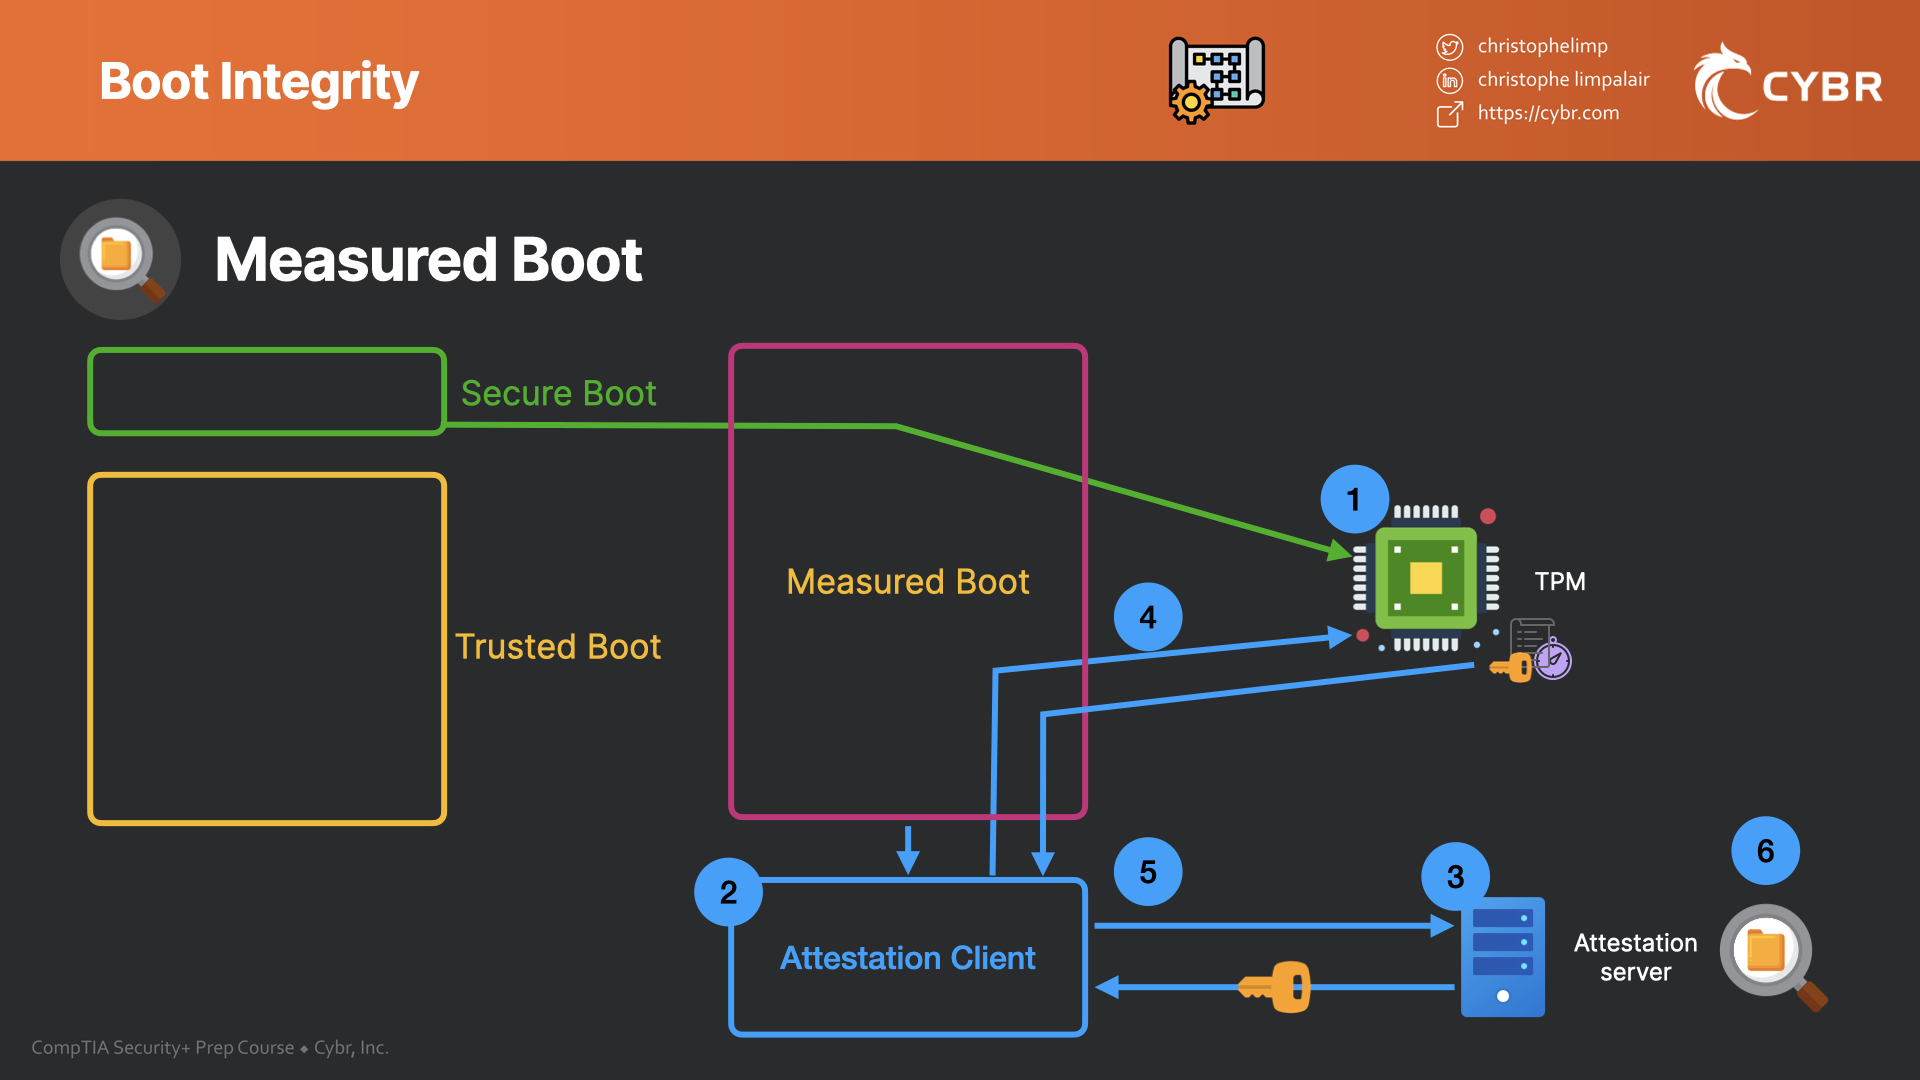
Measured Boot is the last part of the process that we’ll talk about in this lesson, and it’s not a step that gets used to prevent loading corrupted components unlike Secure and Trusted Boot, but instead, it gets used to log the boot process so that Windows can then send the information to a trusted server and that server can assess the device’s health.
In a single sentence: Measured Boot proves the device’s health to a remote server.
The way that it does that is with the following process:
- The UEFI firmware stores a hash value of the firmware, bootloader, boot drivers, and everything else that we talked about that gets loaded, and it stores those values in the TPM
- At the very end of the startup process, a remote attestation client gets started
- The attestation server then sends a unique key
- The TPM uses that unique key to digitally sign the log that’s been recorded by the UEFI
- The log gets sent to the server with its signature
- The server can then report on that log information
Measured Boot is what enables this logging and communication functionality between the device and the attestation client.
This is an incredibly helpful feature when you have multiple devices in an organization. Imagine hundreds or thousands of desktops that need to be managed, monitored, and secured. Having this level of automated and centralized reporting makes a very big difference.
These logs can even automatically be compared with prior logs to keep track of changes and to alert an administrator if something doesn’t look right. Even if the system is able to automatically recover corrupted procedures, an IT administrator may want to take a look at that particular system to figure out what went wrong and whether the corruption was part of an attack.
Conclusion & Sources
If you’ve never learned about the boot process before, then it may be a bit overwhelming. For the exam, though, you don’t need to be an expert on the subject. Make sure you understand what the point of a chain of trust is, what happens at each step of the process, and how it helps secure a system, and you’ll be good to go.
If you need additional information to help solidify these concepts or to learn beyond what the exam expects you to know (out of curiosity), then this documentation page from Microsoft is a fantastic resource.


Responses