Windows 10 ARP Spoofing with Ettercap and Wireshark

Ettercap’s developers have released an updated version (0.8.3) that fixes prior bugs and gives the user a redesigned GUI. In my prior tutorial, I went over how to perform ARP cache poisoning (aka spoofing — we will use the terms interchangeably) against Windows 7 utilizing Ettercap. In this tutorial, we will perform ARP spoofing with Ettercap and Wireshark in Kali against a Windows 10 machine.
This type of attack is known as a man in the middle attack or MitM. There are several types of these attacks which Ettercap can perform. For a detailed explanation of the different functions that Ettercap performs please see their GitHub page.
Note: if you are curious to know what the differences between the older and newer versions of Ettercap are, watch this video by the developers.
Configuring our Virtual Machines (VMs) for ARP Spoofing
In this updated tutorial we will be using Kali Linux 2020, and a Windows 10 VM. Please note for this attack to work and to be able to ping between both VMs you need to disable Windows 10 firewall. This can be accomplished by going to the control panel and selecting Windows firewall turn on or off.
You could also create a GPO which allows the ICMP protocol and other functions. For simplicity’s sake, I recommend that you simply turn off Windows firewall.
Before starting you need to be familiar with the various options for virtualization. I am using VMware workstation in this lab. A free option is Oracle Virtualbox.
In using VMs you ensure that you’re conducting this attack safely. But the one caveat is you will need to understand the various virtual networking options for the network adapters in each VM. The simplest way I have found is selecting the NAT adapter which essentially hides those VMs from the external internet.
Each VM shares your local network’s IP. In this case, the network adapter acts as a virtual switch routing those packets to and from your VMs.
You will have internet using this option, so please be careful when performing this attack and make sure that you are using the IPs of your two VMs.
Virtual networking can be challenging especially if you’re using a wireless connection but choosing the NAT adapter, you shouldn’t have any issues completing this lab.
Step #1 – Networking information
Start both of your virtual machines and get the IPs of both machines (one should be Kali and the other Windows 10).
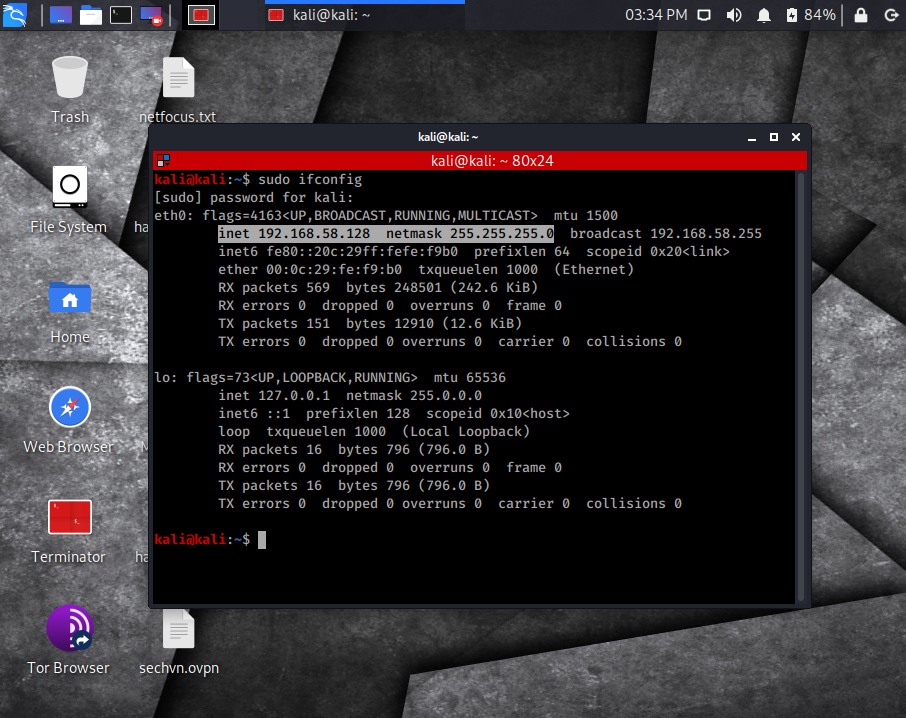
For Kali, open the terminal and type:
sudo ifconfigor:
ip aWithout the sudo command.
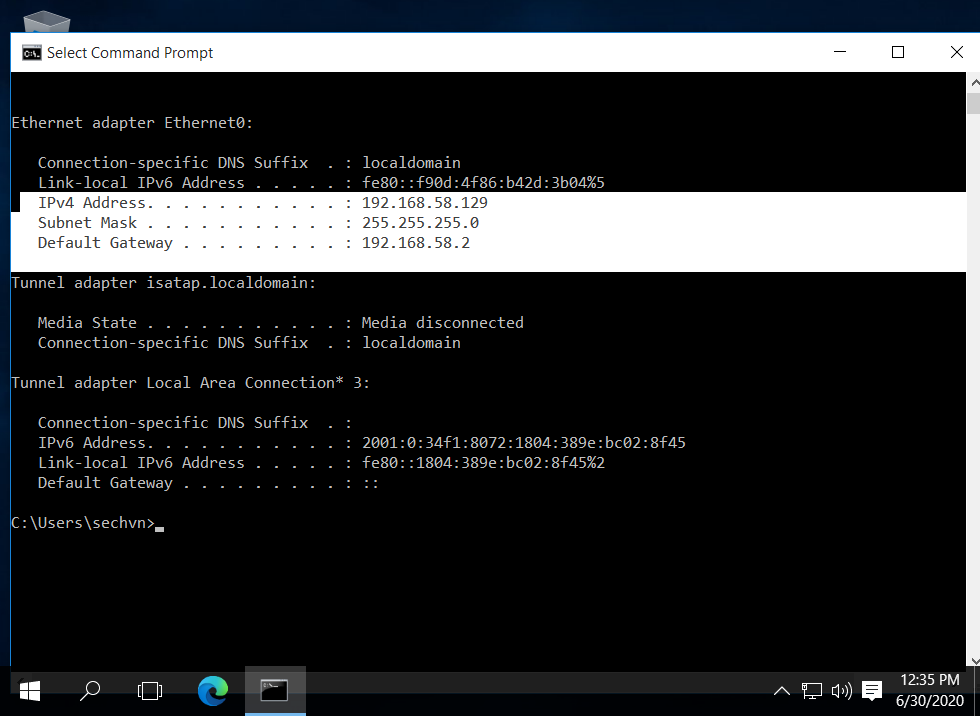
On the Windows 10 machine type CMD after clicking on the Windows icon bottom left of your screen. Then, enter this command:
ipconfigYou will need to copy the IPv4 addresses which will be in a 4 dotted decimal format: e.g. 192.168.0.0
Take note of the default gateway address as well which will be easiest to view on the Windows machine. (See screenshot below)
* I included the subnet mask as you need to make sure that both IPs are in the same subnet.
Step #2 – Launching Ettercap
In the Kali VM, pull up the terminal and type:
sudo ettercap -GThis starts the GUI and you can view the newly designed interface below:
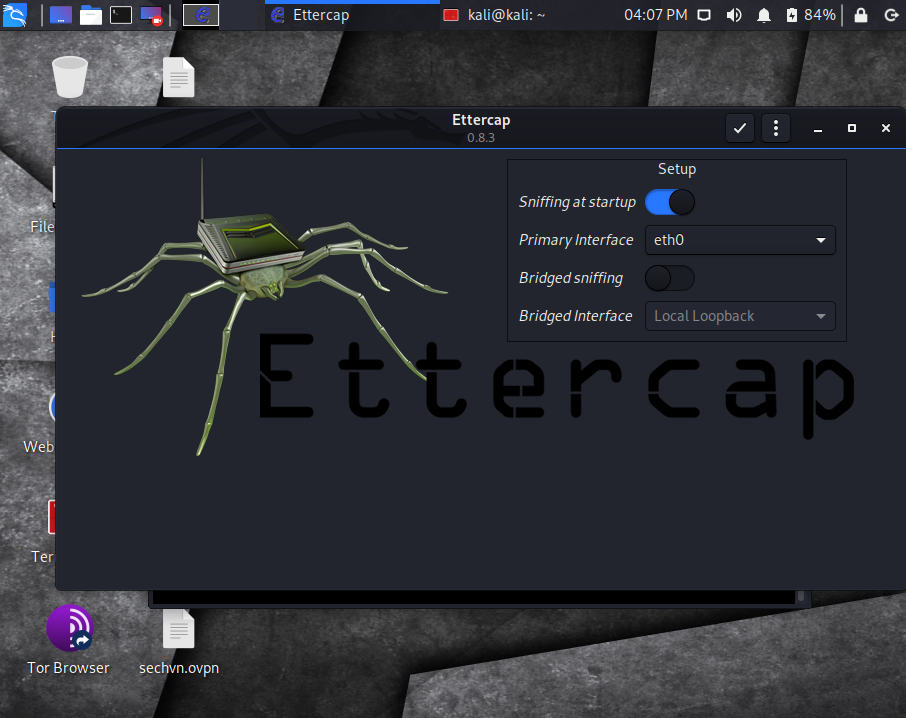
As you can see above the design is completely different with the main difference being the menu options. Those options are now integrated within the application window.
Unified sniffing is selected as the default, so at this point simply ensure that the correct interface you want to begin sniffing on is selected. Most of the time this will be eth0.
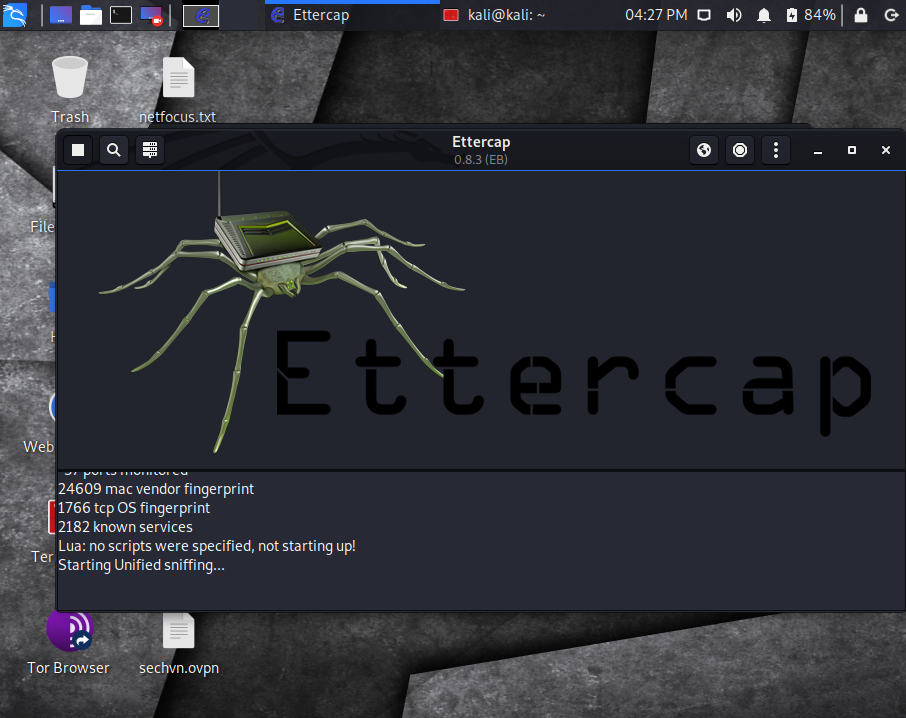
Next, click on the check mark to the right top of the Ettercap application window. This starts unified sniffing on your network interface.
Step #3 – Adding Hosts to Ettercap
Begin by looking at the top left of the application window and click on the magnifying glass icon.
This will scan for hosts within your network. In our case, we are looking for the IP you copied from Step 1, which will be our Windows 10 machine.
You also need to look for the default gateway address in the host list as well.
Below you will find 3 screenshots that show each step with the last enabling you to view the current host list:

Note: Select the three vertical dots on the right of the application window to pull down the options you see, and select Hosts.
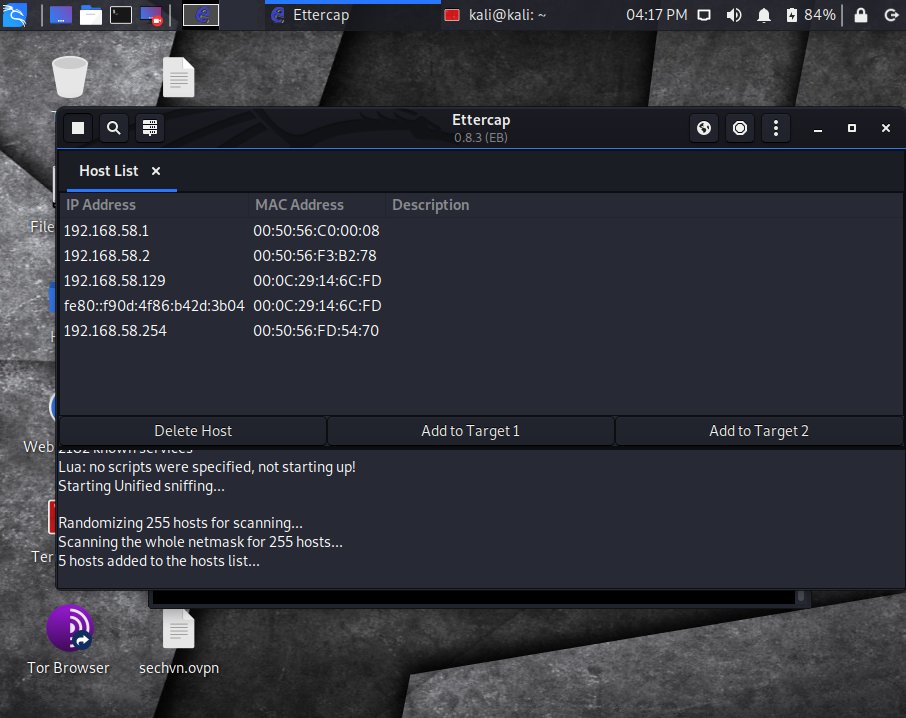
Note: After selecting Hosts, select view Hosts list and this will enable you to see the current listing of Hosts on your network.
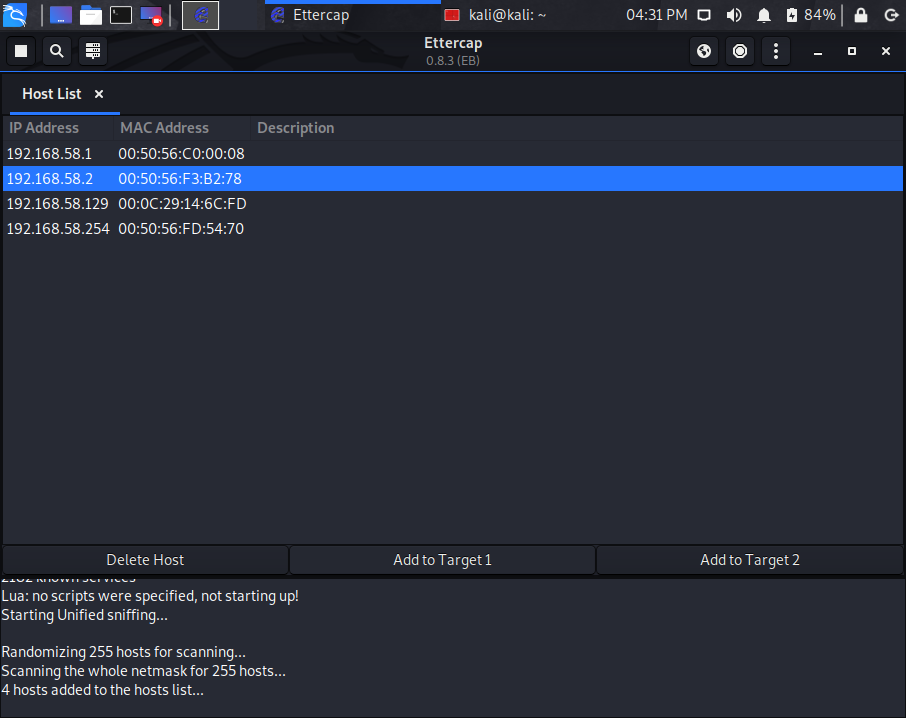
Step #4 – Adding Targets
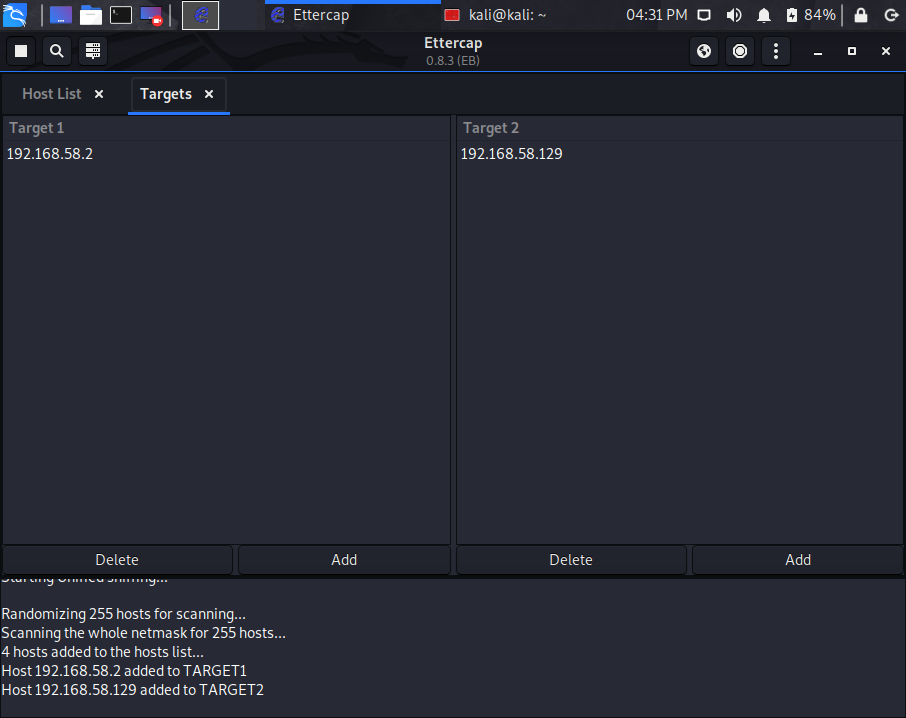
Looking at your current Hosts list, select the default gateway address which in this case is 192.168.58.2 and click Add to Target 1.
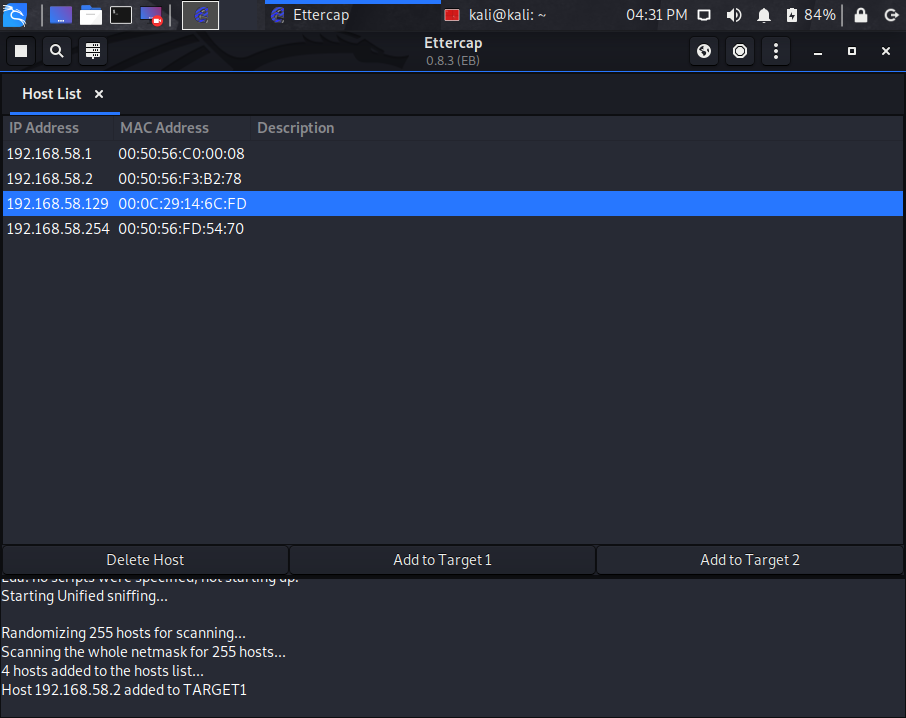
Next select the IP of your Windows 10 machine (in my case it’s 192.168.58.129) and click Add to Target 2.
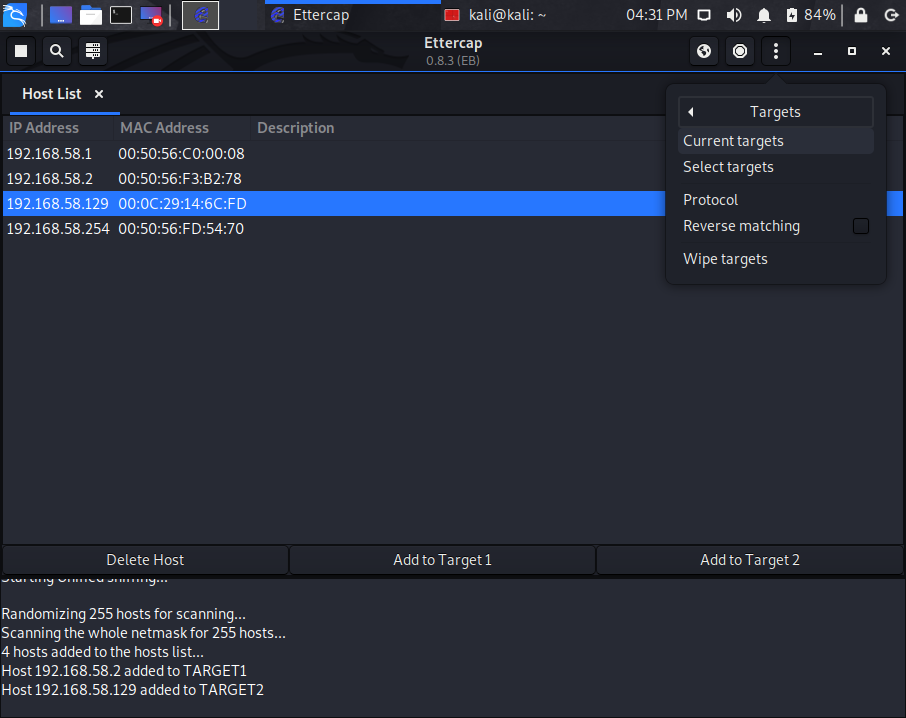
Now if you would like to view which Targets have been selected you can do so by selecting the 3 vertical dots again and clicking on Targets and view Current Targets. (See screenshots below)
Step #5 – Starting the Spoofing Attack
Now we have 2 targets added that we want to conduct the MitM attack on, poisoning the ARP cache of our Windows 10 machine.
Remember we will be sitting in the middle of the gateway and the target. The default gateway (router) will think that the target IP is our MAC address and forward all traffic to our attack machine.
The Windows 10 machine will think that the router or default gateway IP is our MAC address and forward all traffic to our Kali attack machine.
For our attack machine to correctly then forward the traffic to and from both targets, we need to enable IP forwarding. This is done by entering the following command via the terminal:
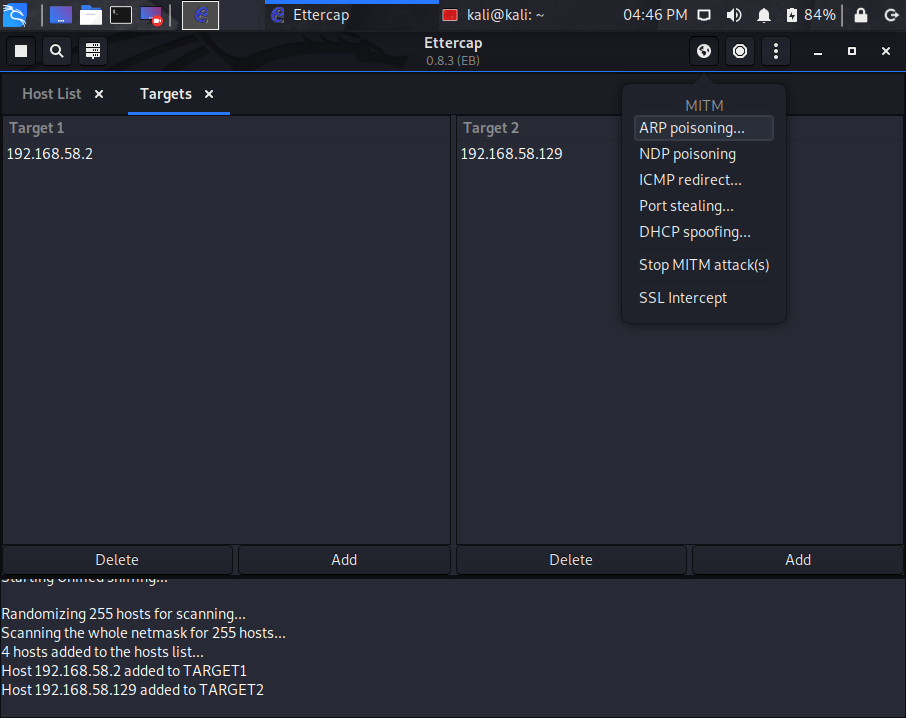
sudo sysctl -w net.ipv4.ip_forward=1We need to now select the type of attack by going to the MitM menu or drop down in Ettercap. Select the earth icon in the top right of the application window. You will see a list of attacks.
We want to select the first one, ARP Poisoning. Once that is selected, it will bring up a small window in which we select OK, keeping the current default choices. (See screenshots below)

Ettercap begins sending crafted ARP packets to both Targets.
Step #6 – Analyzing Traffic in Wireshark
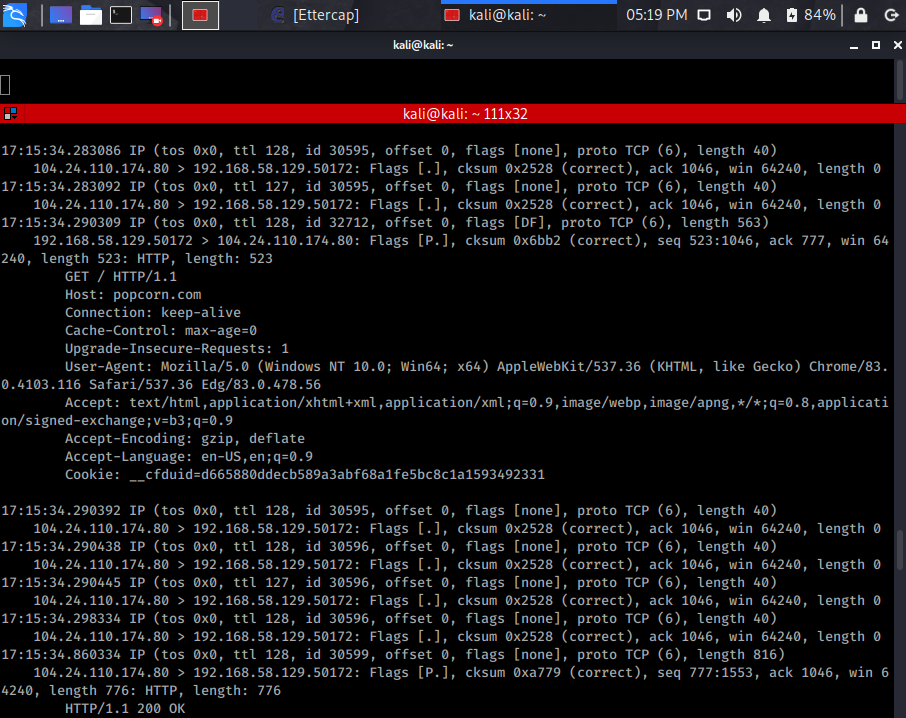
Now, go to your Windows 10 machine and open a browser and go to an HTTP website. In this example, I went to both popcorn.com and website.org. (Both HTTP not HTTPS)
Now we need a way to analyze the traffic on our network to see if the target’s traffic is being sent to our machine. There are several ways of doing this. For this tutorial, I used tcpdump to dump the traffic. I also used -w flag to write the traffic’s output to a .pcap file that I then analyzed with Wireshark.
Pay close attention to the tcpdump and Wireshark screenshots as they will show that our attack machine intercepted the traffic going to and from popcorn.com and website.org.
In a real attack where the user would unknowingly think that their traffic was secure, we could potentially see passwords or other information entered by the user on those sites.
Lastly, I want to go over the tcpdump command that we need to enter in the terminal to capture the traffic. On our Kali machine pull up the terminal and enter the following:
sudo tcpdump -i eth0 -A -v port 80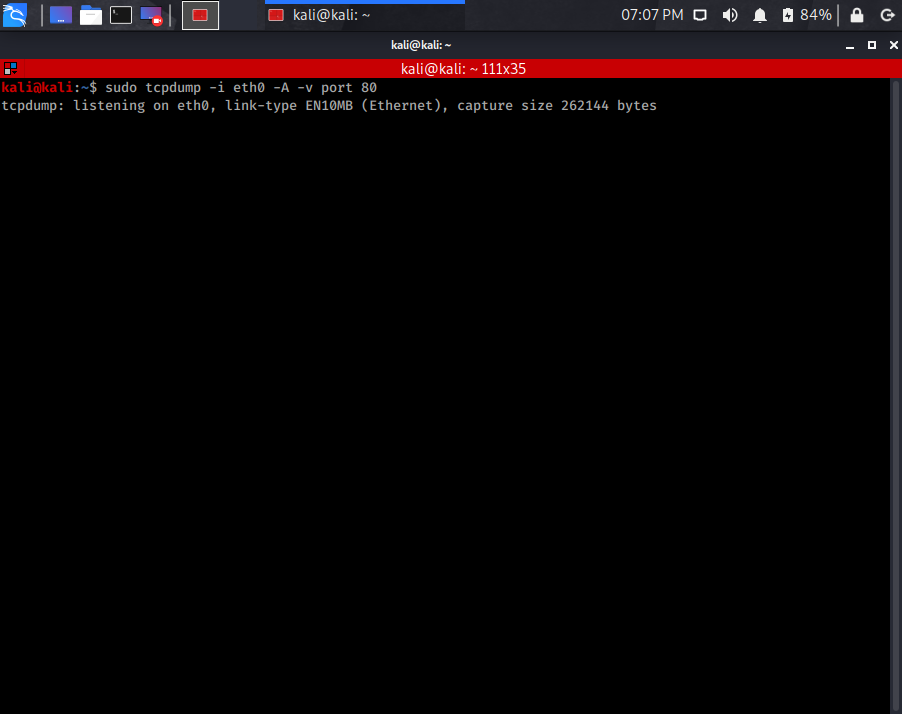

This tells tcpdump the interface on which to capture or listen to the traffic by using the -i flag.
If you are using a wireless interface the flag becomes -I.
Eth0 is simply the ethernet interface. The -A flag will display the content of the packets in ASCII which is very useful for seeing what websites a user visited or if, for example, they used the FTP protocol we could see passwords in cleartext.
The -v simply is a verbose command allowing us to see more information. And since we wanted to see what websites the victim machine visited, we use port 80 to capture HTTP traffic.
In order to analyze the traffic with Wireshark we repeat the same command but add the -w flag which writes it to a .pcap file like so: (See screenshots below)
sudo tcpdump -i eth0 -A -v port 80 -w etter_arp.pcapCode language: CSS (css)
Note: Once tcpdump starts capturing packets you will see the counter represent the number of packets captured.

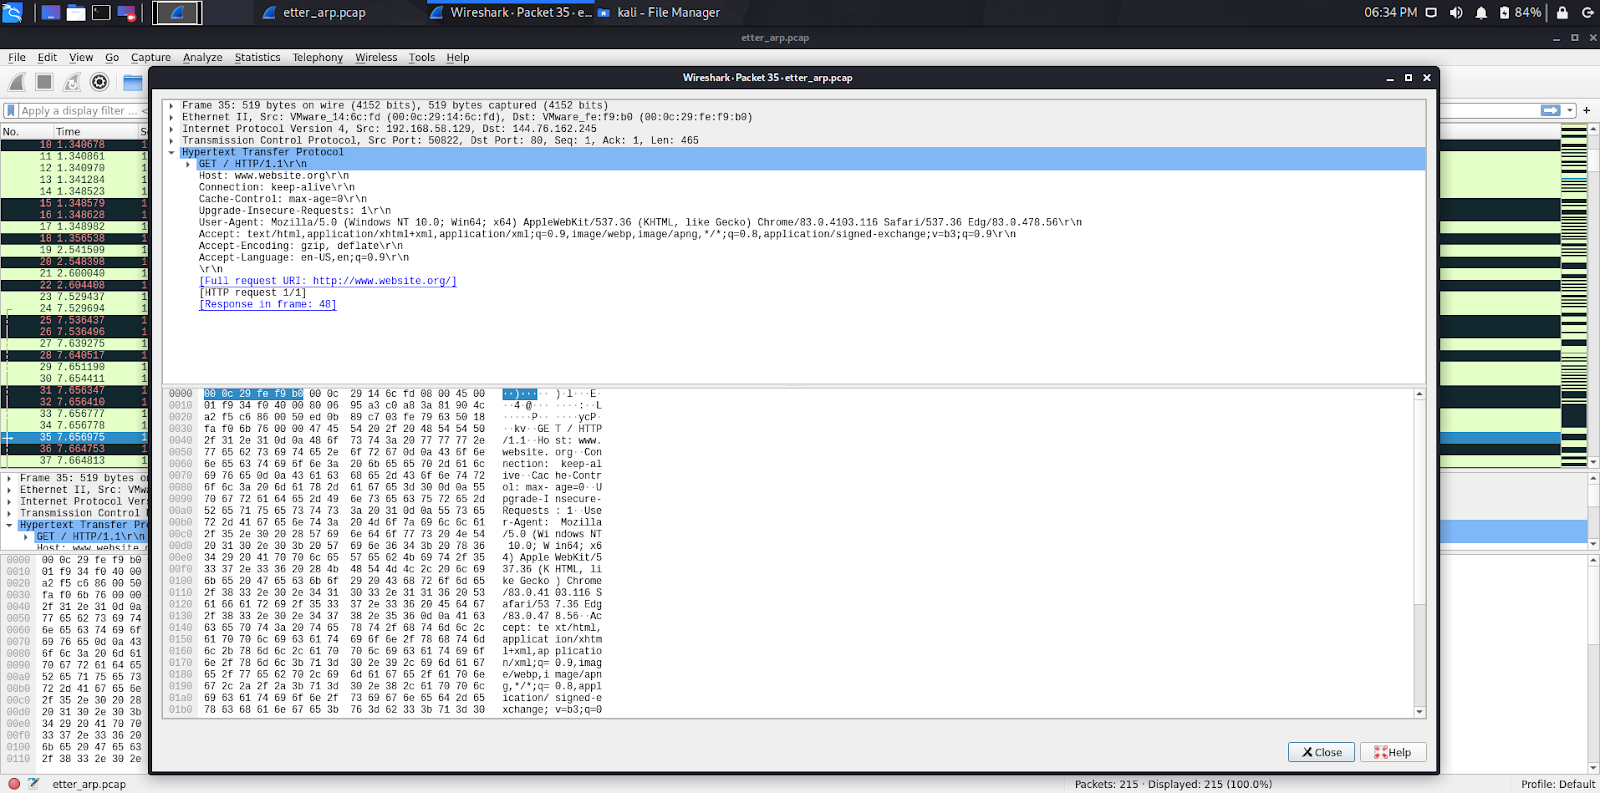

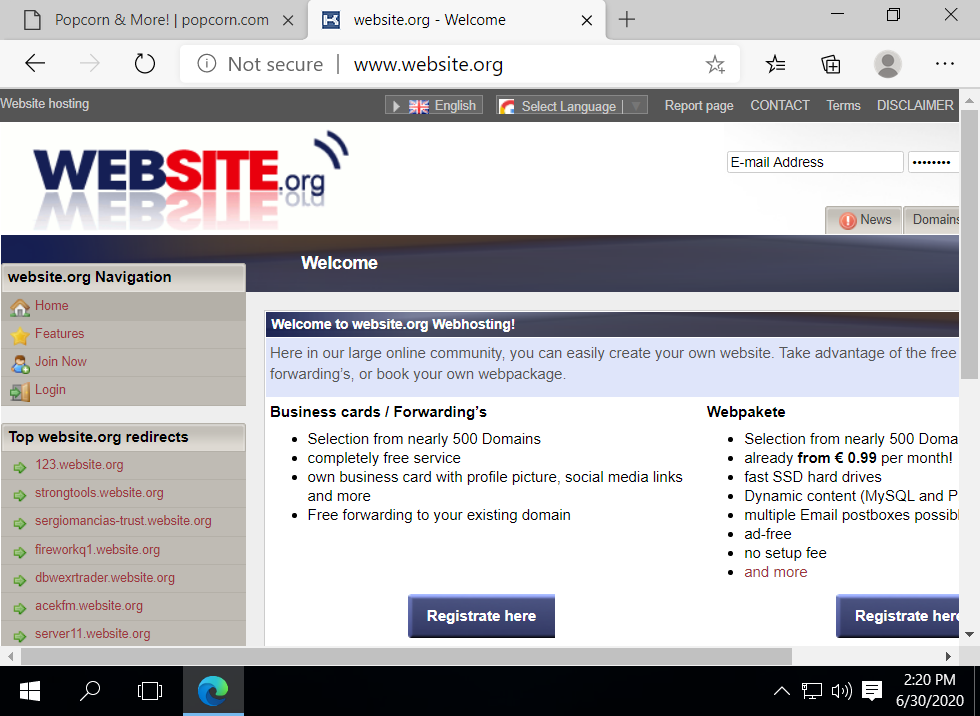
As you can see both websites our Windows 10 machine visited, we were able to capture using Ettercap from our Kali VM.
After performing the attack, make sure to stop the MitM attack by going to the stop icon shown above. (Next to the earth icon)
Then in the top left of the application window, you will want to press the square icon to stop the unified sniffing.

Conclusion and next steps
Ettercap is a great tool for understanding how this type of attack happens. I think the developer team did an awesome job updating the interface and its features.
If you enjoyed this tutorial on ARP Spoofing with Ettercap and Wireshark, check out the other attacks Ettercap can perform and continue to learn how these protocols can affect our networks in making them less or more secure!


Responses