
Centralized root management for AWS multi-account
When you are running multiple accounts through AWS Organizations, there are times when you may need to perform root-level actions in your member accounts. It…

When you are running multiple accounts through AWS Organizations, there are times when you may need to perform root-level actions in your member accounts. It should be rare, but in the event that you need that ability, you can use central root access management via IAM and AWS Organizations.
Prefer videos? Here you go:
What is central root access management?
In the past, whenever AWS created a member account for you through AWS Organizations, they automatically generated a password for your root user, but no one knew what that password was — not even you. You never received it. If you needed it, you would have had to password reset, and then set up MFA to protect it. But imagine managing MFA for dozens or hundreds of accounts…not great!
AWS’ solution to this problem was to launch centralized root access management.
With this feature, you can now remove these long-term credentials from the root user, and by doing this, you also disable password recovery flows and the need for MFA on those root user accounts.
Instead, if or when you need to perform root actions in your member accounts, you can use root sessions. These root sessions provide you with short-term credentials that expire within 15 minutes and that are used just like other role credentials.
Example of using root sessions
As an example of when you might need to use a root session, let’s say that you accidentally lock yourself out of an S3 bucket via a misconfigured S3 bucket policy (I’d be lying if I said this hasn’t happened to me once…or maybe twice). You can use a root session to fix the problem, and you would do that by scoping your temporary credentials to one of these actions:
- Auditing root user credentials – Read-only access to view root user and account information
- Re-enabling account recovery – Reactivating account recovery without root credentials
- Deleting root user credentials – Removing console passwords, access keys, signing certificates, and MFA devices
- Unlocking an S3 bucket policy – Editing or deleting an S3 bucket policy that denies all principals
- Unlocking an SQS queue policy – Editing or deleting an Amazon SQS resource policy that denies all principals
Alright, let’s take a look at how this actually works by enabling the feature and testing it out.
How it works and how to get started
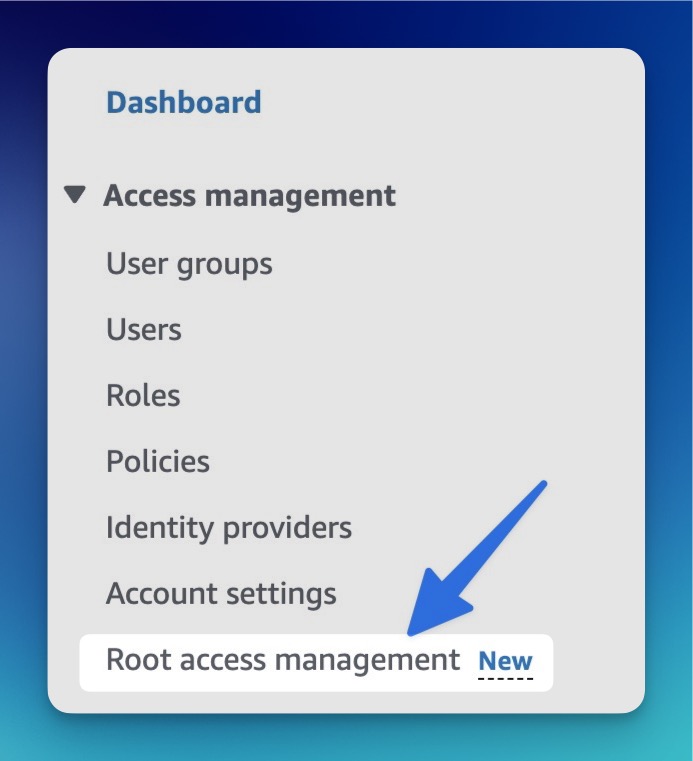
Authenticate into your management account via an admin user/role (but not root) and head over to the IAM dashboard. You’ll see Root access management in the menu – click on it.
Click on Enable.
Note: If you don’t see that as an option, you need to first enable trusted access for AWS IAM in AWS Organizations. Details here.
We can enable 2 different capabilities:
- Root credentials management
- Privileged root actions in member accounts
The first enables you to delete and audit root credentials of member accounts, and you can also allow password recovery for specific member accounts.
The second option lets you take root actions in member accounts for certain services, like SQS and S3.
So these are treated as two separate capabilities, and you may not need to enable both. Up to you.
Finally, we’re asked whether we want to delegate administration of centralized root access. AWS recommends doing this, because it prevents the need to use the management account for administering root access in the future. So if you have an account you’d like to delegate this to, go ahead and paste in its ID here.
Then Enable.
You should see a success banner — click on the Root access management button.
Deleting existing root user credentials
Clicking on that button will take you to your organizational structure where you can see all of your OUs and accounts. Expanding OUs will show the accounts, and next to them, it will show whether you have root user credentials present or not.
If you created the accounts before this feature was launched (11/15/2024) then you will have credentials present. There was no alternative back in those days…
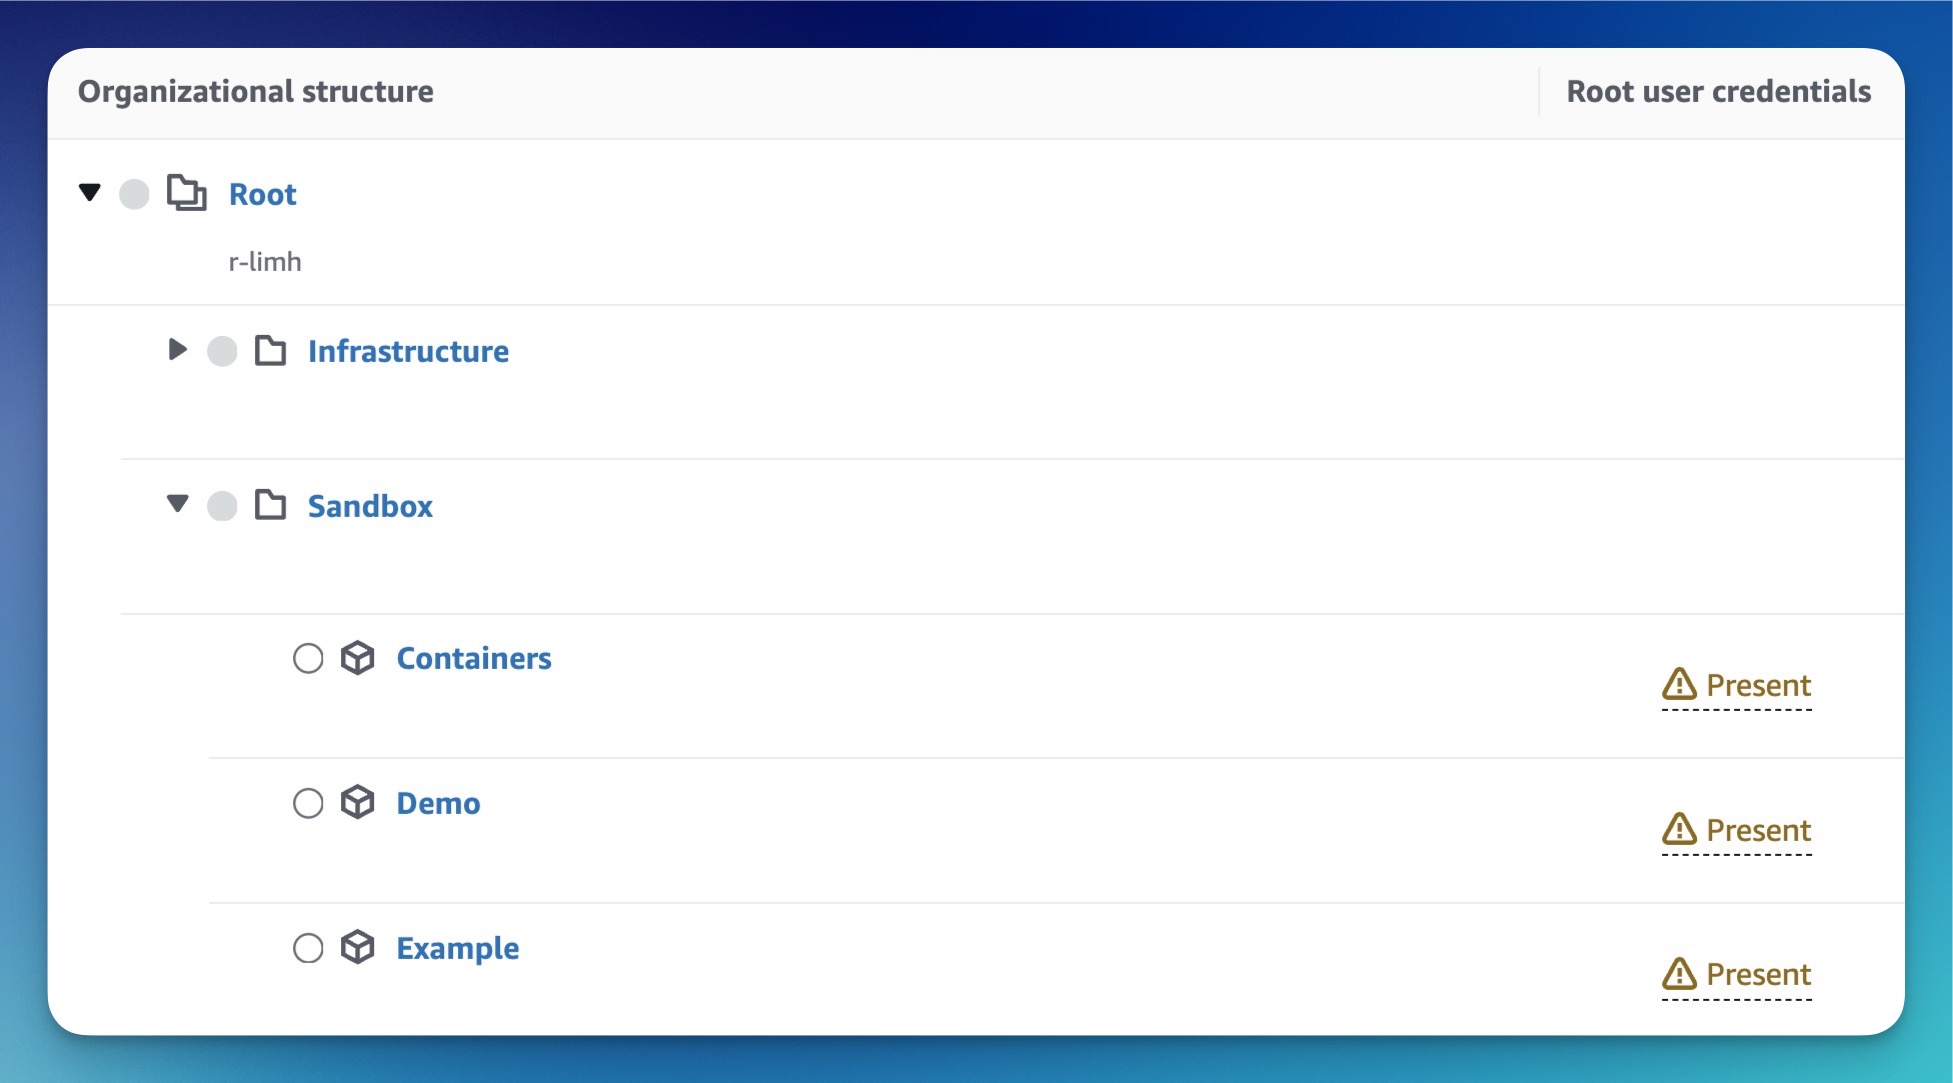
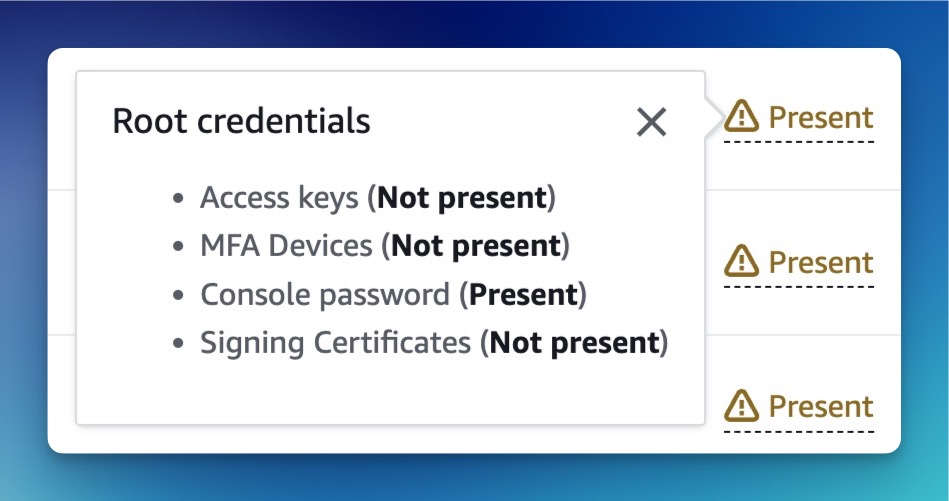
If you click on the Present tooltip, it will show you what types of credentials are present in that member account:
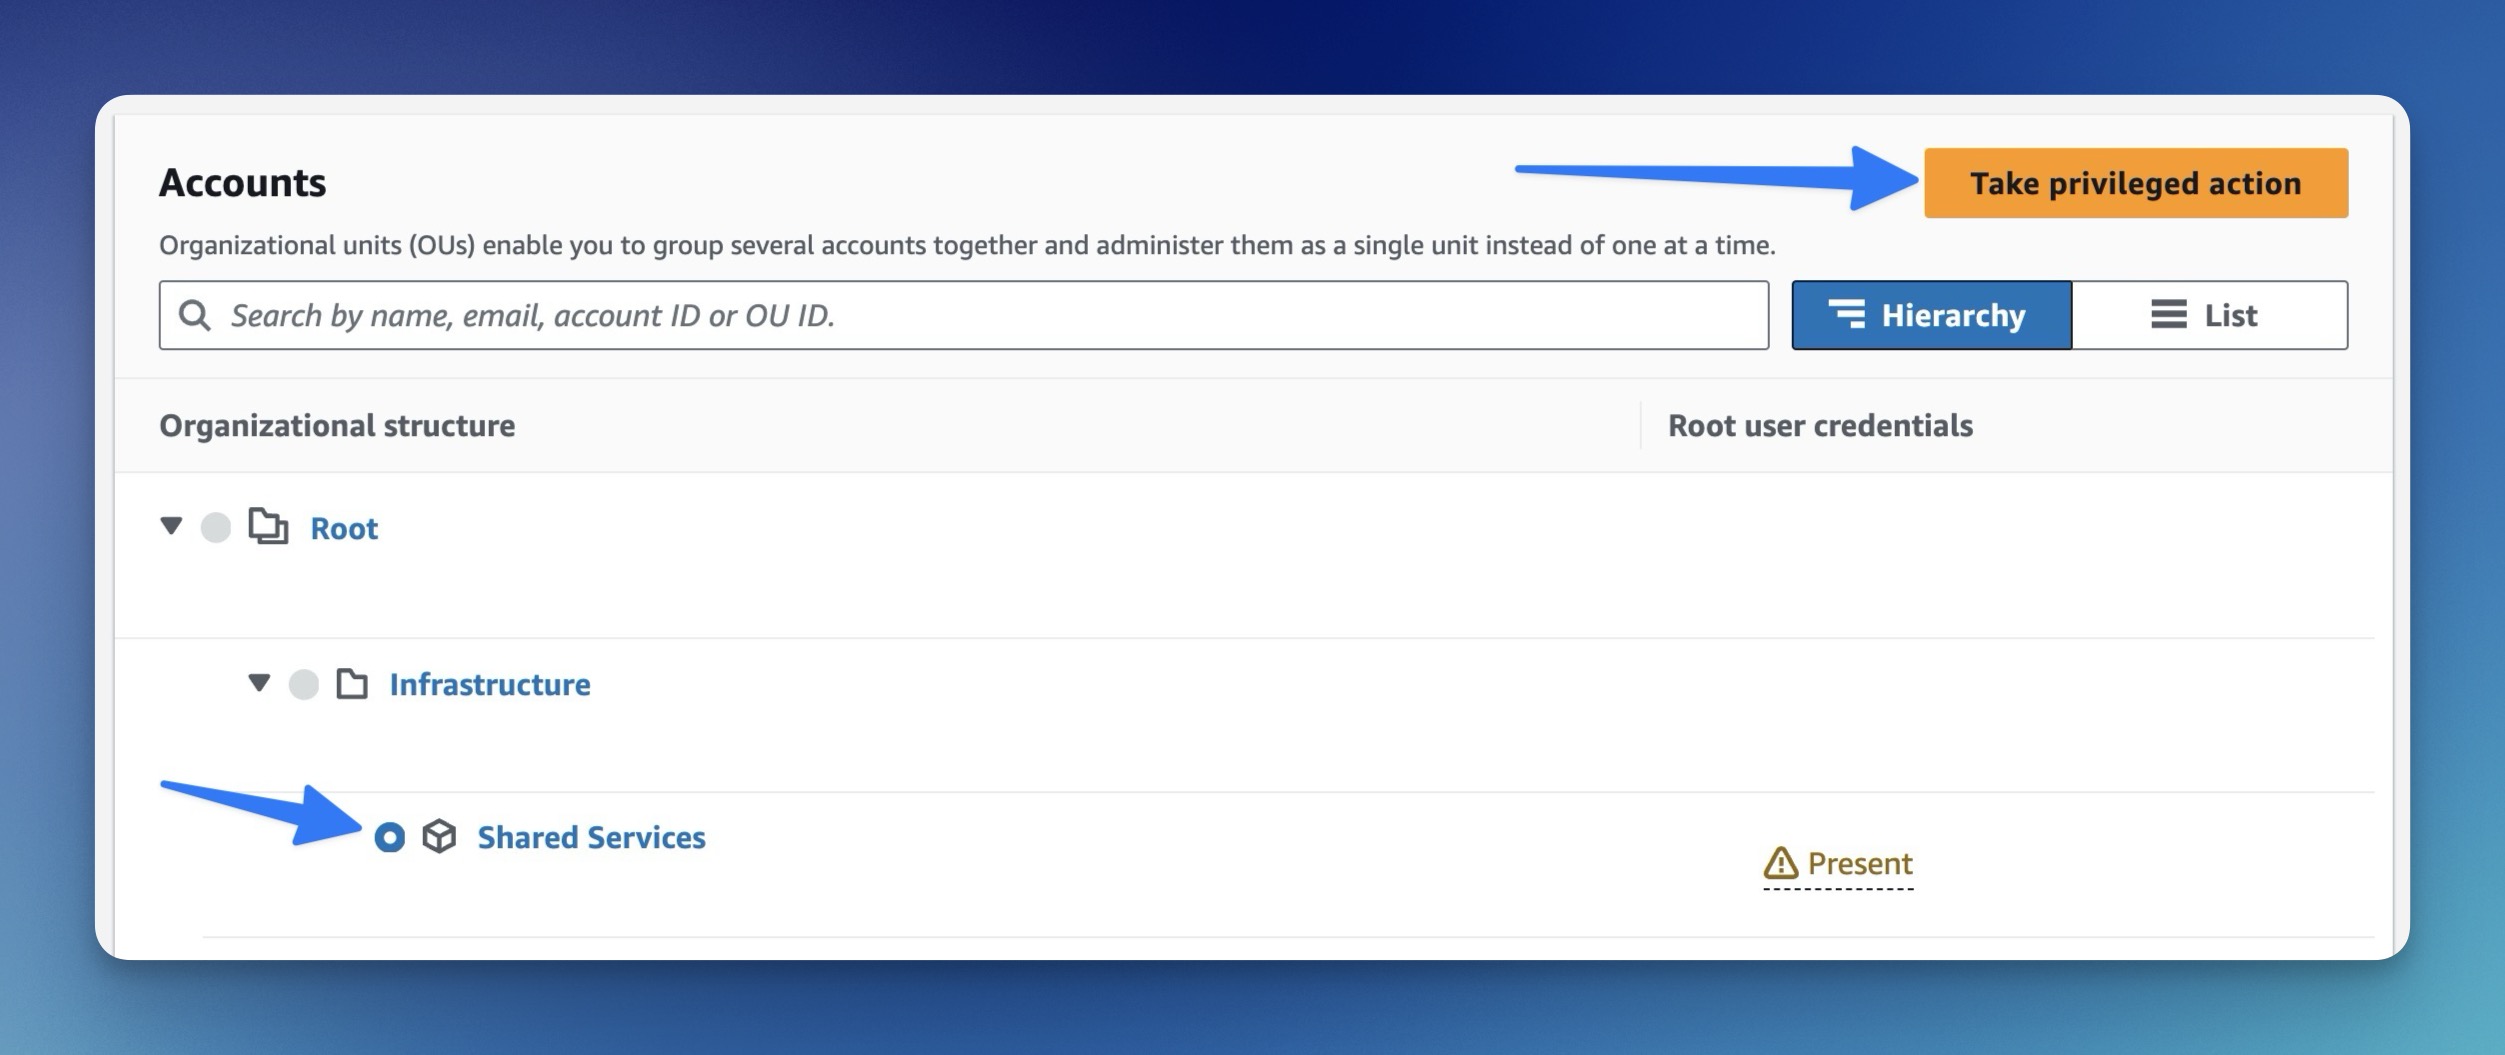
Getting rid of the credentials in the console is quite a manual process right now. I saw AWS mentioned sharing scripts to automate this process in the future, so we’ll keep an eye out and update this post. You have to individually select the accounts, then click on Take privileged action, then select Delete root user credentials. If you have a few hundred accounts, have fun with that. Maybe wait for that script from AWS or figure out how to write one yourself!
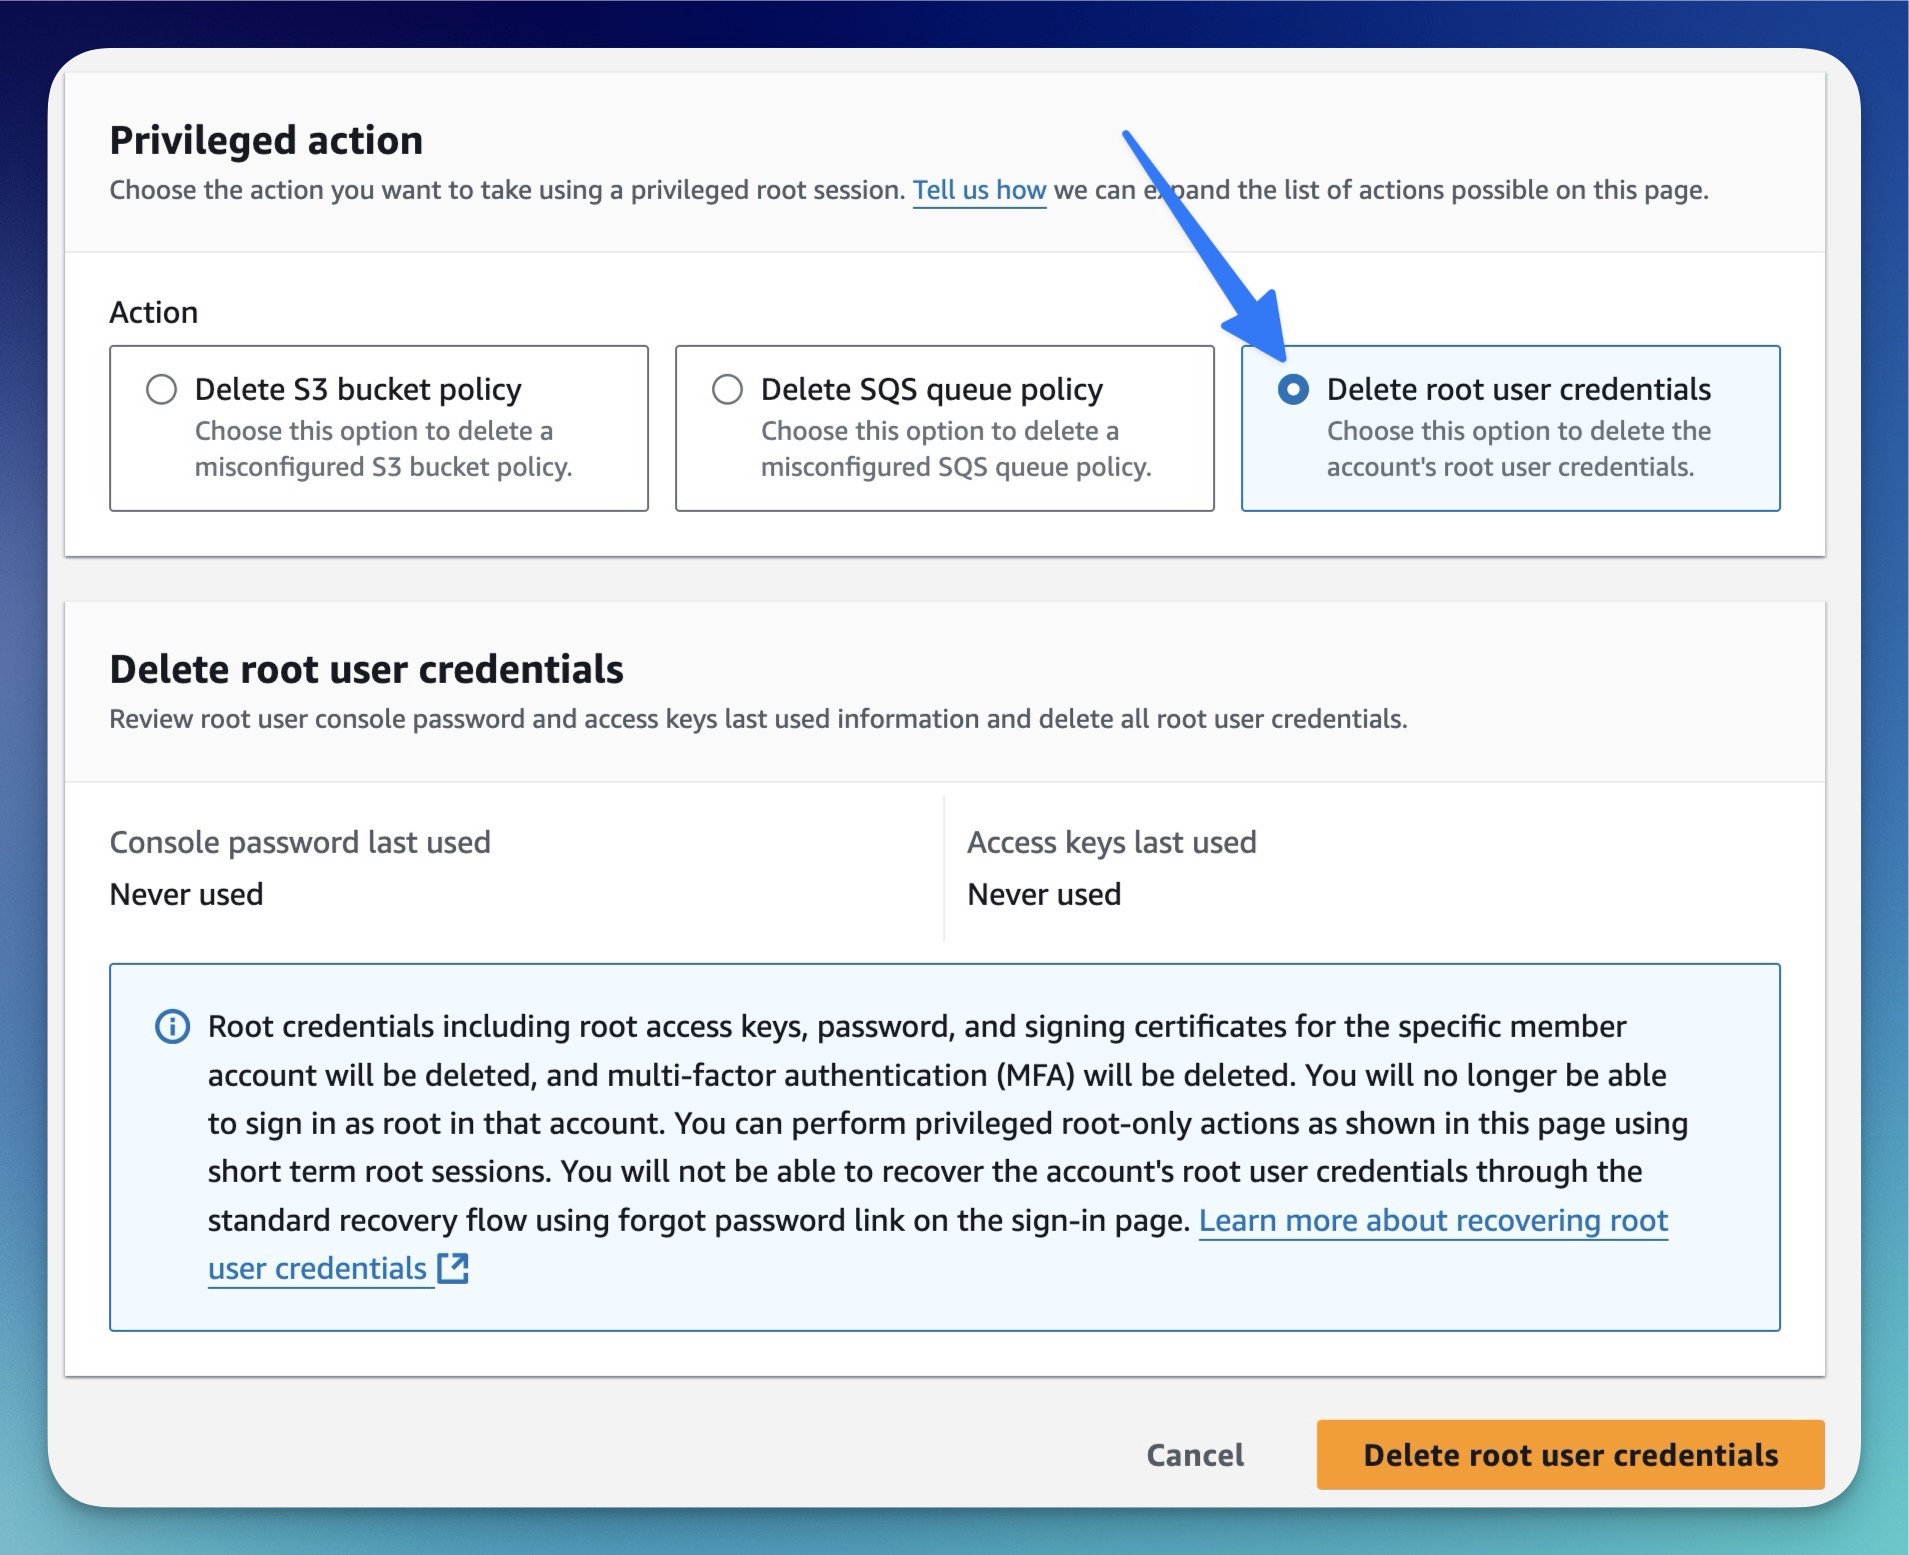
This will effectively delete:
- Root access keys
- Root user password
- Signing certificates
- MFA for the root user
You will have no ability to log in to the root user account in that member account after doing this. Instead, to perform root actions, you’ll have to use a root session (which we’ll look at in just a minute).
Finally, submit the change by clicking on Delete root user credentials. You’ll be asked to confirm.

Now if you select that same account and go back to Take privileged action, you’ll notice that the 3rd option was replaced with Allow password recovery. So it is still possible to enable a password for root if you ever need it, but you would have to go through that step first to enable it. Otherwise it’s a disabled flow.
Root session – getting short-term root credentials
With this step completed, if we need to perform root-level actions in that account, we have to either go through that Take privileged action route, or we can use AssumeRoot through STS. Let’s take a look at how to do that via the CLI.
Before this will work, you will need to upgrade your CLI version. Versions before 2.21.2 will not work. How you do this depends on how you installed it. Instructions here.
Note: if you used Brew on MacOS to install your CLI, you can simply do brew upgrade awscli.
You will also get an error of “rootsession may not be assumed by root accounts” if you are authenticated as root. Instead, authenticate with an admin-level user/role and try again.
We’ll issue the command of:
aws sts assume-root \
    --target-principal <value> \
    --task-policy-arn <value> \
    --profile <profile-name>
--target-principalis the member account principal ARN or account ID that you want to assume root in--task-policy-arnis how we set the scope of this session. It has to be one of:
Since you need to pass in an ARN value, the ARN format goes like this:
arn:aws:iam::aws:policy/root-task/<scope>
So if I want to use IAMAuditRootUserCredentials:
arn:aws:iam::aws:policy/root-task/IAMAuditRootUserCredentials
I would pass it in like this:
❯ aws sts assume-root \
    --target-principal 211125520673 \
    --task-policy-arn arn=arn:aws:iam::aws:policy/root-task/IAMAuditRootUserCredentials \
    --profile cybrdemo
This will give back temporary credentials, just like what you’re used to for other roles. Let’s configure our CLI:
❯ aws configure --profile temproot
AWS Access Key ID [None]: ASIAT...
AWS Secret Access Key [None]: 5DYDwj...
Default region name [None]: us-east-1
Default output format [None]:
Don’t forget to set the session token:
❯ aws configure set aws_session_token IQoJb3JpZ2luX2Vj... --profile temproot
Check that it worked:
❯ aws sts get-caller-identity --profile temproot
{
    "UserId": "211125520673",
    "Account": "211125520673",
    "Arn": "arn:aws:iam::211125520673:root"
}
These credentials are good for 15 minutes, so don’t wait up.
For more information about what you can and cannot do depending on the task policy you chose, refer to the documentation. The JSON policy document will show you what you have access to.
In this case we can:
iam:ListAccessKeysiam:ListSigningCertificatesiam:GetLoginProfileiam:ListMFADevicesiam:GetAccountSummaryiam:GetUseriam:GetAccessKeyLastUsed
For example we can do:
❯ aws iam get-account-summary --profile temproot

{
    "SummaryMap": {
        "GroupPolicySizeQuota": 5120,
        "InstanceProfilesQuota": 1000,
        "Policies": 0,
        "GroupsPerUserQuota": 10,
        "InstanceProfiles": 0,
        "AttachedPoliciesPerUserQuota": 10,
        "Users": 0,
        ...
}
Or:
❯ aws iam list-access-keys --profile temproot

{
    "AccessKeyMetadata": []
}
You get the idea!
Conclusion
So that’s it! This is how we are supposed to managed our root accounts and access in member AWS accounts going forward!
Recommended course of action for your AWS accounts
Knowing what we know now about this feature, here’s the recommended course of action:
- If you have member accounts that have root users with credentials, go through and remove those credentials
- Determine whether you want to enable or disable “privileged root actions in member accounts.” You can always enable it later by going to the IAM dashboard →
Account Settingsso you may want to keep it disabled until it’s needed for added security - Consider delegating root management to a member account to keep people out of the management account
- Lock down access to this root management feature — almost no one should have access to it, and actions should be monitored like a hawk
Otherwise that’s about it!

Hi, nice article! thanks.
I would like to ask what happen if your identity provider is not working and you disable all root accounts?