Install and Use Burp Suite in Minutes for Pentesting

In this tutorial, we will be going over the basic installation and setup of Burp Suite. You can find this tool for download here. There is a paid version, however, for the purposes of this tutorial, we will use the free community version. Certain functions are not available with the free version, but it definitely provides enough to get started.
Burp Suite is a suite of tools that center around web application testing. In short, you use this tool to test the security of a website or web application.
In learning its basic functions, I will say that it is comprehensive, and a multitude of different tutorials are written for the variety of ways that website vulnerabilities can be exploited. That being said, we are just going to cover the very basics of how and what this tool does.
What is Burp Suite?
Burp Suite is a proxy that sits between you and the website you are accessing for testing.
This means that when you type in a URL for example www.google.com, all the traffic behind the scenes going from your browser to the server that hosts the website or application is first sent to Burp Suite.
This means that you will be able to see the HTTP traffic like the GET and POST requests. This is so you can analyze the traffic and in cases where there are vulnerabilities, you can inject certain attacks like SQL injections into the traffic going to the targeted website.
This can enable you to carry out other attacks like XSS, CSFR, and even brute-forcing passwords.
Setting up Burp Suite
After downloading Burp Suite, the next step is to configure your browser and Burp Suite to ensure that traffic will be sent from your browser to Burp Suite’s proxy and vice versa.
So we will cover how to configure Burp Suite, and in the next section, we’ll go over browser settings and extensions.
Step #1 – Starting Burp Suite
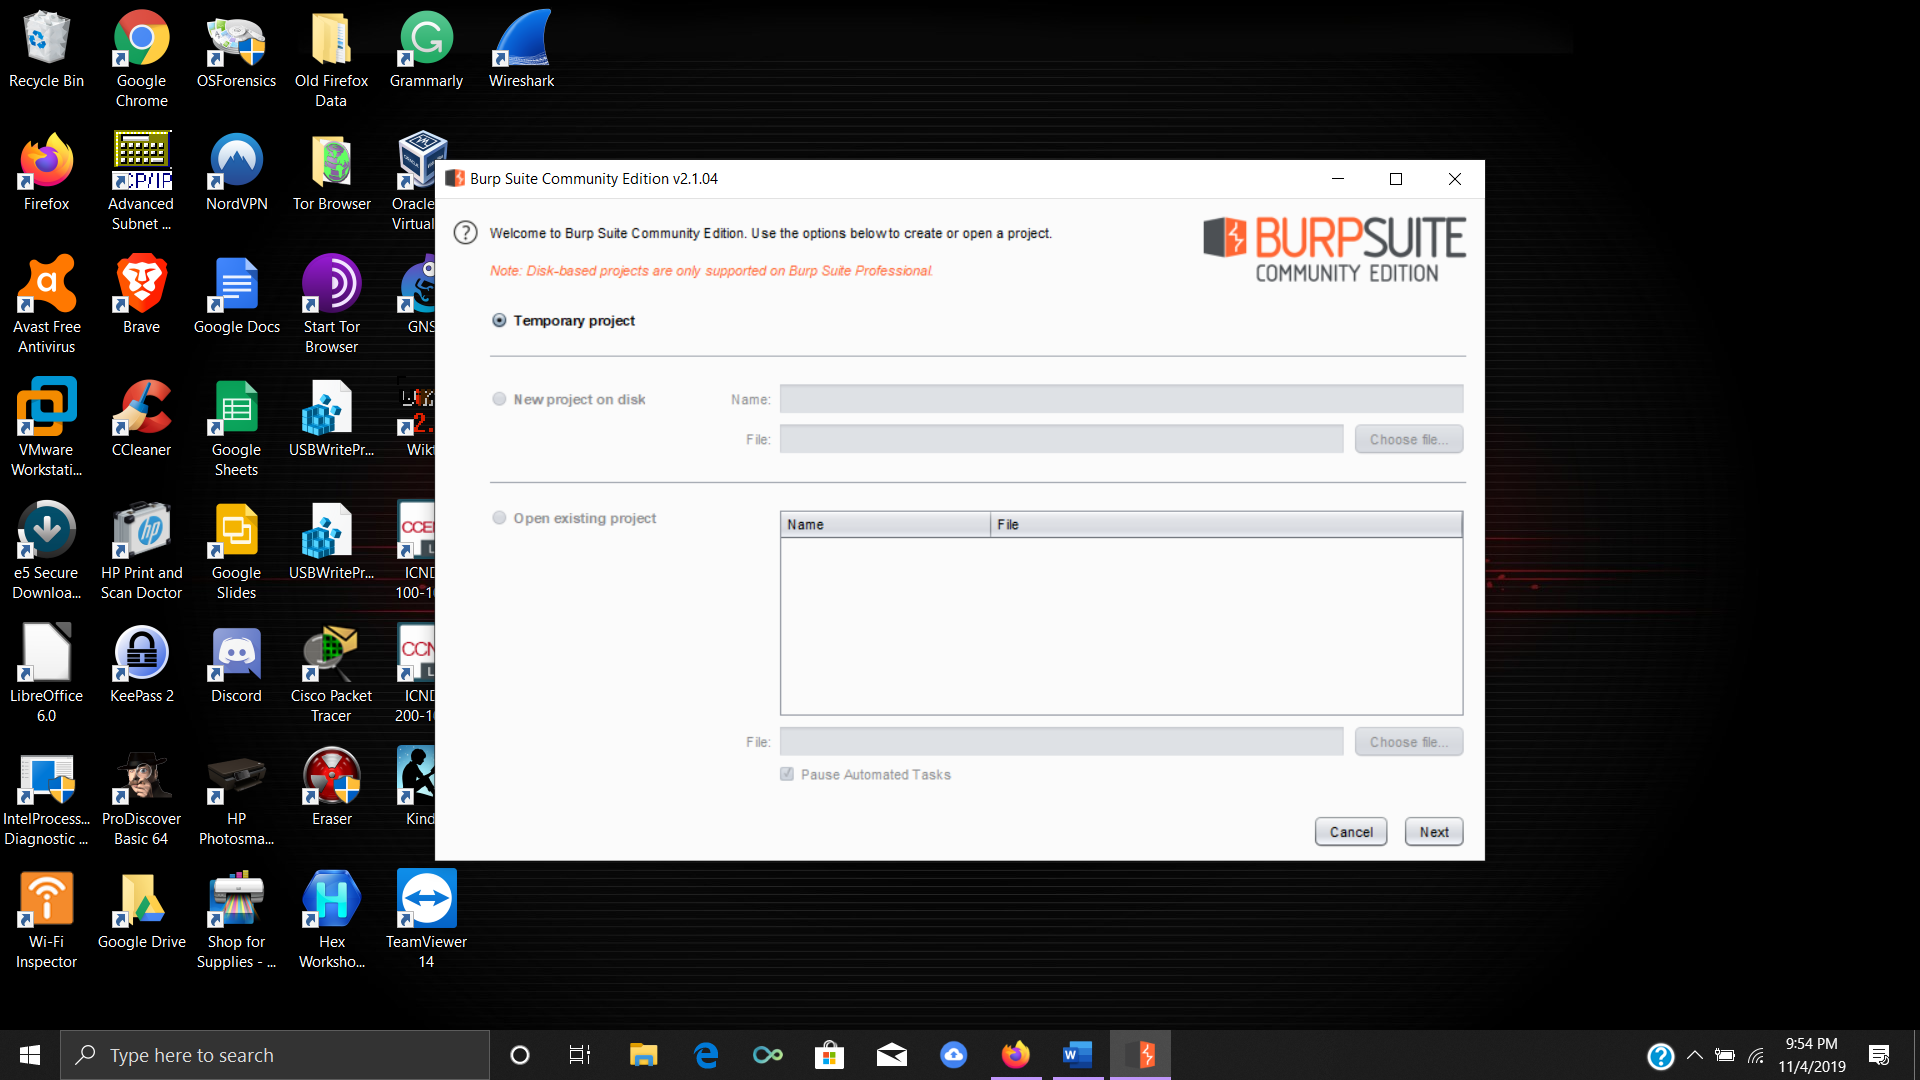
After installing Burp Suite, open the application. You are going to see in the free community version where it says temporary project. Click on next.
Then make sure that use burp defaults is selected, and click on start burp, at the bottom right of the window. (See screenshots below)

Step #2 – Turning Off Intercept
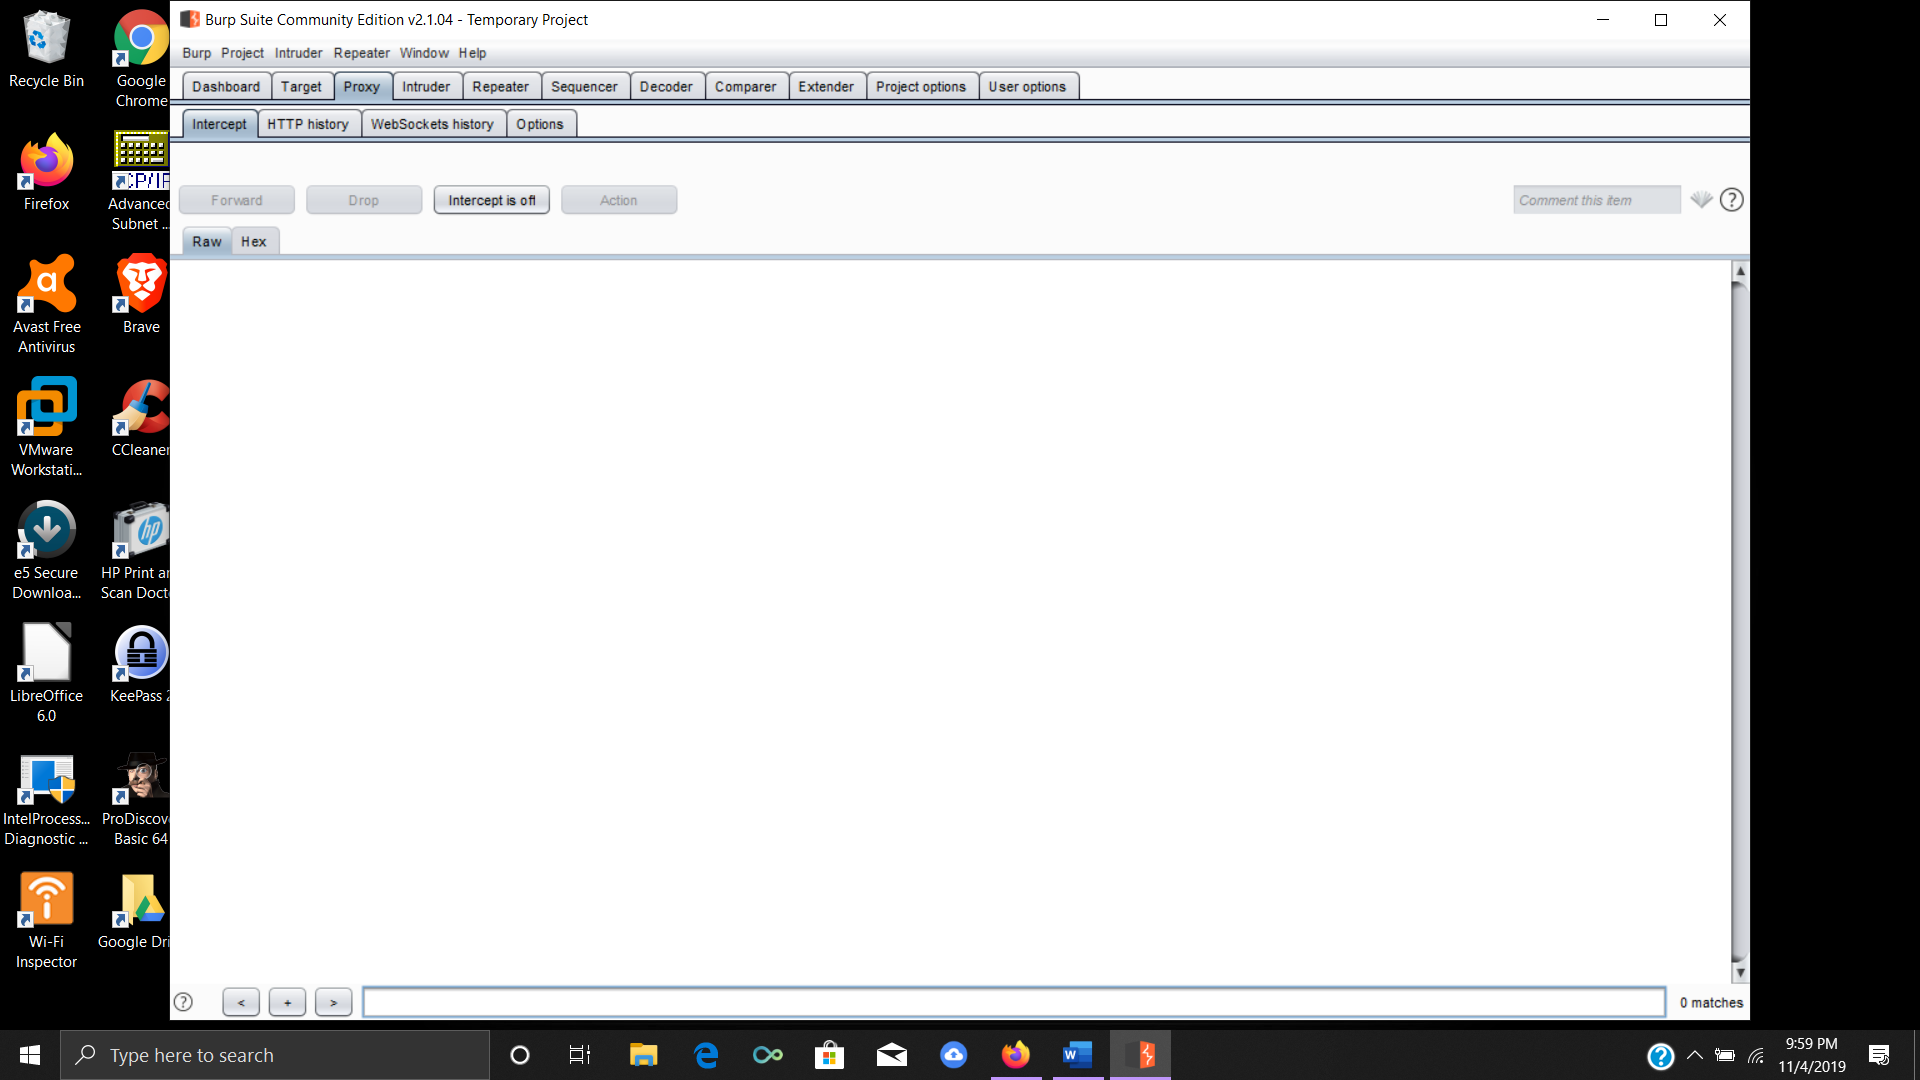
Once started, Burp will open with the Dashboard showing.
By default, the interceptor, which is where Burp intercepts your traffic, is enabled, but let’s go ahead and turn it off temporarily.
You need to go to the Proxy tab and make sure you are on the Intercept tab, then click Intercept is on, this will turn the interceptor off. (See screenshot below)
Step #3 – Proxy configuration in Burp Suite
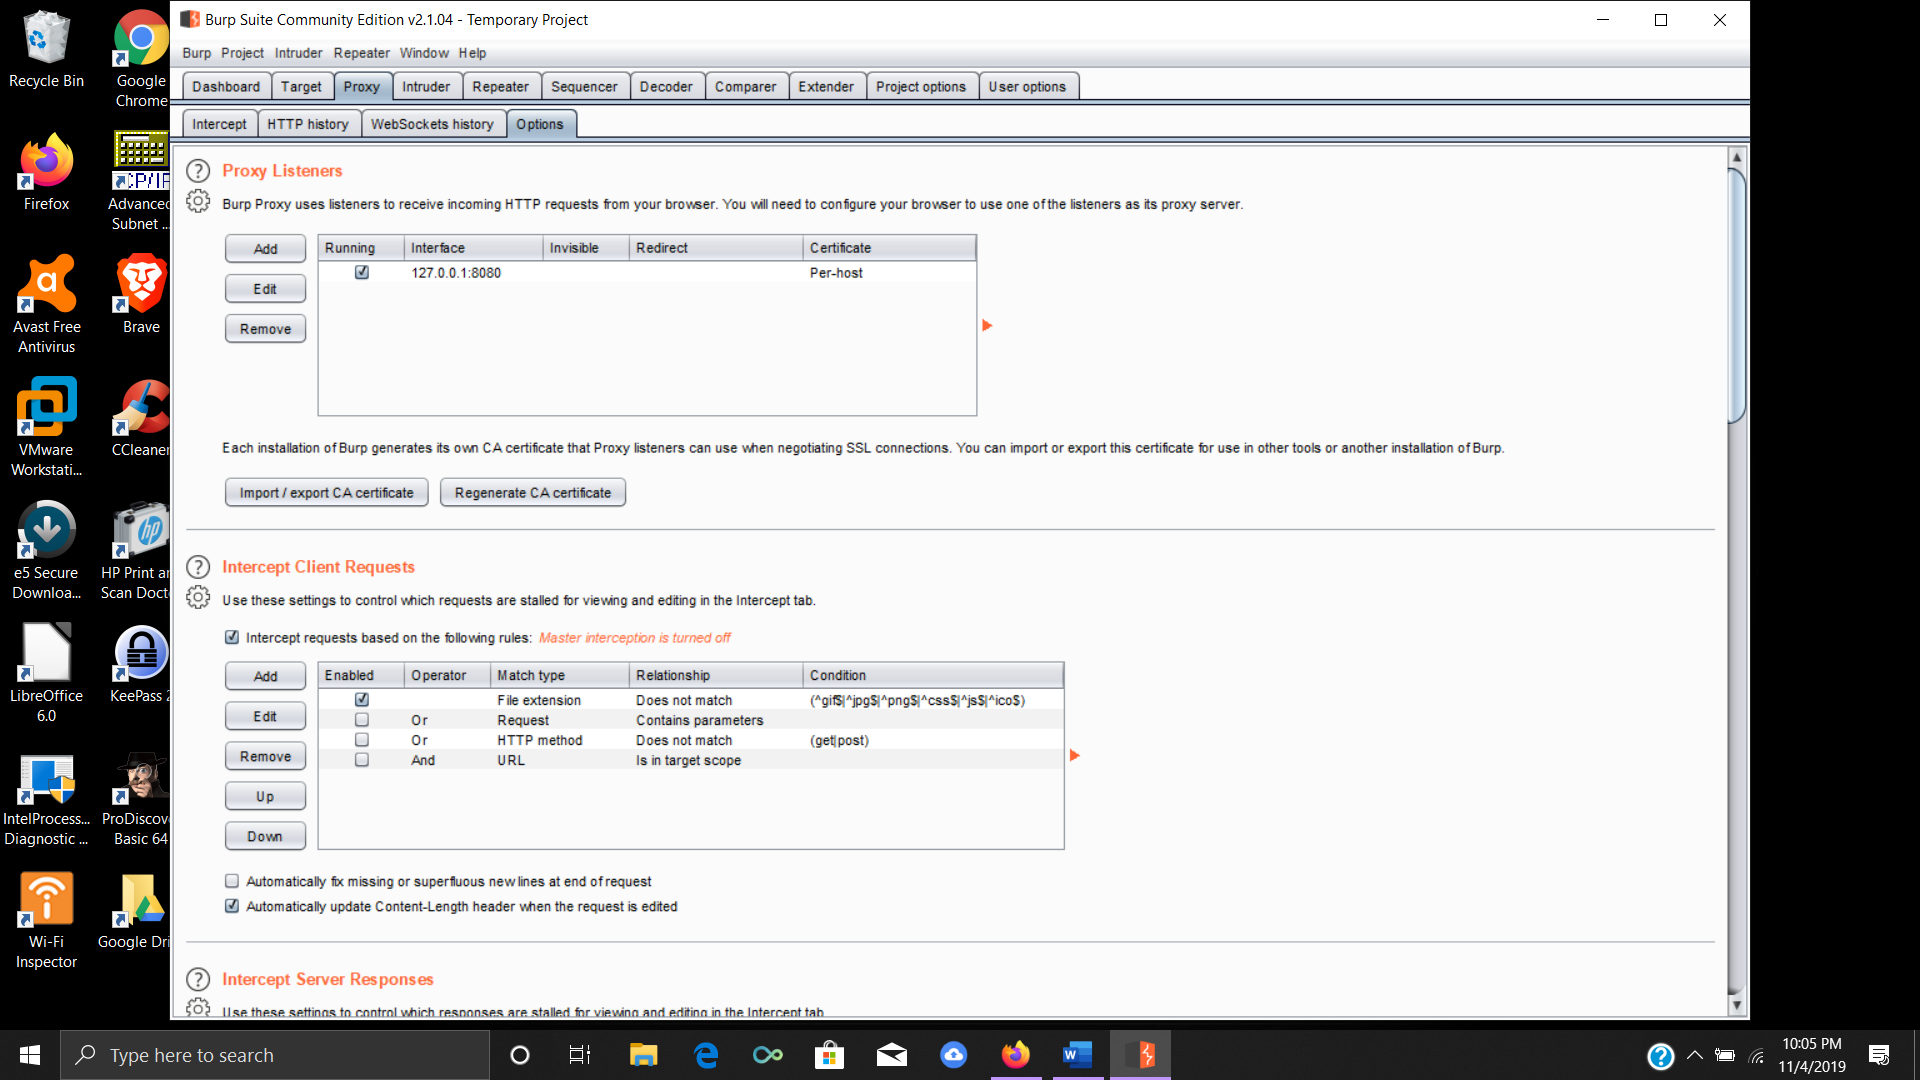
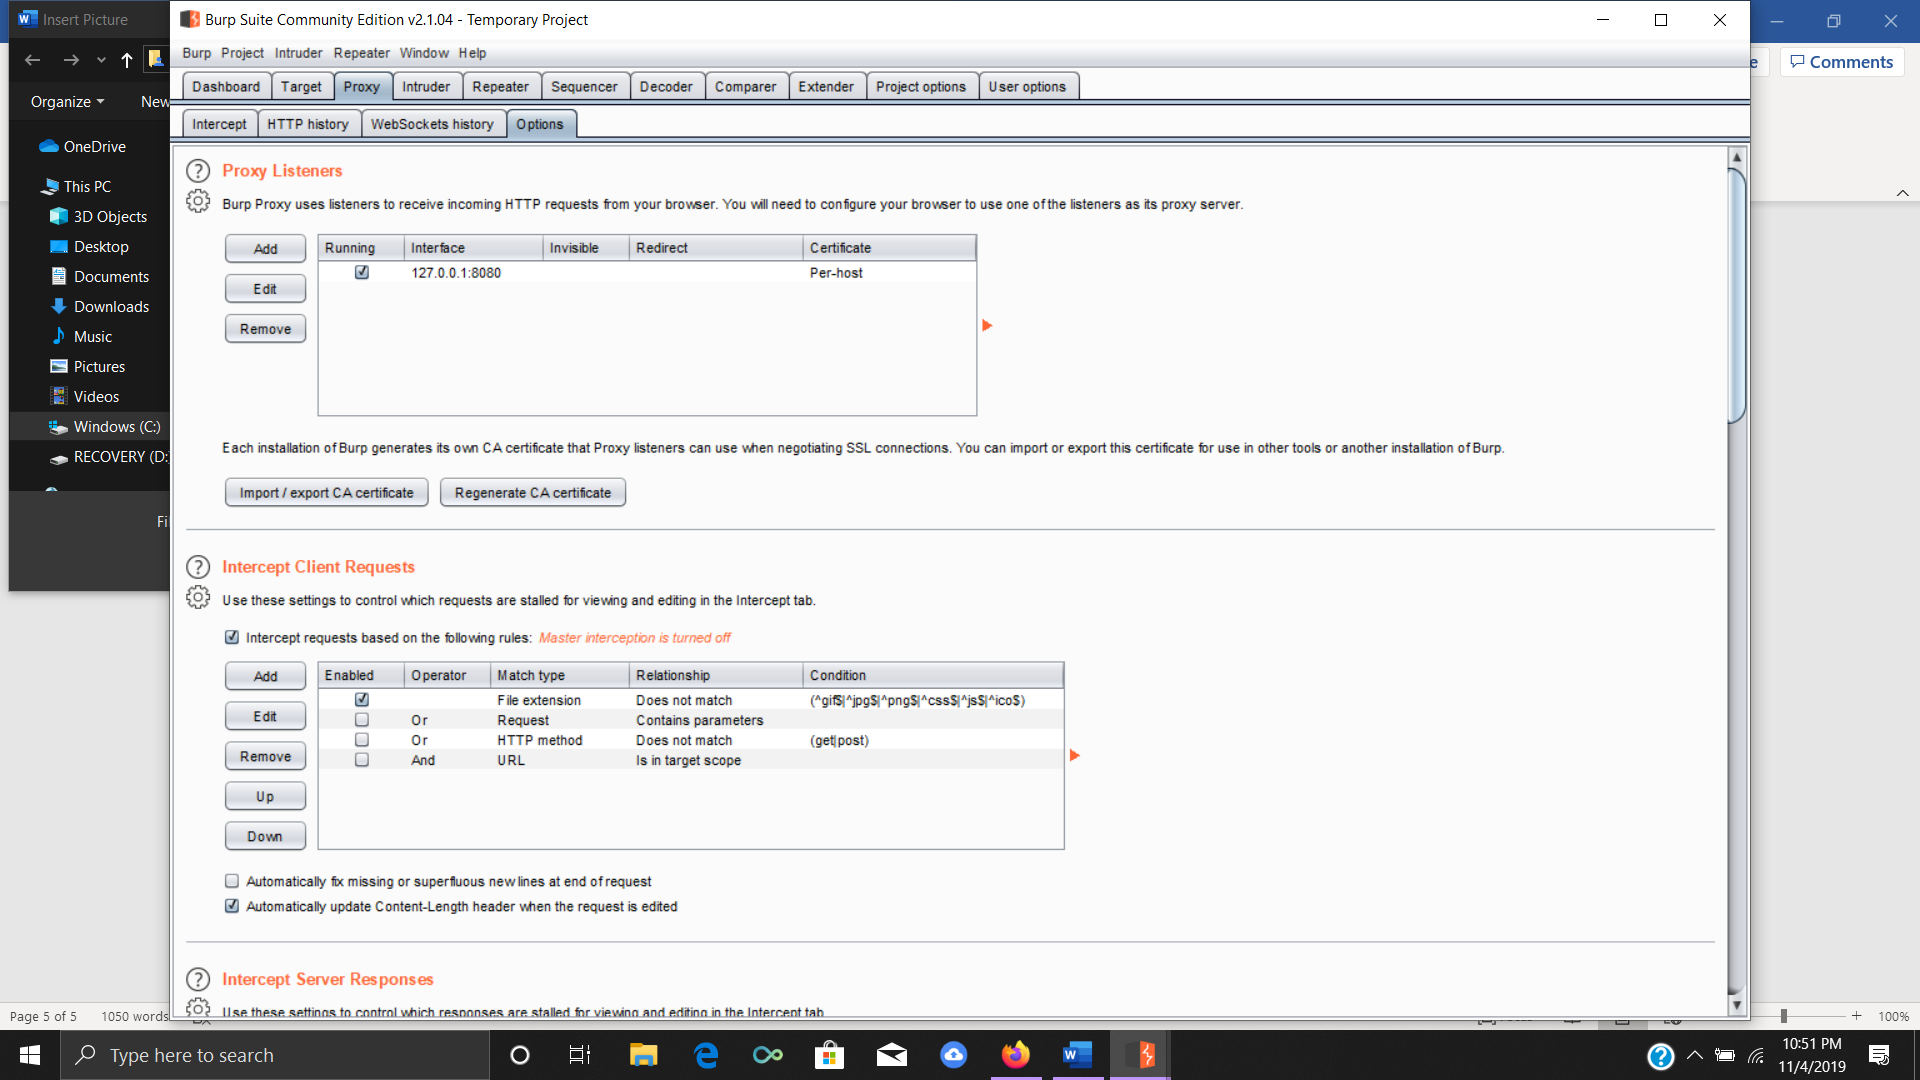
Under the same Proxy tab, we now want to click on the Options tab.
You will see the section labeled Proxy Listeners.
By default, Burp already has the proxy listening on 127.0.0.1 port 8080. If for some reason this is blank, or another address is being used you need to change this to the above address and port.
The address 127.0.0.1 is a loopback address which just means that this is the IP of your local machine i.e. your computer!
Why do we want to use our own machine’s address? Essentially, when you start up your browser it is software that is designed to connect to a remote host or machine. It does this by accessing an IP address. When using a proxy like Burp, our goal is to trick our browser to send all the incoming traffic back to our computer where our software Burp is listening; which is why we give it a port in this case 8080.
We configure our browser to use a proxy and send the traffic back to our machine. Burp listens on port 8080 for the traffic that is being sent to the loopback address. I recommend reading more on the loopback address by simply googling it. For now, just make sure Burp is configured to use the localhost address of 127.0.0.1, the loopback address. (See screenshot below)
Step #4 – Proxy configuration in Firefox
Now that we have ensured that Burp is configured correctly and the interceptor is off, we are going to configure our browser so that it sends our traffic to the loopback address as well.
I recommend using Firefox as the browser of choice for Burp.
There are two ways we can configure the browser to use a proxy. The first is by going into the options and selecting networking and setting it to use 127.0.0.1.
The second is to use an add-on or extension for Firefox. We will use the second option with an extension called FoxyProxy. This extension is free for download.
Once you have the extension and have added it to Firefox, you now have to set up an option.
You do this by simply going to the options within FoxyProxy. If you are in the right place you will see at the top of the page FoxyProxy Options.
Click on add. This will open another window asking for a name, proxy type, proxy IP, and port. You guessed it! This is where we enter the exact same address and port discussed in step 3:
- Proxy IP address: 127.0.0.1
- Port: 8080
After entering the correct information, click save. (See screenshot below)

Step #5 – Configuring certificates
Once you have completed the previous step, make sure you have the saved option turned on.
You will see the FoxyProxy icon in your browser all the way to the right of the screen. You can click on this to either use Firefox settings or your saved option you configured to use the loopback address, making it easy to switch back and forth. So, be sure to turn this off when doing regular browsing, and turn it on when using Burp.
Now going back to Burp we are going to go to the same tab as before.
We need to fix or make sure that when we are capturing the traffic sent between our browser and the site we are testing; we don’t get security warnings from our browser.
We do this by exporting a certificate from Burp and importing it to Firefox.
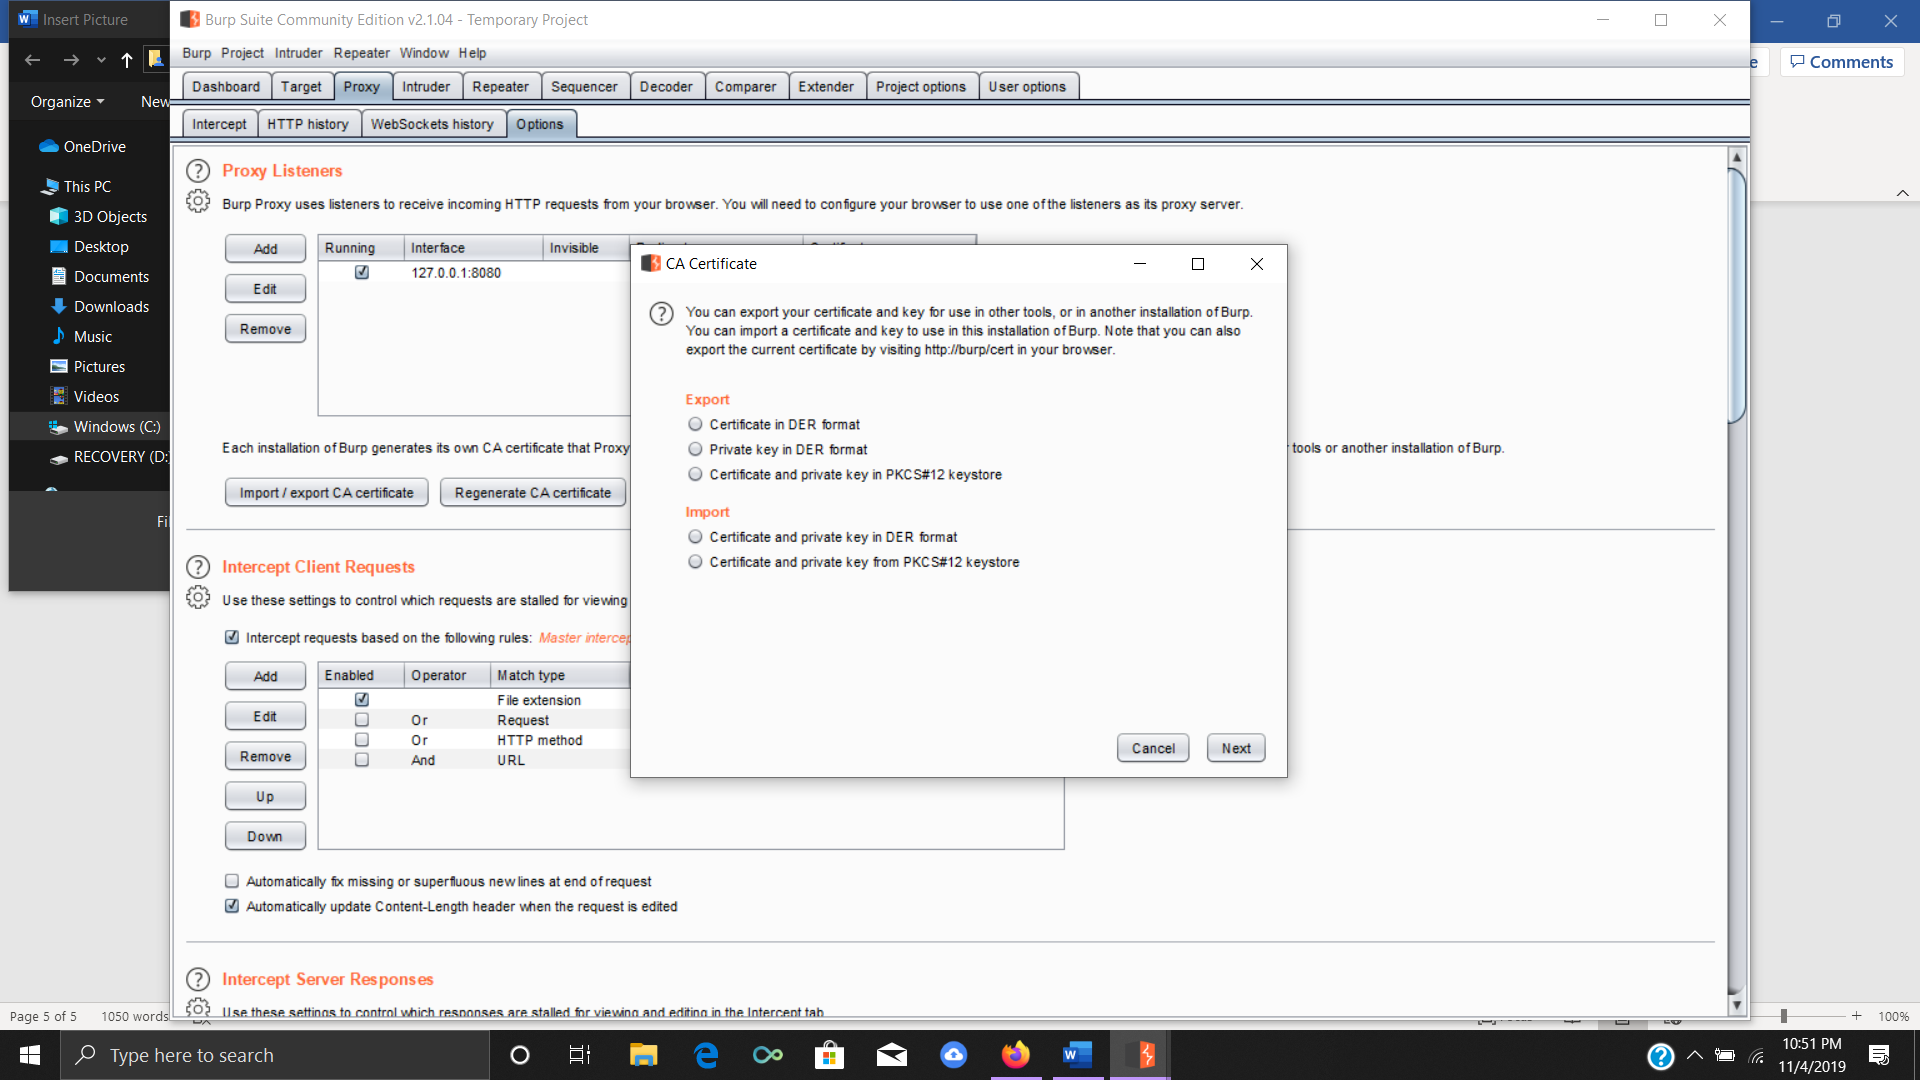
Beneath Proxy Listeners, we see Import/export CA certificate. Click on this and then under the export tab check Certificate in DER Format.
Save this to your computer.
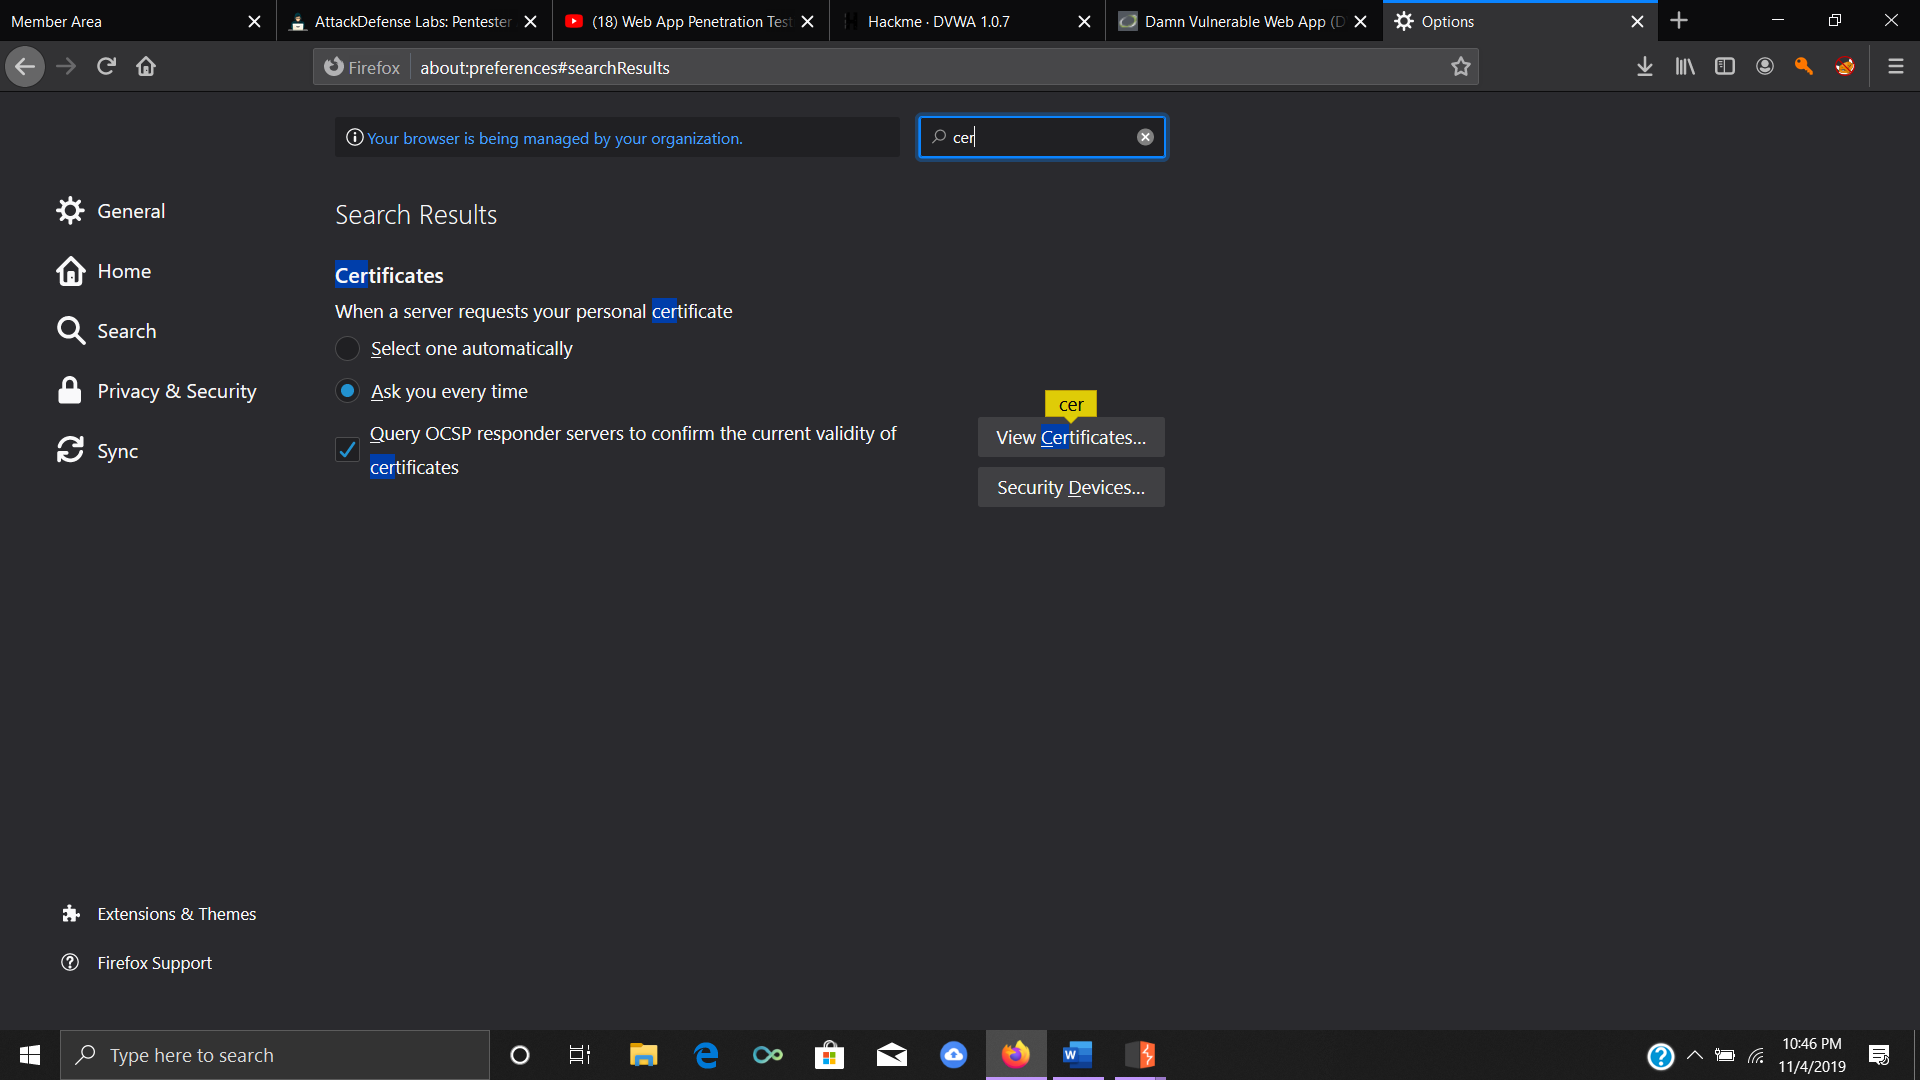
Now go to Firefox and click the three horizontal lines in the very right top of your browser. Click on options.
In the search bar at the top type in certificates.
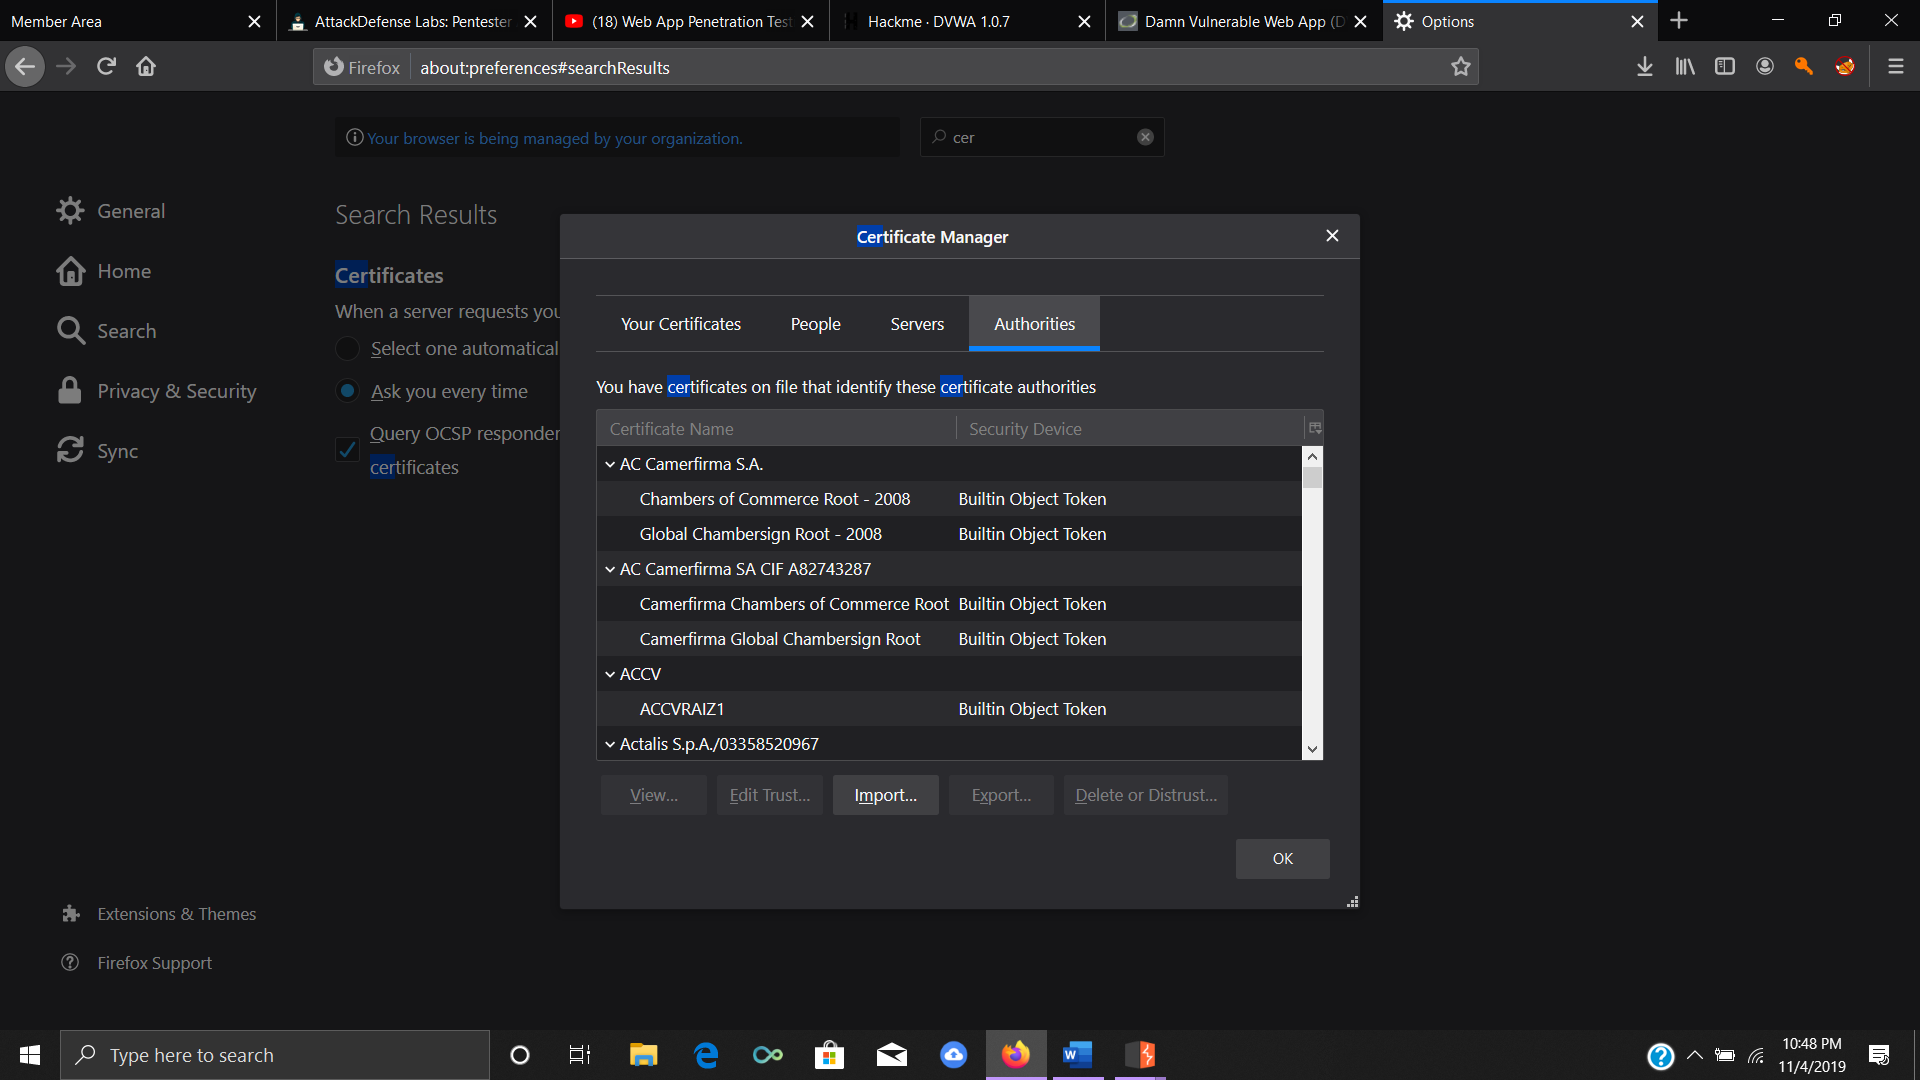
Now, click on view certificates. Make sure you are on the Authorities tab.
Then, click on import. You are now going to import the saved exported certificate from Burp. (See screenshots below)
Step #6 – Using Burp Suite with vulnerable environments
We are now at the most difficult part of this very basic tutorial! We cannot modify traffic to websites we don’t have permission to test. But we can’t start testing sites until we have experience. So, what do we do?
Well, thankfully, there are website apps that are set up with intentional vulnerabilities to practice on. Choosing how and what we set up is the difficult part. But I have found the simplest way of doing this and it is free!
The options range from paying a site that has different apps running off their servers that you can use, to setting up local apps like the OWASP Juice Shop in a docker container in Kali.
You, of course, can also download and configure these vulnerable web apps in virtual machines as well.
The option we are going to use is a site that offers vulnerable web apps preconfigured running in a sandbox. This means it’s basically a VM or container that is created in its own environment each time you choose to run it.
Go to: https://hack.me/101047/dvwa-107.html in order to access the Damn Vulnerable Web Application (DVWA).
If, instead, you’d like to set it up on Kali with Docker, here are instructions on how to do that.
This site allows you to sign up for free or even try it before signing up. Once you’re on the page you are going to click start. They will have you sign up or try after ensuring you are real! (See screenshots below)

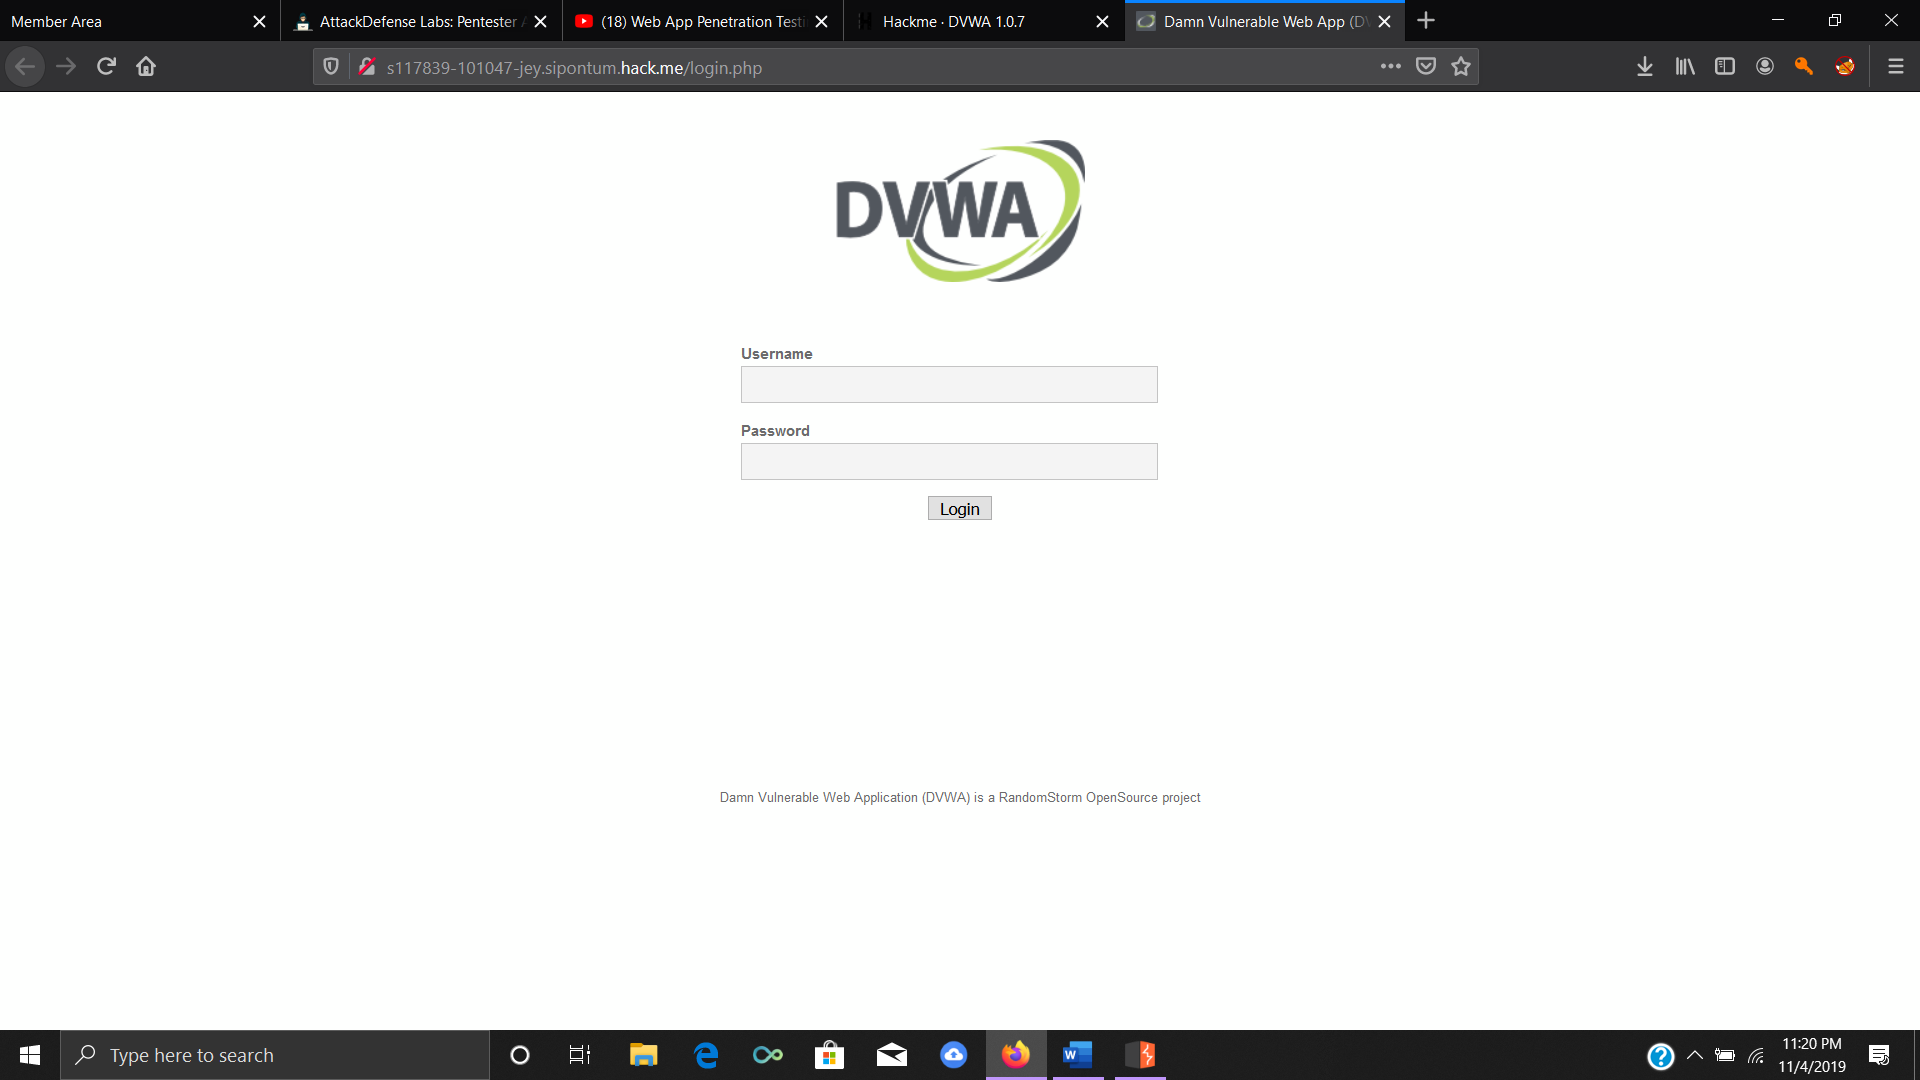
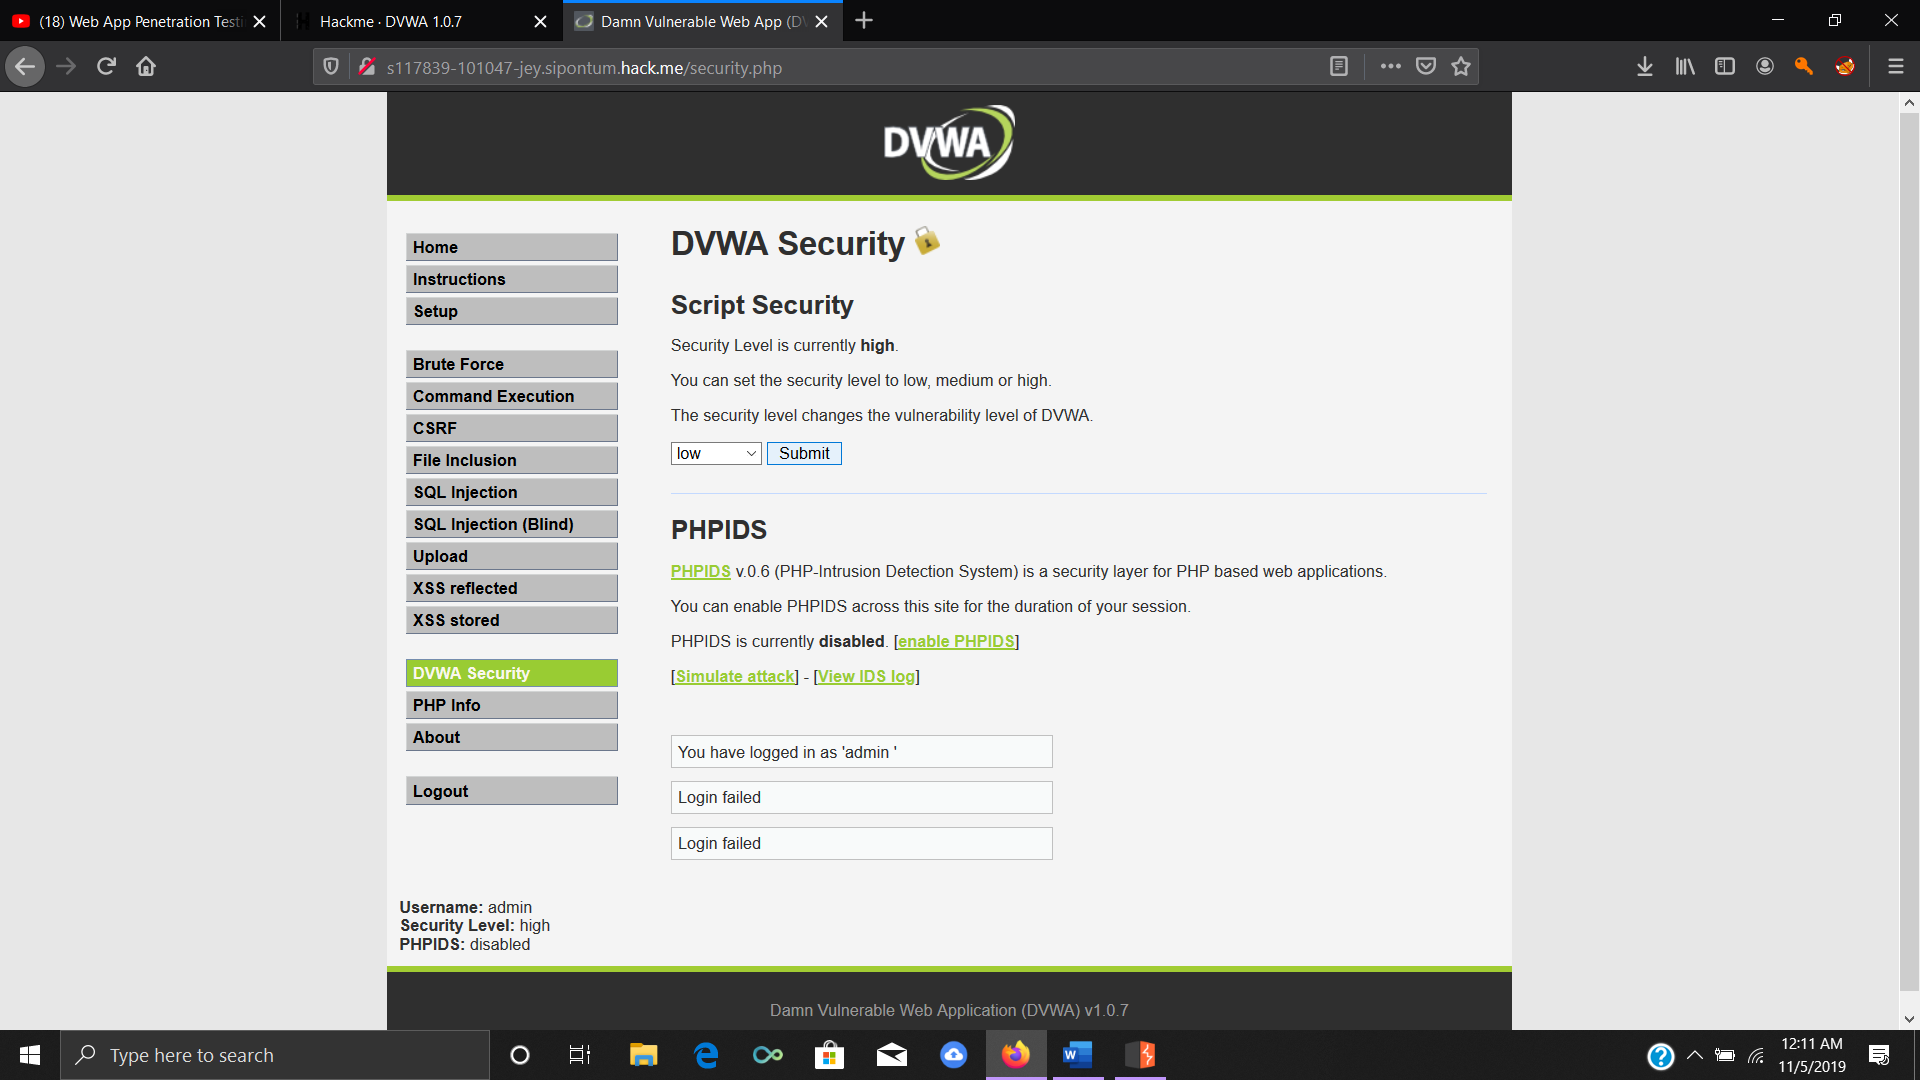
Login using admin and password. Then click on DVWA security on the left of page and set the security level to low, since the default may have it set to high.
Step #7 – Using target scopes
Now we have a website that we can use to start practicing legally with Burp.
This DVWA has been set up with intentional vulnerabilities that we can exploit through various attacks using Burp.
Let’s go back to Burp. Click on Target🡪Scope. We are now going to add the website address of our DVWA by clicking on Add 🡪
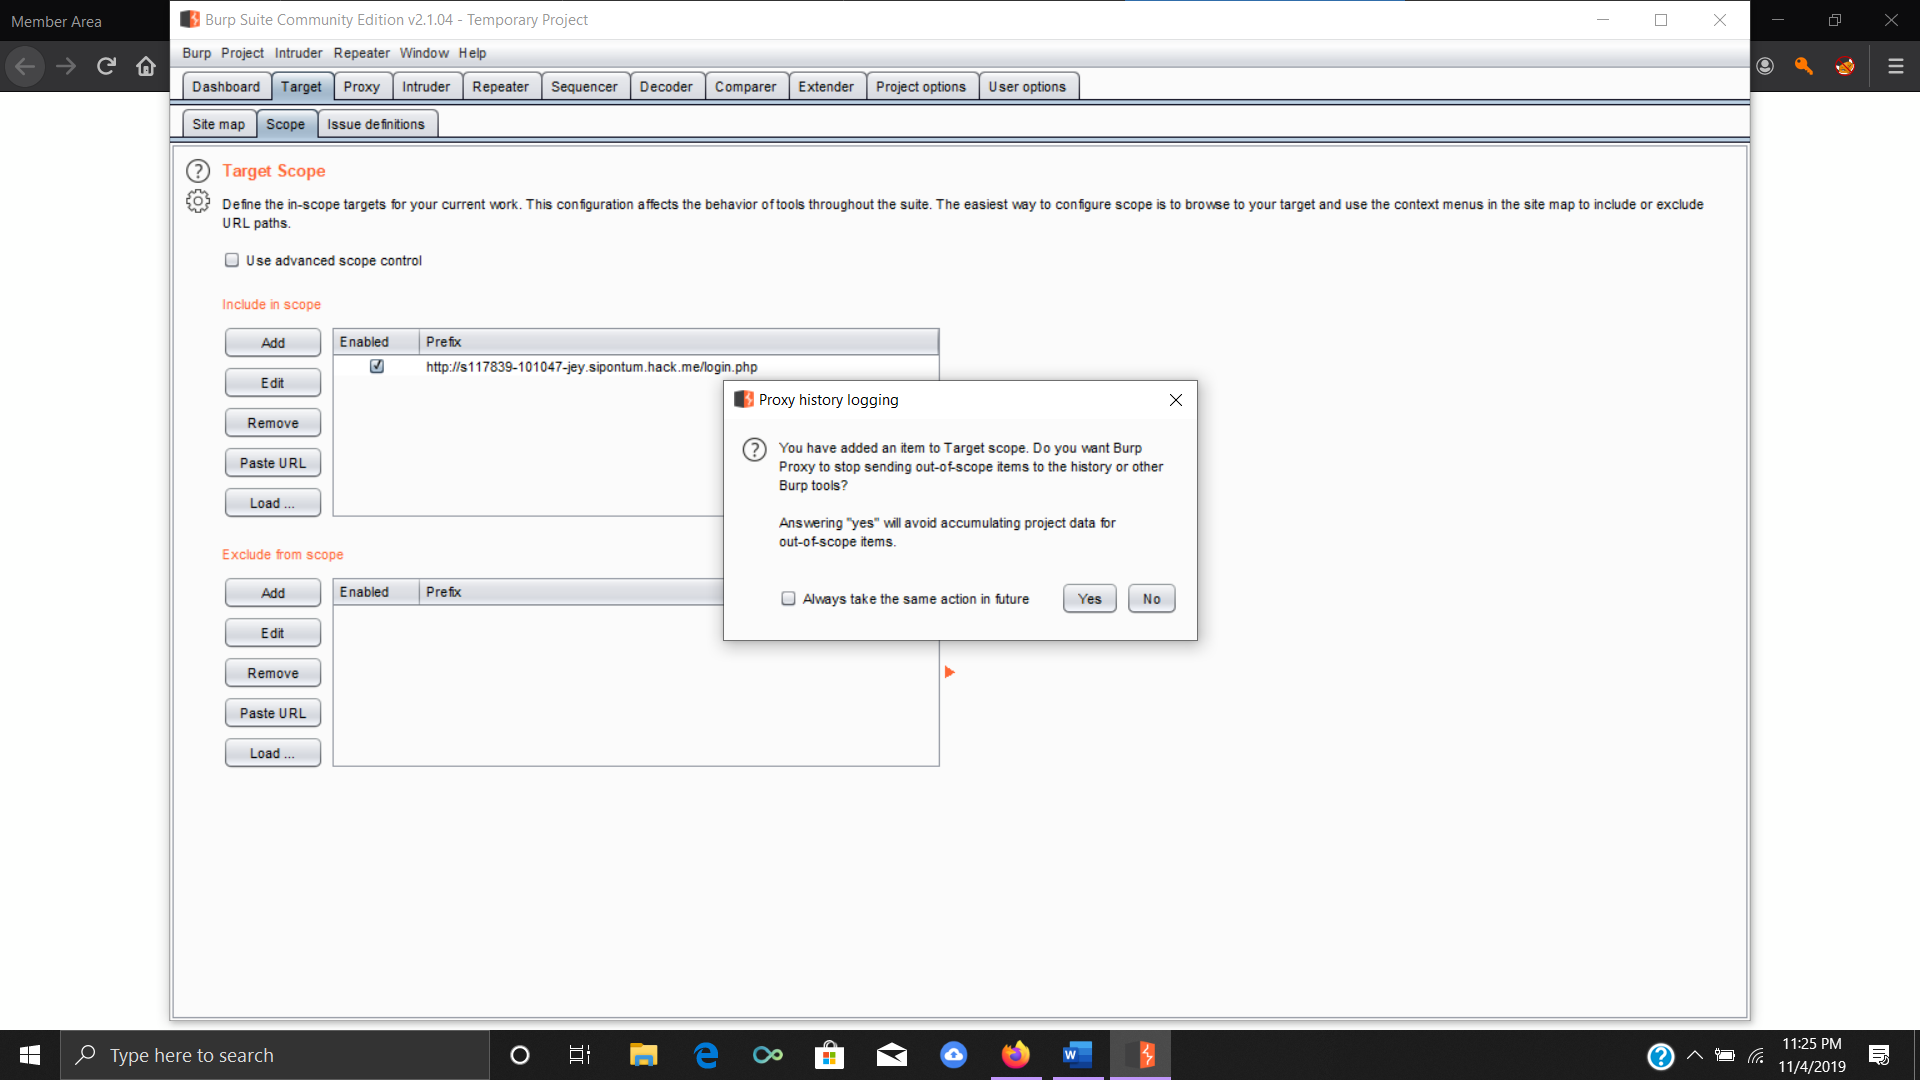
We then click on yes to just capture the traffic from our DVWA. This makes sure we don’t collect traffic from out of scope items and ensures we don’t have tons of traffic to sift through!
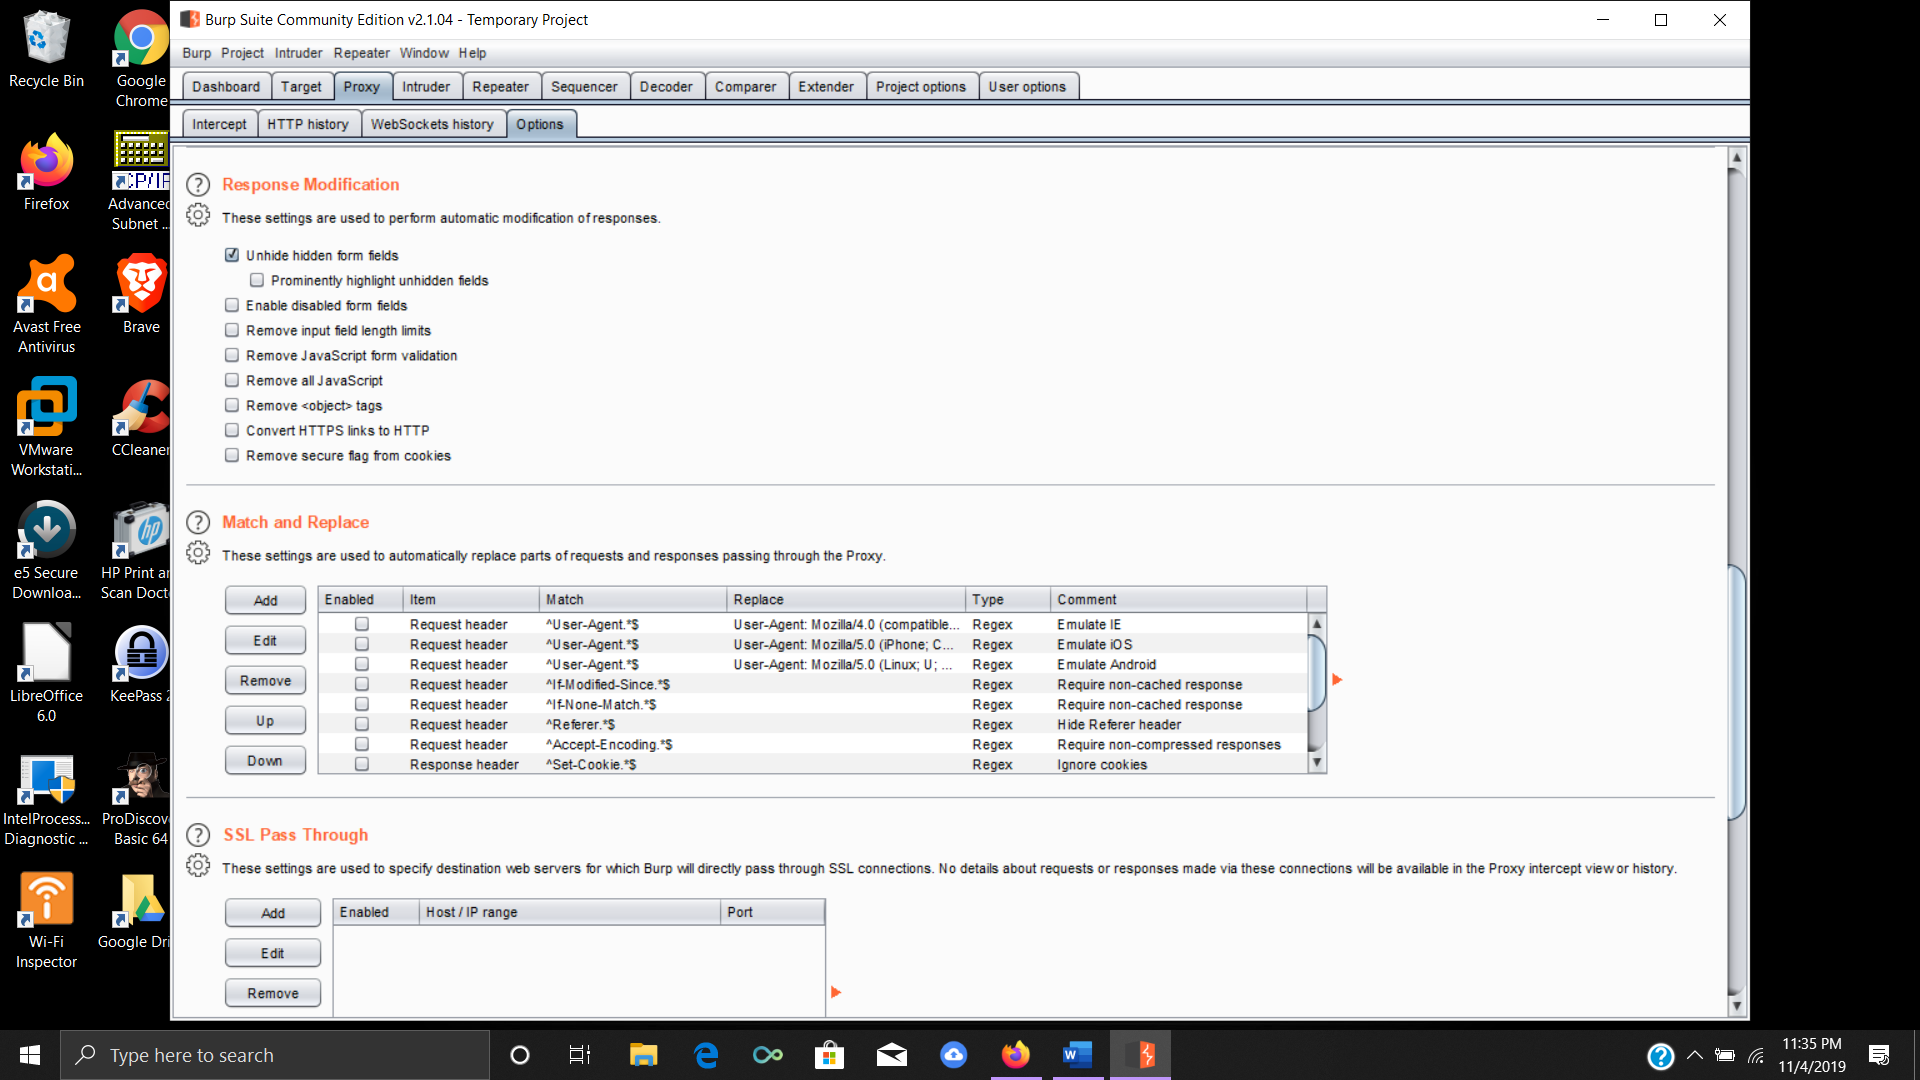
There’s one more option to click before we start capturing traffic. Go to proxy🡪options, scroll down to Response Modifications and check unhide hidden form fields.
Step #8 – Collecting, analyzing, and attacking
We are now ready to start collecting some traffic to analyze and potentially attack!
Make sure that you have FoxyProxy and the option we added turn on.
We now go to the Proxy🡪Intercept tab.
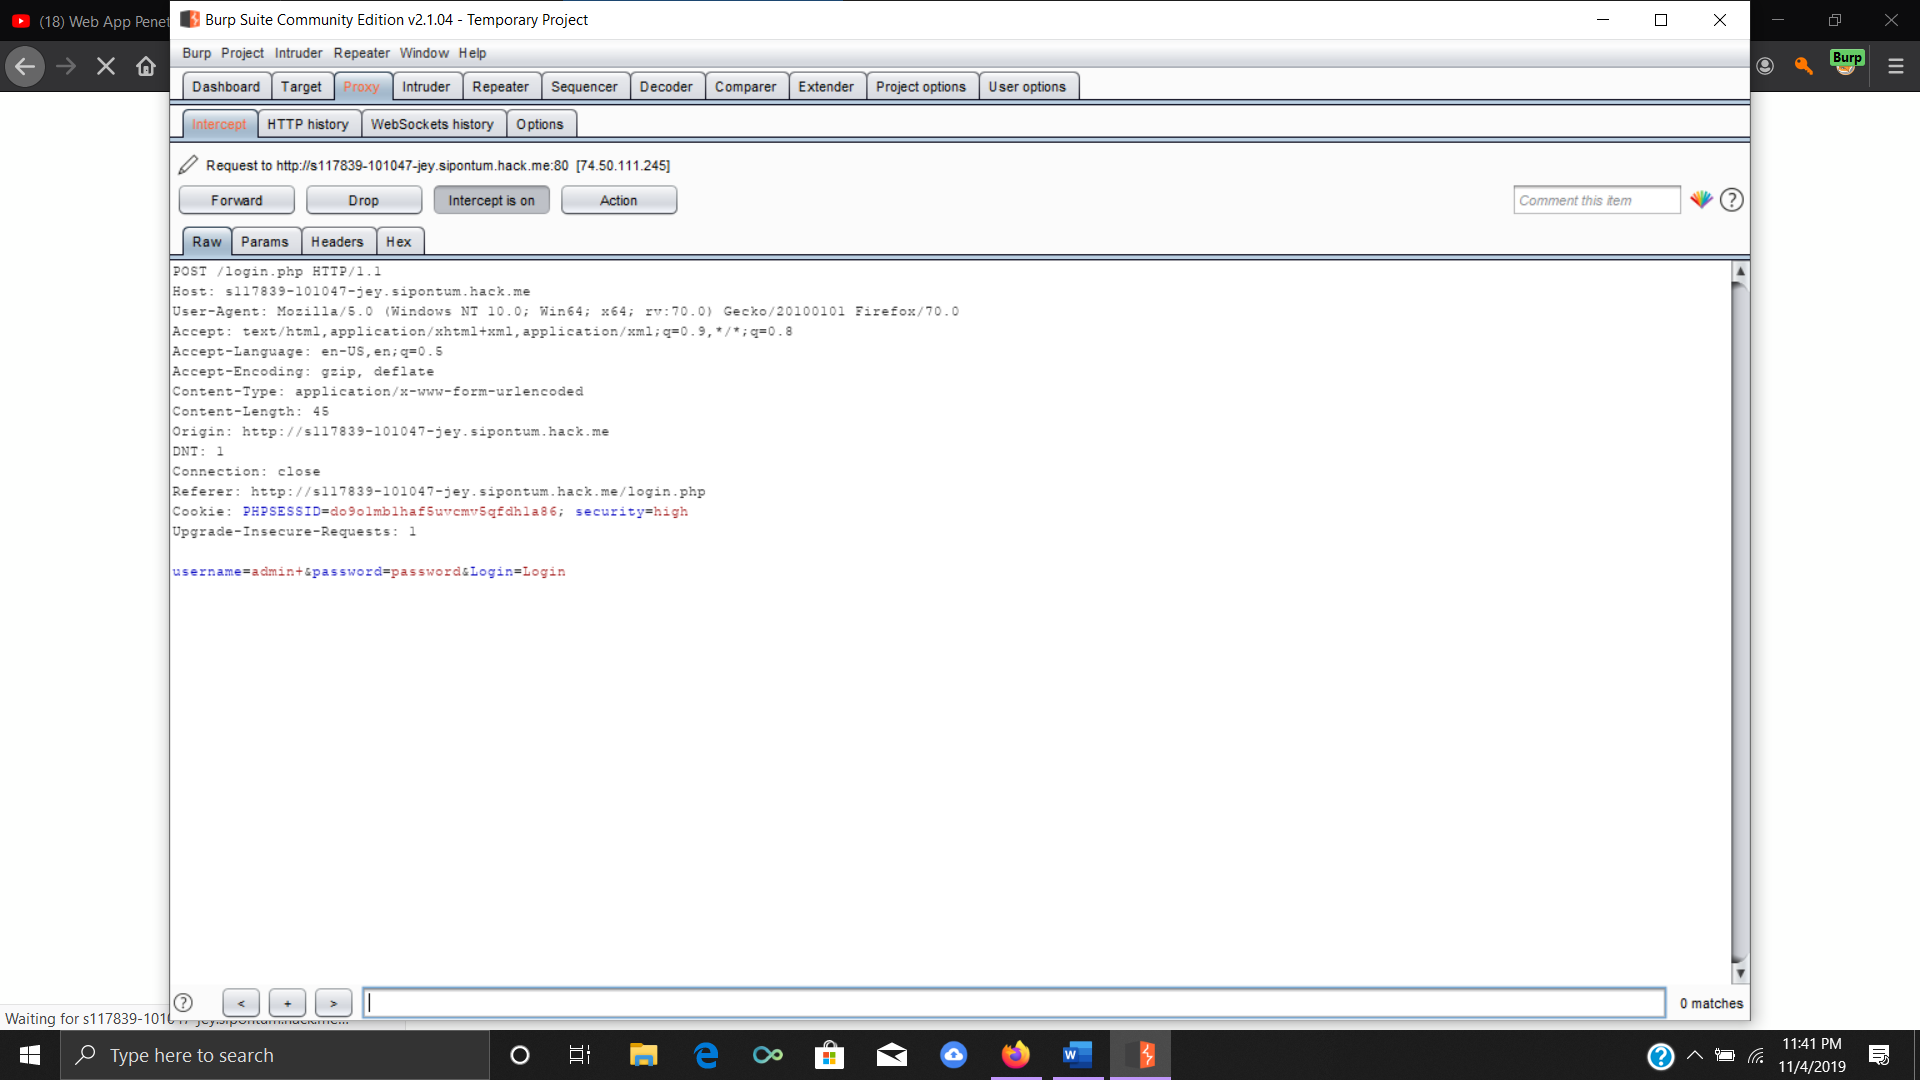
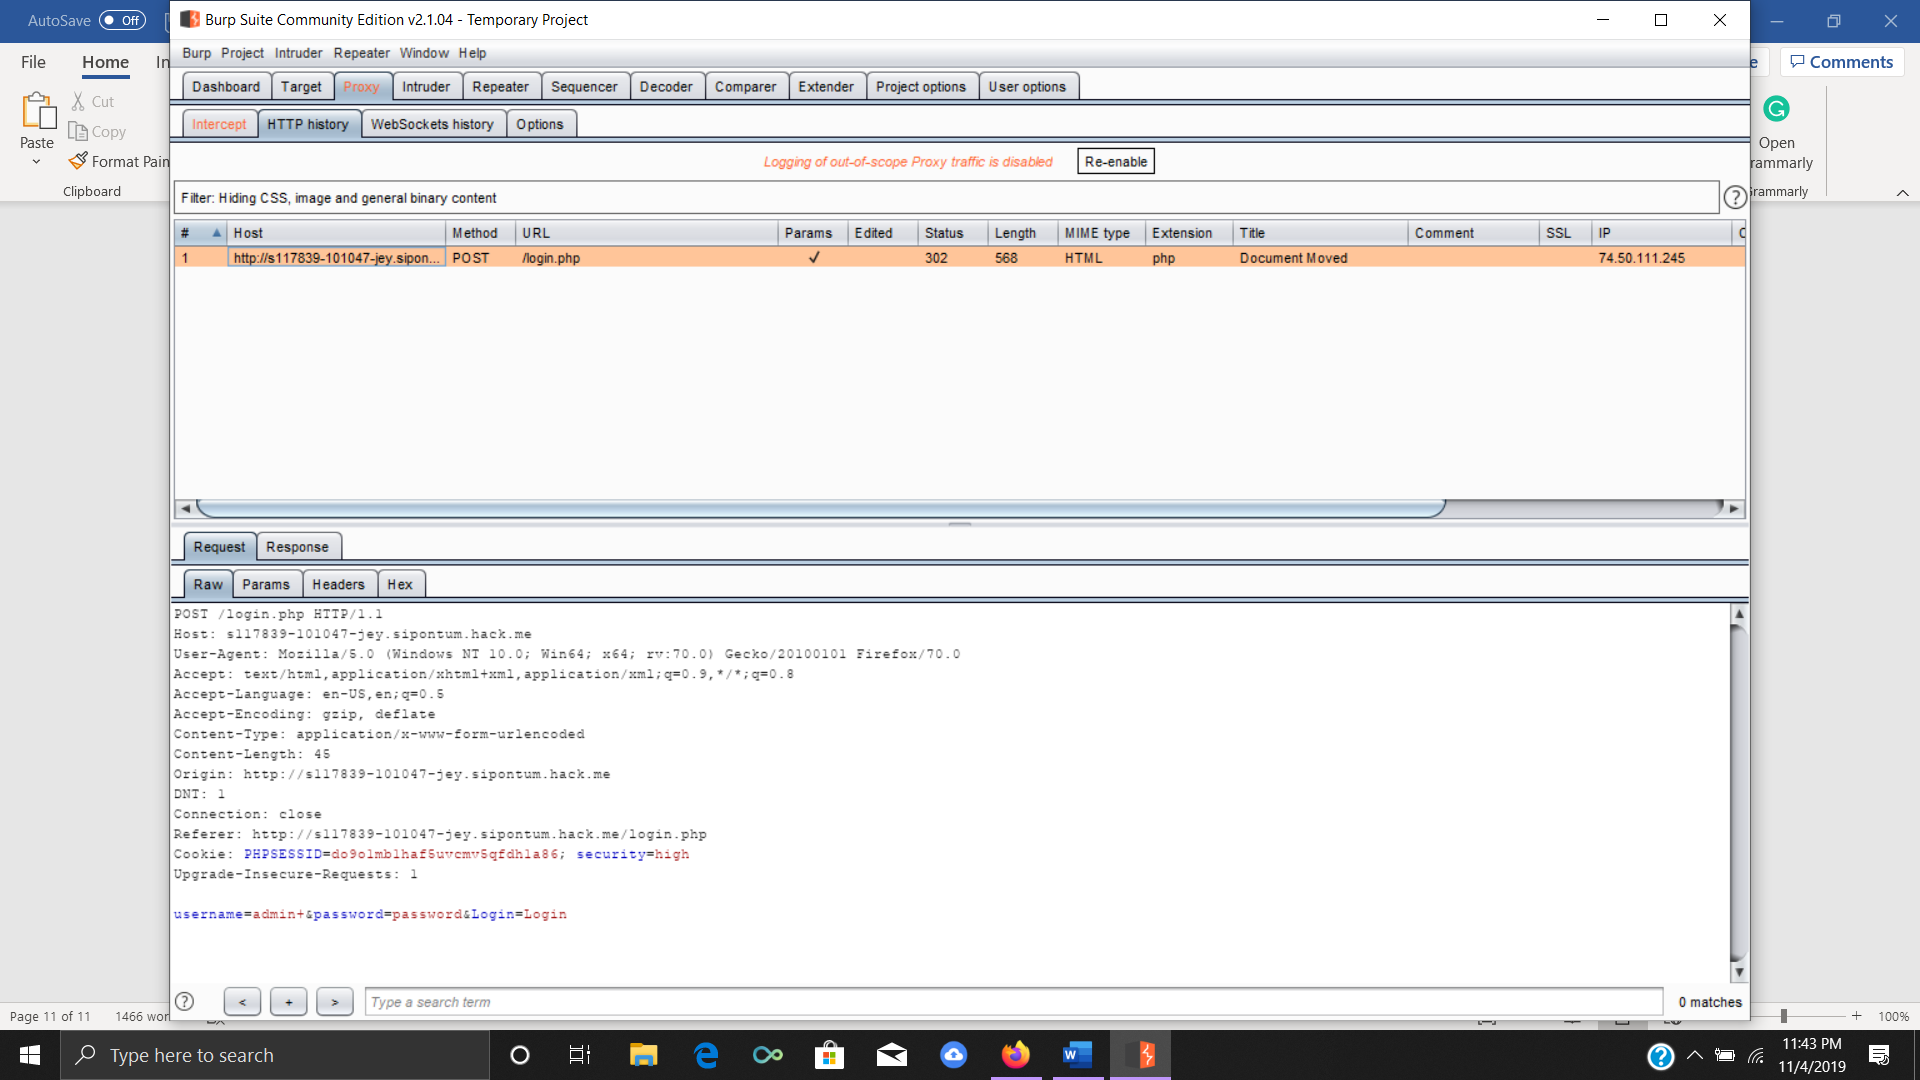
Turn on the interceptor and refresh your browser. Now you are going to type in the username and password and be able to see HTTP GET and POST requests using Burp and see those values and headers.
After typing in username and password, go back to Burp, and in the intercept tab, you are going to click on forward which forwards the requested traffic through the proxy.
You will notice after logging on that the website hangs without immediately logging in. This is because Burp is doing its job of capturing the traffic in the middle for analysis before you forward the request on. After you click forward a few times you will see in plain text the values you just entered in the login page for your DVWA.
Now we can see this information in a few other places.
First I want you to go to the tab right next to the intercept🡪HTTP history. There you will see the same values you entered and can choose to see the response as well.
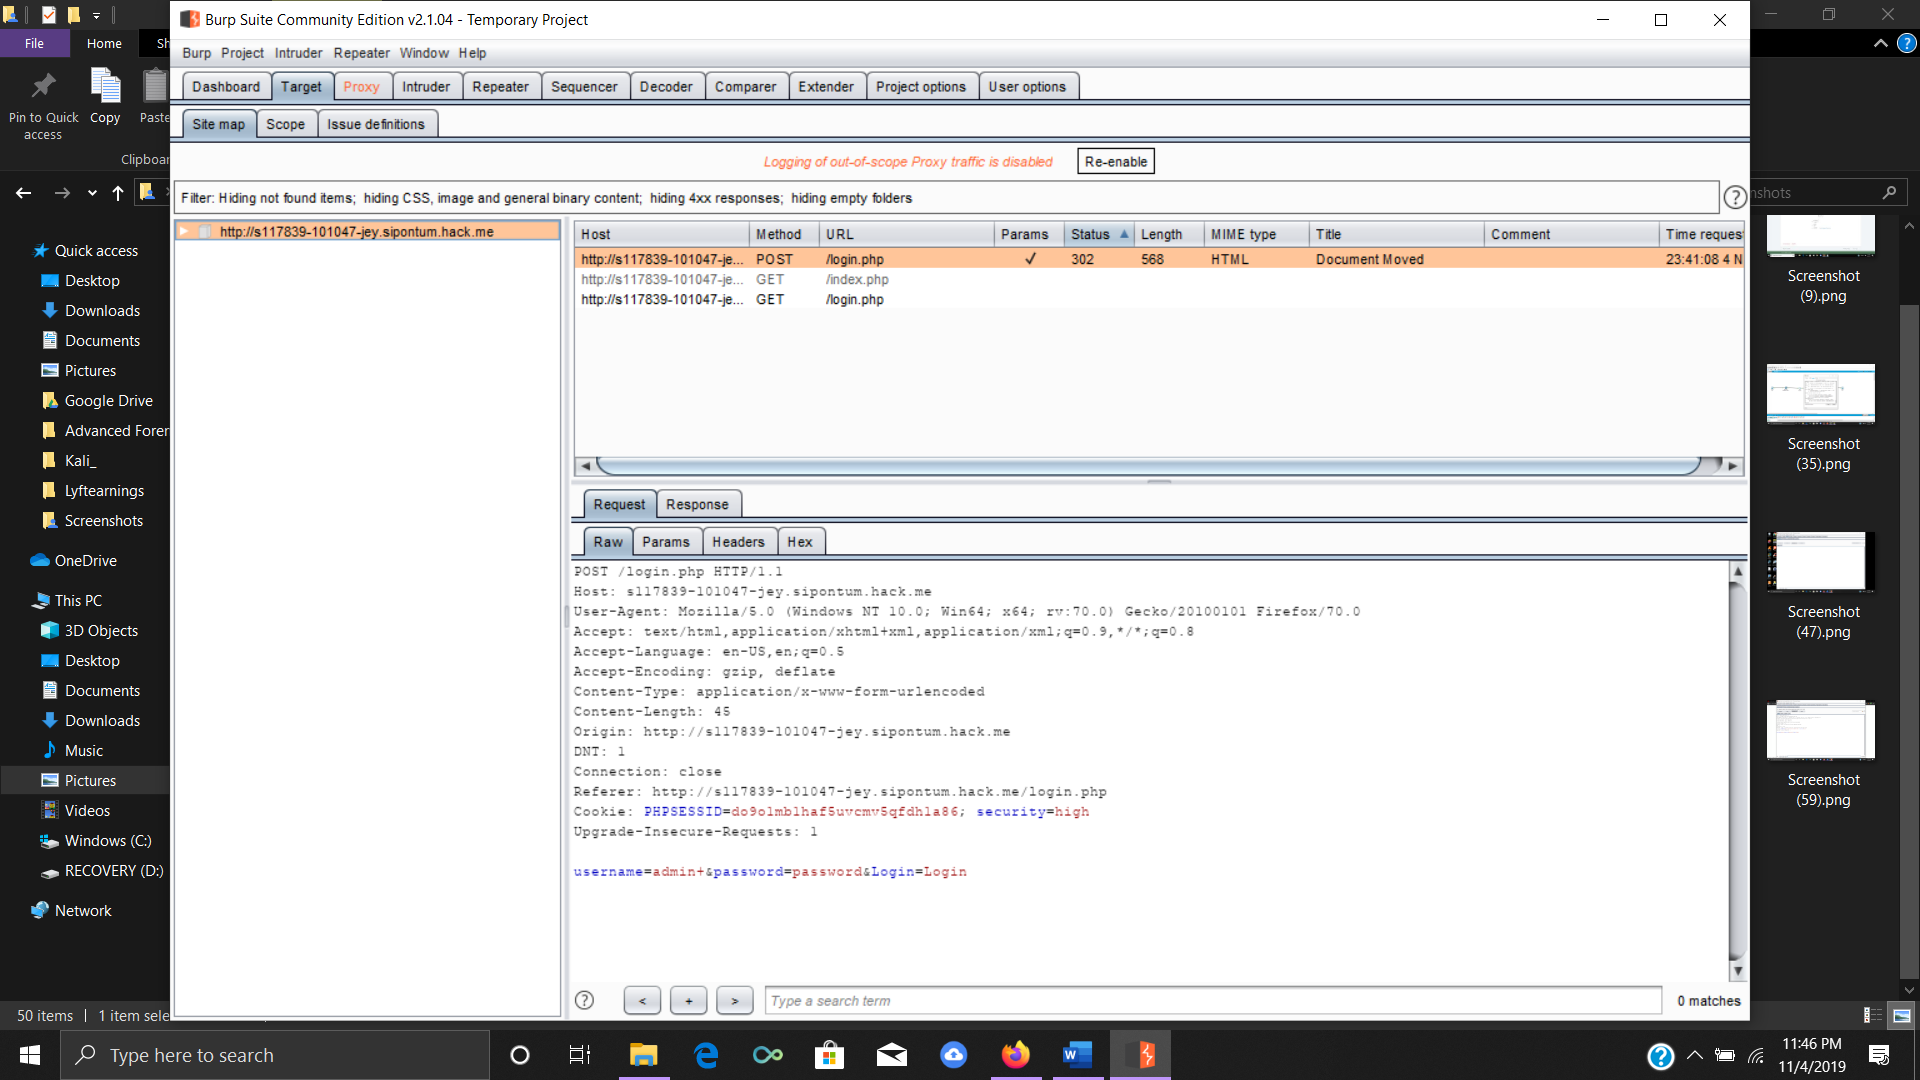
Now we are going to change the main tab. Go to Target🡪Site Map.
Here you will see the target scope which is the address of the DVWA. Next to that, you will see multiple requests that have been made including the host.
On the bottom right of the application, you can view the same values you entered on the login page and you can view the response from the back-end. Burp gives you the option of viewing this information in raw format, params, headers, and hex. (See screenshot below)
Step #9 – Using the intruder for automated attacks
We are now going to explore one more tab. For this tutorial, we have just scratched the surface of what Burp can do.
If you’d like to explore some of the vulnerabilities in the DVWA and carry out attacks, check out the free course Introduction to Application Security that includes brute-force, SQL injection, and XSS attacks.
But, let’s explore the intruder tab.
In this example, I am going to show a basic concept of why we would want to intercept a GET request.
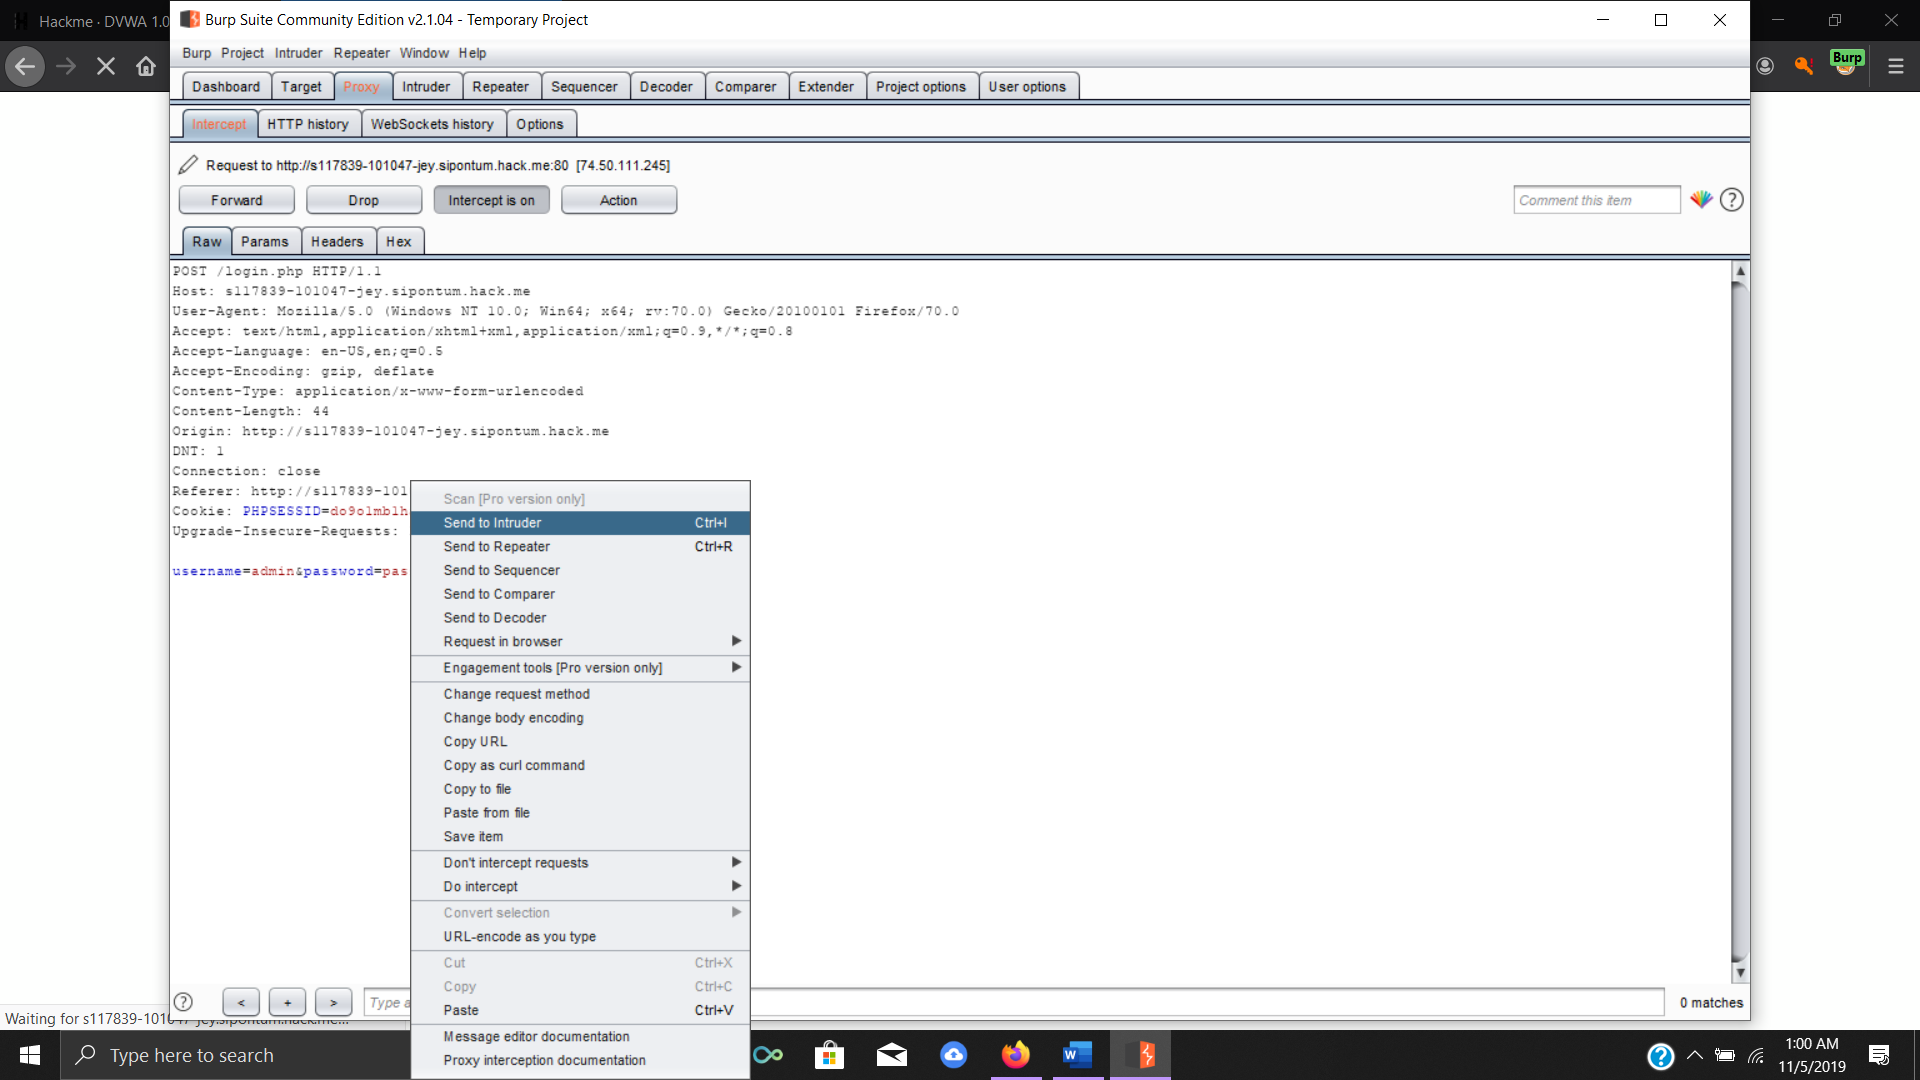
Go to the proxy🡪intercept tab. Then login to the DVWA with username: admin; password: password. Forward the traffic until you see those same values.
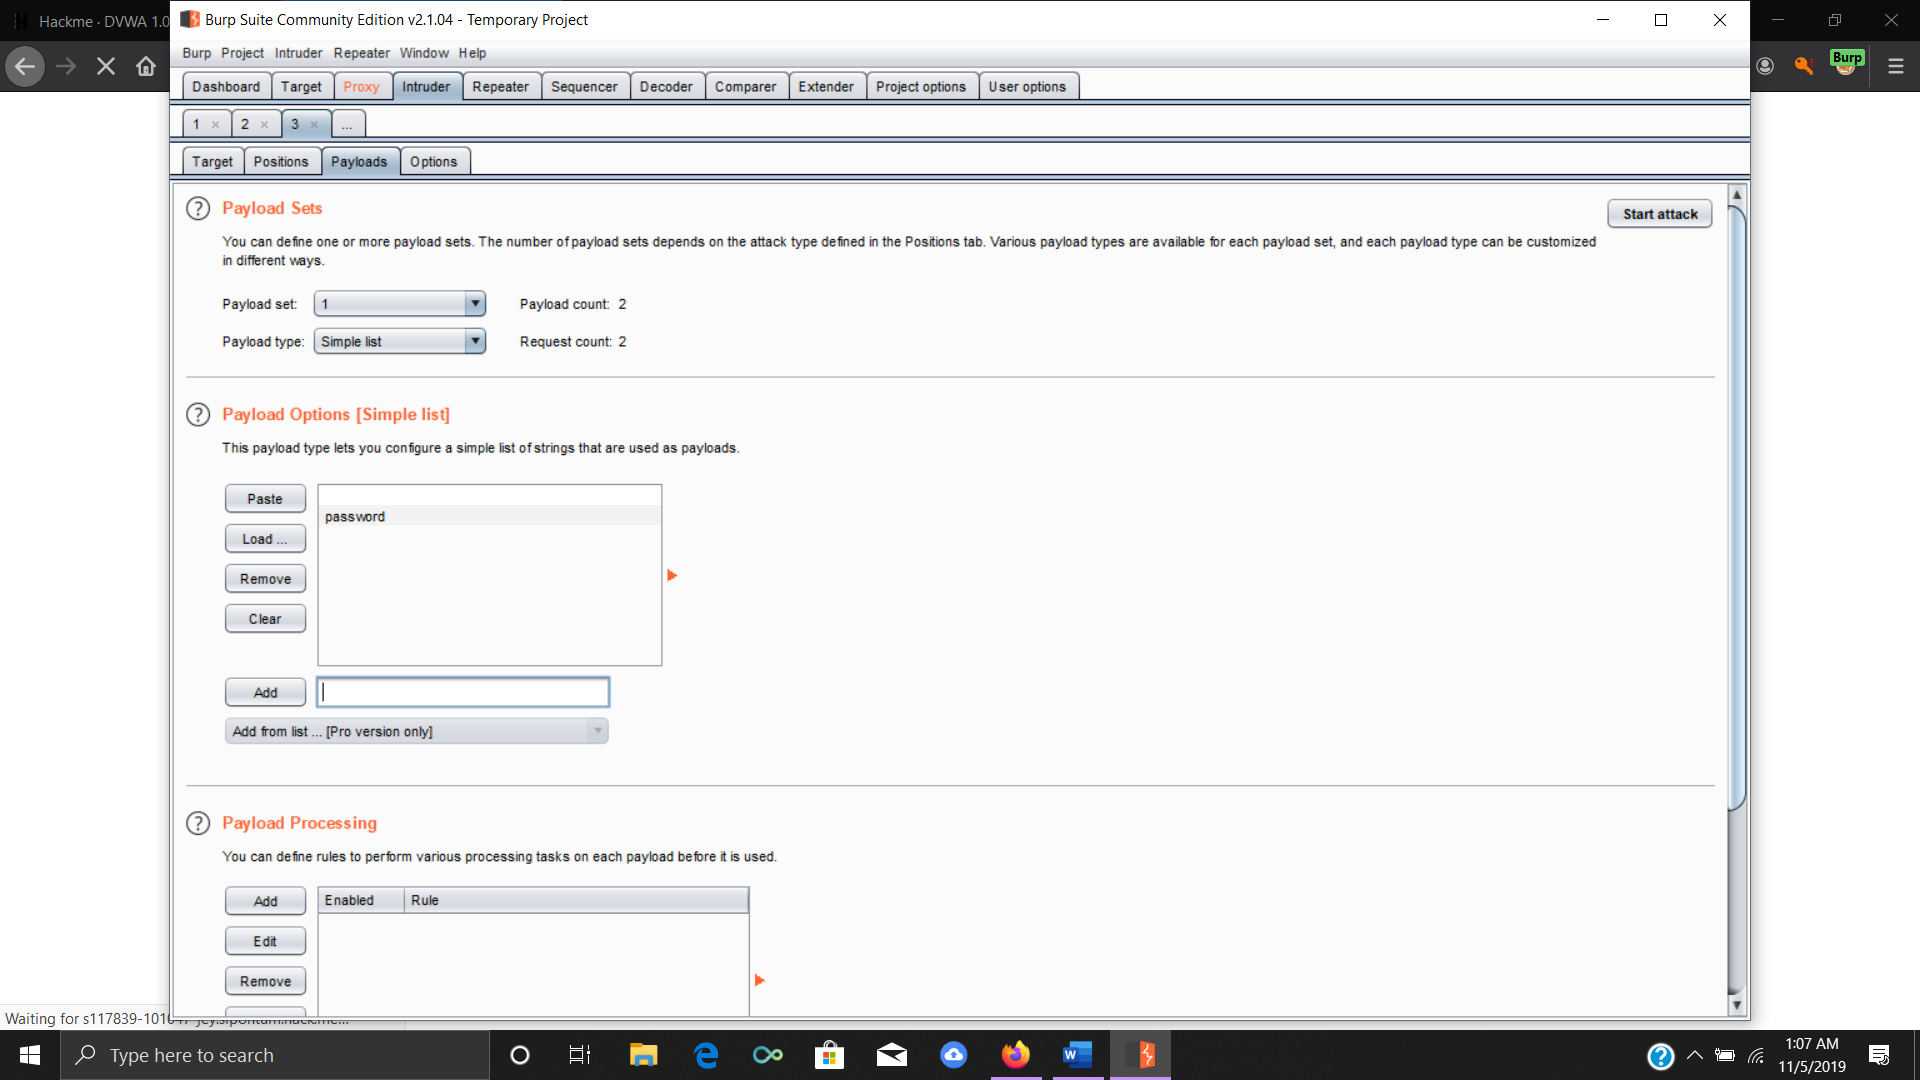
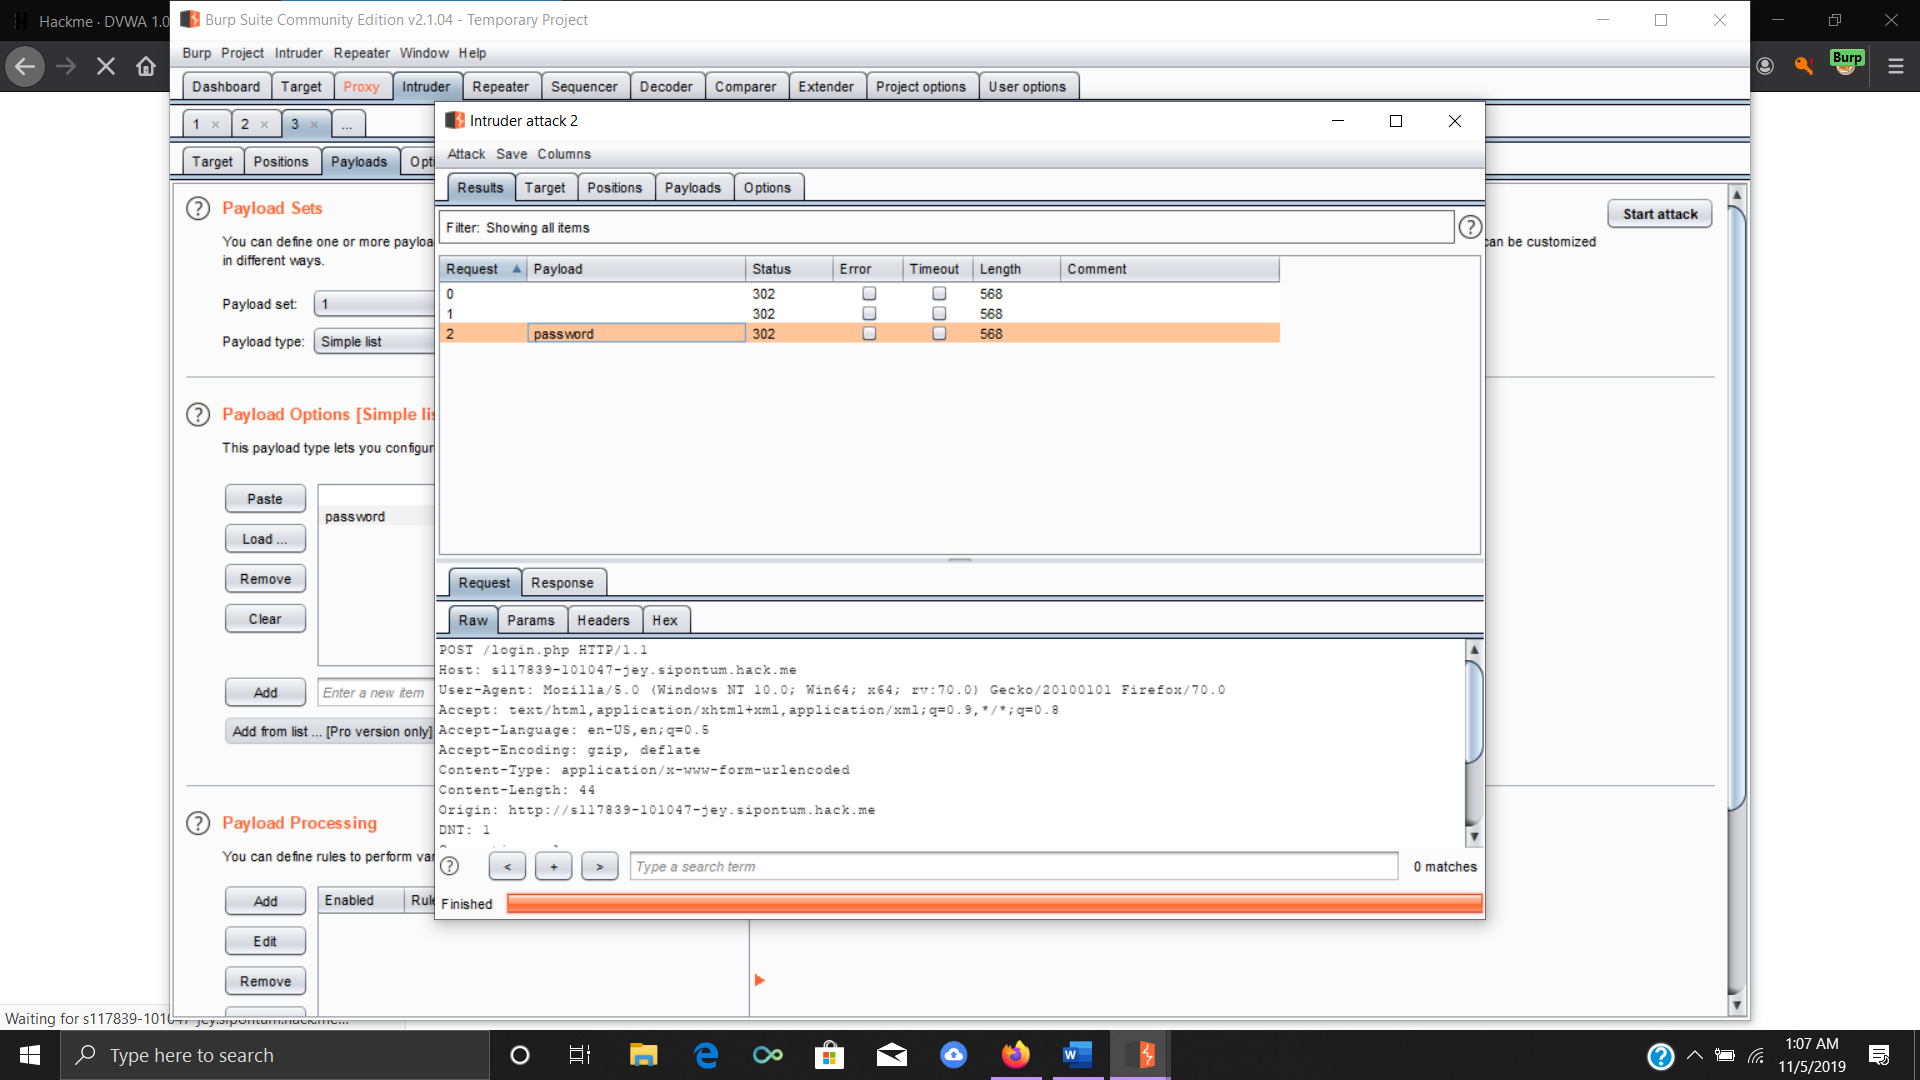
You are then going to right-click on the username and password values and click send to intruder. Then click on the intruder tab and go to the positions tab. Click clear.
Highlight the password value and click add. Then go to the payloads tab and under this tab you will see payload, select simple list.
Click add and type password in adding that to the simple list box. You then click on start attack.
You will have another window open which will show results. This is a very simplified example of what stopping and inspecting a POST and GET HTTP request can be used for. In the event you didn’t know the password you could modify the request to run the intruder payload giving it a list of passwords to try as you forward that traffic to the server or website.
As I mentioned at the start this tutorial was just meant to get you started and familiarize yourself with some of the different functions of Burp Suite. (See screenshots below)

Conclusion and next steps
Burp Suite is a powerful tool used by many for application security testing since it can help them find vulnerabilities, and perform penetration testing.
While we just got started in this tutorial, there’s a lot you can do with Burp Suite and I highly recommend you continue to explore Burp with vulnerable sites like the DVWA, or the OWASP Juice Shop.
If you’d like to learn more about Application Security, Cybr has a free Introduction to Application Security (AppSec) course as well as an ebook version of the course.


Fantastic post, Eric! Well written and easy to follow tutorial.