ARP Poisoning with Ettercap in 6 steps with Windows 7
This tutorial explains how to conduct ARP poisoning with Ettercap in 6 simple steps in order to sniff the traffic from an unsuspecting victim in your LAN (local-area network).
Ettercap is a suite of tools for man-in-the-middle attacks. It lets you sniff live connections, filter content on the fly, and it includes many features for network and host analysis. While it now has a successor, Bettercap, Ettercap is still a very powerful tool used by many. It is an important tool to be familiar with for anyone interested in network security.
Note that this tutorial assumes you have already set up a virtual environment where 2 VMs can communicate with each other. If you don’t have that yet, refer to this documentation (you could also try Bridged Mode instead of Internal) or ask in our forums and we’ll be glad to help!
What is ARP poisoning?
ARP, or Address Resolution Protocol, is a communication protocol used for discovering the MAC address given an IP address of a system. So in short, ARP helps resolve an IP address to its corresponding MAC address.
ARP poisoning, then, is a man-in-the-middle (MITM) attack used to poison the ARP cache of your victim’s computer.
What this simply means is that you will be sitting in the middle of the traffic flowing from the gateway and your victim’s machine.
We do this by directing the traffic from the victim’s IP back to our MAC address (attacking machine) instead of the victim’s own MAC address. If done correctly, the gateway will think that our MAC address corresponds to the IP address of the victim’s computer, which will let us receive messages intended for our victim.
Below are each steps needed to complete this with screenshots of the ARP poisoning taking place utilizing Ettercap.
Step #1 – Choosing an Operating System
It is your choice on what OS you choose to use to carry out this attack. However, for the purpose of this tutorial it is recommended you use Kali Linux for one VM, and Windows 7 for the other.

Step #2 – Firewall and Network Sharing settings
Once you have both VMs up and running make sure that on the Windows 7 machine, the firewall is turned off and network sharing is turned on.
Note: If at the end of all the steps ARP poisoning wasn’t successful, go into the Windows 7 adapter settings and turn off IPV6. This is located in the Network and Sharing Center by right-clicking the internet symbol on the bottom right of your screen.
Step #3 – Finding IPv4 addresses and enabling Kali IP forwarding
On both machines, pull up a terminal and type ifconfig (Kali) and ipconfig (cmd Windows) to write down the IPV4 address of both machines. Also, write down the gateway address.
On the Kali machine, click on the terminal and type the following:
sysctl -w net.ipv4.ip_forward=1This ensures that your Kali machine can receive the packets that will be forwarded by the attack. (Screenshot below)

Step #4 – Enabling Unified Sniffing
Now open another terminal window and type:
ettercap -GThis brings up the graphical interface of Ettercap.
The next step is to click sniffing 🡪 unified sniffing.
Then check eth0.
If you are using a wireless card adapter click on that interface. Usually, though, you will just see eth0.
Note: Unified sniffing can be used to perform MITM attacks from a single network device, and with the target device being in the same subnet as you (typically connected to the same router).
Once you have done that you should see on the bottom window of Ettercap that unified sniffing started. If not just click on the sniffing tab on the top of the Ettercap window and click start sniffing.
Step #5 – Configuring your target
Now you are going to click on targets.
Add, for target 1, the gateway IPV4 address.
For target 2, you will add your victim’s IPV4 address. (Screenshot below)
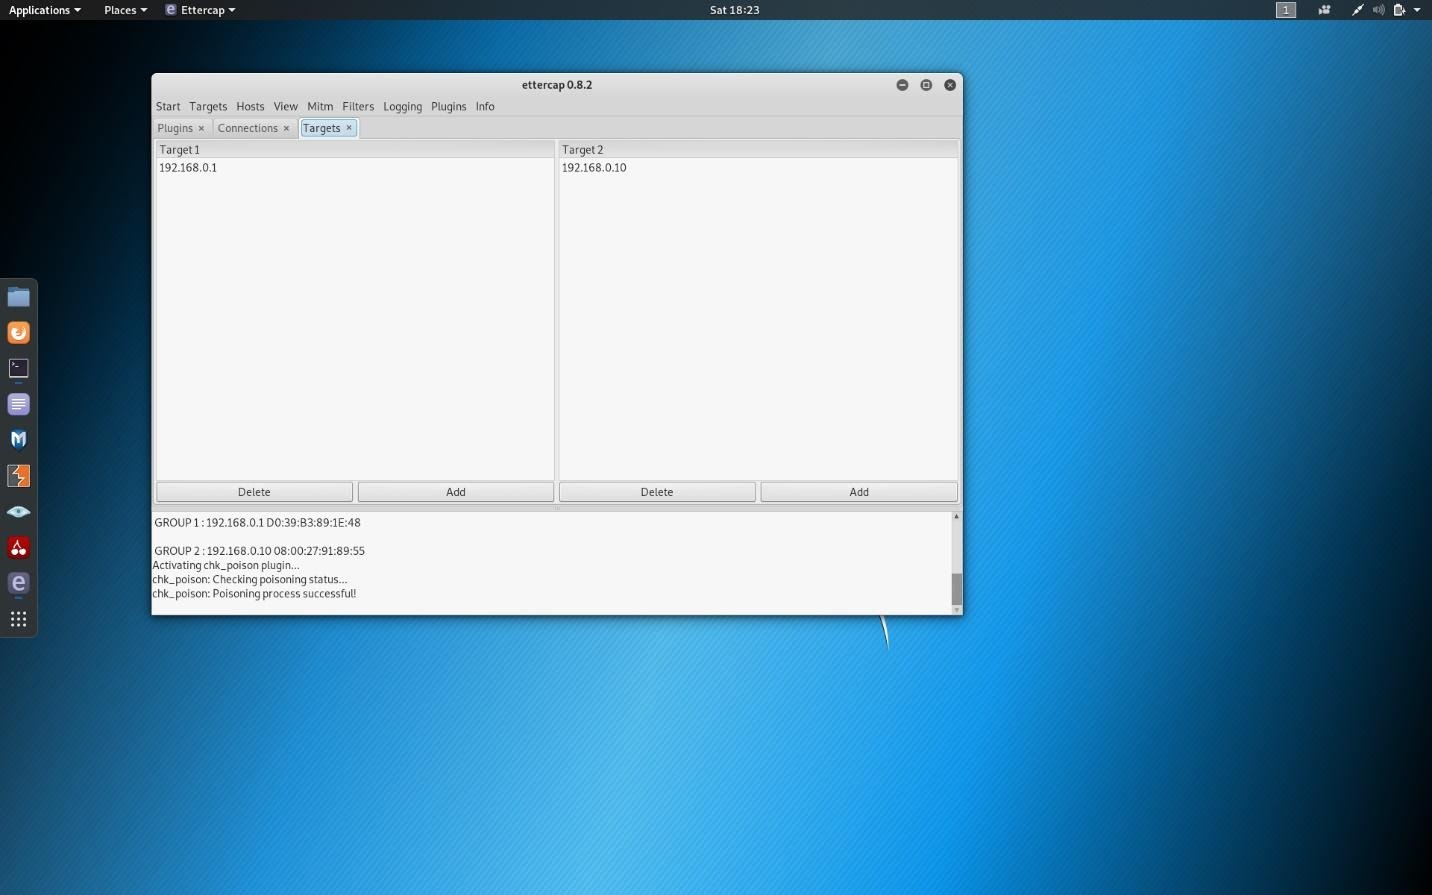
In this screenshot, you can also see that ARP poisoning was successful, which is possible by running the chk poisoning plugin. This can be done by clicking the plugins tab and clicking on that plugin.
Step #6 – MITM time!
Now we are going to click on the tab labeled Mitm. From there click on the first choice which is ARP poisoning.
Then, make sure the sniff remote connections are clicked.
Ettercap is now poisoning the arp cache of your victim’s computer.
Now, go to your Windows 7 machine and pull up Internet Explorer or Chrome if you downloaded it, and go to a website of your choice.
I chose popcorn.com and reddit.com.
Open another terminal window from your Kali machine. Type:
tcpdump -A -I eth0 tcp and src [ip address of target here without brackets] and port 80Code language: CSS (css)This will bring up the ability to see all your victim’s traffic. (Screenshot below)
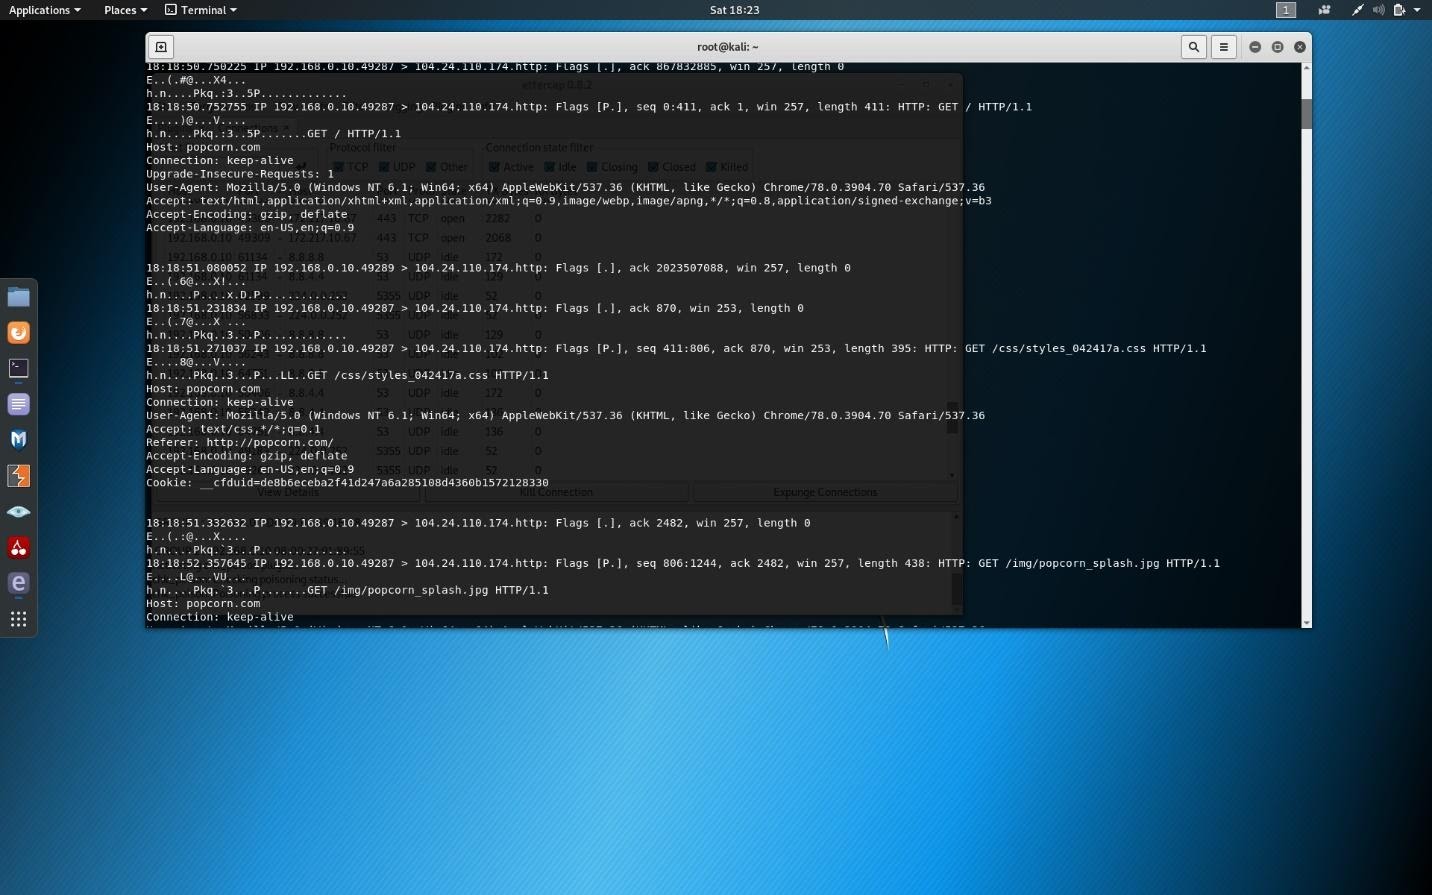
In this screenshot you can see popcorn.com, which is the traffic from my victim’s computer as I ran the arp poisoning attack.
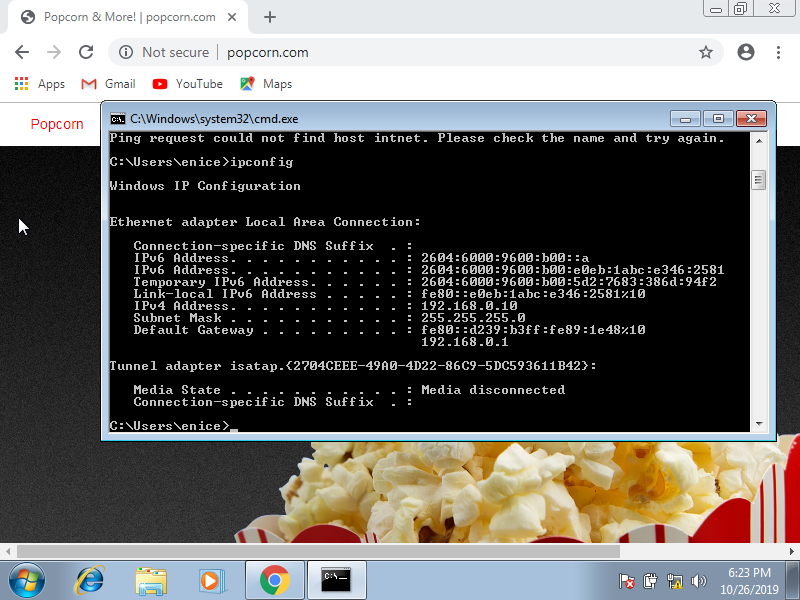
Here are some additional screenshots of my Windows 7 machine showing I was connected to popcorn.com.
By the way, you could also use Wireshark to view the traffic.

Conclusion
Ettercap is a great tool to learn network security, and Bettercap is its more powerful successor. These are great tools for security researchers, red teamers, and reverse engineers to perform reconnaissance and attack WiFi networks, Ethernet networks, and more.
So if you enjoyed learning from this tutorial, we recommend you look into using Bettercap as well. If you need help with that, don’t hesitate to ask!


I’m have create my account now what can I do
Hi Olivier, welcome! You can now check out all of our free courses and enroll in the ones that interest you, here: https://cybr.com/courses